Week 1 | Week 2 | Week 3 | Week 4 | Week 5
Week 6 | Week 7 | Week 8 | Week 9 | Week 10
Week 11 | Week 12 | Week 13 | Week 14 | Week 15
Week 16 | Week 17 | Week 18 | Week 19 | Week 20
Week 21 | Week 22 | Week 23
Week 6
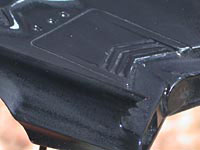
The paint has now had several days to dry, so it was ready for more work. Here it is after a thorough wet sanding, making everything as smooth as possible for a final color coat.
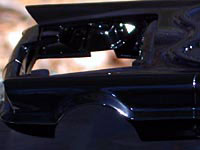
I used Duplicolor's Universal Black for the final color coat (I was going to use their Nighthawk Black Pearl until I discovered that it was actually a deep metallic blue, not black). That finishes the body for now, I'll give it a few more days to cure before I start polishing it.
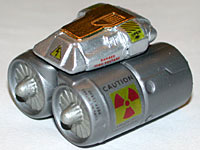
The body looks good, so now it's time to do some more engine work. I painted the turbine fans with Testor's Steel, then applied a set of custom-made decals that I made in Illustrator and had printed on to clear decal stock. These include a set of radiation hazard signs and a pair of "Caution Turbine Intake" decals. For the upper relay box, I applied Gold Metal Foil to the top and rear panels, then added more decals including a yellow & black stripe and electrical warning labels. The relay and turbines were then glued together with epoxy.
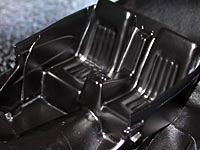
I finally finished with the filling & sanding on the interior bucket, and was able to paint it. I used Krylon's Semi-Gloss Black for the appropriate satin look. Next week, I will begin detailing the interior with carpeting, trim, and other accessories.
Week 7

Most of this week's work was spent on the interior: with the door panels finished and the base paint dry, it was time to start detailing. The first thing I added was the carpeting. I cut a sheet of fuzzy craft paper to fit crosswise in one piece, over the center tunnel and to the bottom of the side panels. This was glued into place with Elmer's white glue.

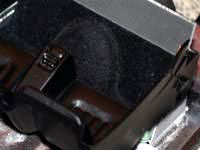
Next, I cut a front bulkhead from .040" styrene. I scored the reverse side of the sheet and bent it to make a realistic looking panel, then glued it into place with superglue at the door panels and a bead of white glue between it and the carpet. I then cut more fuzzy craft paper to carpet the bulkhead and the panels under the seats.
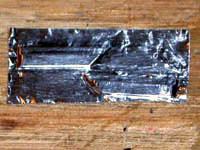
Now that the carpeting was all in place, it was time to add the trim. The Futura kit is showing its age, and there is very little in the way of interior detail. For the strips along the bottom edges of the doors, I cut short sections of strip styrene, layered them to create the contoured effect, then covered them with metal tape to look like stainless steel.
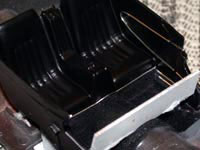
The rest of the interior trim is done with stainless steel wire. This includes the door panels, trim panels in front of the doors, and edging between the top of the carpet and bottom of the seats. This last piece was made from a single section of wire, curved to fit over the tunnel.
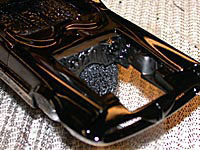
Time to leave the interior alone for a while...cutting the carpeting, shaping the trim, and getting everything measured out took quite a bit of time, and I was ready to look at something else for a bit. I spent about as much time on the body, polishing the paint with progressively finer compounds until it was as smooth as possible. Once that was done and thoroughly washed (to make sure there was no leftover residue) I sprayed two layers of Testor's Gloss Cote. It still needs a final polishing, but overall the body is starting to look pretty good. Barring any accidents, this was the final spray coat, so I painted the engine bay flat black so that I can start adding details in there next week.
Week 8
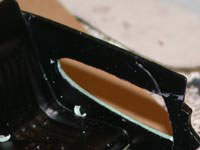
I didn't get a chance to work on the body this week, because I wasn't quite happy with how the interior looked after last week. The only real problem was the door panels - the Futura kit is really showing its age, and the door panels just didn't sit well with me. So I could either finish the model, and it would continue to bug me until I finally had to redo the model, or I could redo some of last week's effort and build it better. Decision made, I removed the bulkhead, carpet, and trim, then cut out the door inserts with the Dremel and hobby knife.
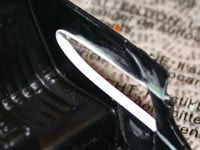
This also gave me the chance to even out the door panels, since Revell wasn't too picky about getting them to match each other. Once the holes were cut, I smoothed off the few rough spots left by the Dremel, and ran a strip of .125" wide styrene around the edge to make the cove sill.
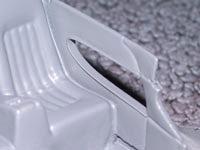
A coat of primer shows where I will need to touch up any paint chips or scratches that appeared when I was cutting out the door panels. Once I was satisfied, the interior was repainted satin black.
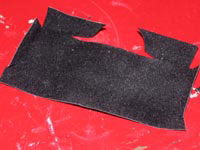
As long as it was apart, I decided to do the carpet differently. I made the first carpet out of three different pieces, but I decided to make the carpet in as few pieces as possible this time. Here is the carpet after test fitting but before installation: the "wings" at the top of the photo will go on the panels between the seats and the floor.
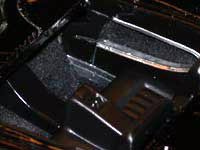
Once the paint was dry, I added a .020" diameter rod around the edge of the trim to create the ribbed effect, then painted all the trim on the doors. The carpet, door inserts, and extra trim were installed, and I made a center console for the Bat Phone. Just for the fun of it, I popped it into the body to see what it looked like.
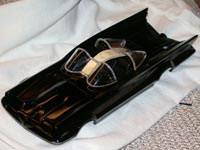
As long as it was together, here is what it looks like with the glass and (still unpainted, but now properly fitted) roll bar in place. Next week: dashboard & interior details, engine installation, and body polishing!
Week 9
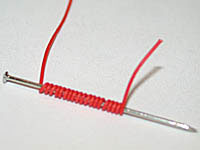
Back to the Batmobile after being away last week, I've started working on some of the interior details. Though the first couple of pictures here are slower paced than usual, I thought it would be helpful to show the individual steps I use to make telephone cords. First, I star by wrapping a section of wire wrap wire (available at good electronics part suppliers) around a straight pin. I try to make the coils as tight as possible, so they are the same size when I'm done.
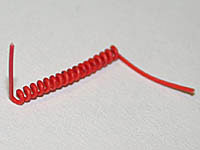
Next, I slide the coil off of the pin and use a dead X-Axto blade between each coil to create even spacing. When I use the term "dead," I mean this blade isn't sharp enough to cut masking tape, so it works perfectly for things like this without damaging the wire.
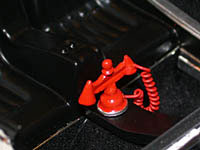
Finally, I used fine-tip tweezers to bend the cord into a realistic curve. The ends are bent to meet up with the base and handset of the telephone. The telephone itself is a metal part supplied by Tonymoe, painted Testors Gloss Bright Red. The center console is a final version of the earlier mockup I had, made from .080" x .25" strip styrene with .015" sheet styrene sides.
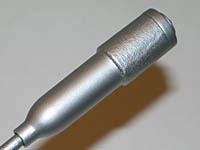
Moving back to the running gear, here is the painted generator/motor unit. It's actually pretty straightforward: the bulk of what you see here was made from a section of a Sharpie permanent marker. Once cut, the forward end was capped with a wheel retainer and the whole unit was painted with Model Master's Aluminum plate. When it is dry, I will give it a light buffing to enhance the "metal" look.
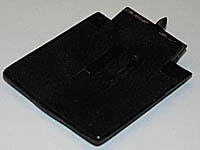
As the last thing for this week, I added the soundproofing material to the underside of the hood. I started by making a paper mockup, then transferring that to a sheet of faux felt. The appropriate slices and cutouts were made to accomodate the complex design, as well as leave the scoop open. I wanted to do this before the final paint detailing, so I wouldn't have to work on the hood upside-down. With it now finished, that means that next week I can start on the pinstriping!
Week 10
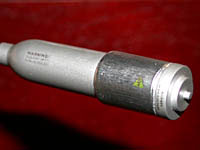
I'll only have a short update this week, because my one major project took up quite a bit of time. But first, here is the finished motor/generator unit, ready to go in the Batmobile. The aluminum paint from before has been clearcoated, and the generator body was covered in metal tape. "High Voltage" and "This Unit Must Remain Sealed" decals were placed around the unit, and it was clearcoated again. Once the body & chassis are together, I will install the turbines from the top side and the motor/generator from the underside, then make all of the appropriate connections.
The bulk of this week's work, however, went to pinstriping the body. The straight lines along the beltline and fin tops were made by cutting thin strips of pinstriping tape, then applying the stripes and securing the ends with small spots of white glue. The curves around the grills, headlight hoods, fender flares, and hood were hand painted using Colors by Boyd Sunburst to get the proper red-orange color. Now that the pinstriping is done, I can lay down the final clearcoat and do my final major assembly.
