Original Kit:
Holden Custom HJ Panel Van
Made By:
DDA (kit #DDA506K)
Scale:
1/24

Other 1970s Movie Models
The Spy Who Loved Me Lotus
Dirty Mary, Crazy Larry ‘69 Charger
Animal House Deathmobile
Smokey & the Bandit Firebird T/A
White Line Fever Blue Mule
Mad Max V8 Interceptor (Review)
Star Wars C-3PO & R2-D2
Jaws Blazer
Inglorious Bastards Jeep
Hooper Firebird
Duel Peterbilt Tanker
Good Guys Wear Black Porsche
Star Wars X-Wing
Gone in 60 Seconds Eleanor Mustang
Star Wars Luke‘s Landspeeder
Grease White Lightning
Thunderbolt & Lightfoot Firebird
The Car Kustom Lincoln
American Graffiti Deuce Coupe
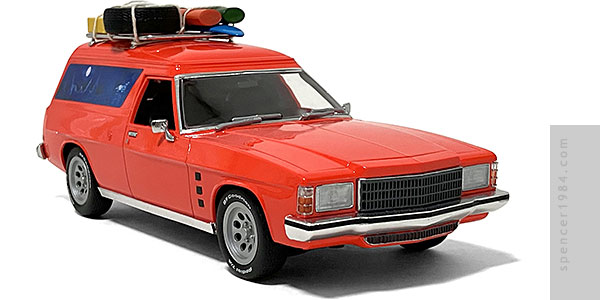
When I reviewed the DDA "Last of the V8 Interceptors", I was hoping that it might be the start of seeing more 1/24 scale releases from the Mad Max universe. It took another 15+ years, but DDA came through again, this time with a dual release of the Holden Sandman as both a prefinished diecast and a plastic kit based on the same tooling. I chose the latter, planning for a mostly box stock build but with one or two minor changes.
The box itself is worth mentioning: heavy cardboard with a hinged top and full-color graphics on all sides, plus a suede-textured plastic insert give it a very premium feel. Every parts tree was individually bagged, which was nice for the glass and hardware but a tad unnecessary for the rest of it. Most of the kit was cast in light gray, with one tree of clear parts and a few soft vinyl items. No chrome parts were included at all.
Assembly was very straightforward, thanks to its roots as a diecast car. It consisted of several individual modules were assembled separately - the engine, the interior, the chassis - and then brought together once completed. The parts were all cast well and required only minimal cleanup, and I had absolutely no issues with parts fit during the build.
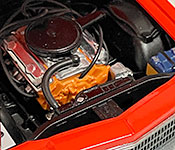
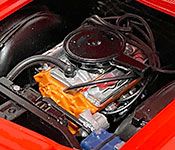
Given the custom nature of the car, I wanted to give it a little bit of an upgrade under the hood. The block was painted orange, the intake manifold was painted to represent an aftermarket performance part, and the valve covers were chromed with a Gundam marker. The distributor, heater hoses, and upper radiator hose were soft vinyl, and worked well enough. To avoid the "Alfalfa" look for the ignition wires, I had to do a little trimming so that they could cross over each other, and then neatened them up with a bit of black thread hidden behind the heads. The battery was painted to represent a Century, and the engine bay was done.
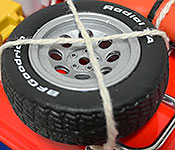
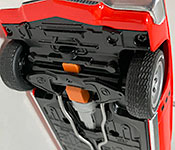
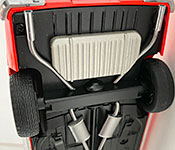
The chassis was done straight out of the box, and features probably the weakest part of the kit: only one of the exhaust pipes was cast into the chassis, with the other being a separate piece. I have never seen a company actually pull this off successfully, and while everything here fits together as nicely as possible it still doesn't look quite right. A little creative paint application helped hide the worst of it, though. The oil pan was painted the same color as the block, and at the other end I gave it some chrome exhaust tips. The tires were plain blackwalls from DDA, but upgraded nicely with a set of BF Goodrich lettering from Fireball Modelworks. Having learned my lesson from the Cobra Mercury, I removed the center support rib from the wheels before installing the tires. This eliminated the need to stretch them to fit, and kept the decals nice and sharp with no touchup required.
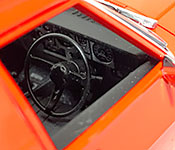
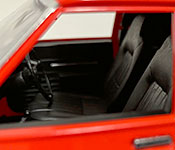
Inside, I added some embossing powder for carpeting around the front seats and finished the dashboard with a combination of paint, BMF, and the kit-supplied speedometer and tach. The rest of the decals were discarded as it would have been near impossible to fit them to the raised details. The seats were vinyl, but thick enough to avoid the warping seen in some Gunze-Sangyo kits.
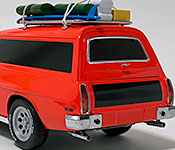
The body went together just as smoothly as the rest of the kit, including some places where I expected tight fits like the rear hatch and glass installation. My research suggested that the movie car was what we used to call "Tomato Red," so I layered TS-36 Fluorescent Red over pink primer to get a passable representation of this bright orangey-red. Trim was done with a combination of paint, Gundam marker, BMF, and chrome printed elements, plus Sharpie markers for the front corner and rear lights. The kit-supplied decals were supplemented with my own side marker lights and square accents for the front fenders.
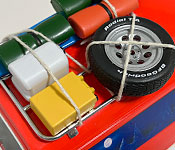
Speaking of things I did myself, there were a couple of small changes that needed to be done to give me exactly what I wanted. First, the spare tire on the roof rack had the same lug nut/hubcap detail as the road wheels. This wouldn't do, so I cut out the center of the wheel and replaced it with a 3D printed part that I drew up. Next, the grille was molded to include the piece of gate that disabled the car when Jessie was being chased by Toecutter's gang. It was especially odd when you consider that DDA also included Cundalini's hand on a length of fine chain to be attached to the back of the roof rack. Those two details were from very different parts of the movie, so it would have been nice if you could choose one or the other (or, in my case, "none of the above). To fix it, I first carved the pocket off the back of the grille, leaving a fully open slot. I then layered some 0.005" (0.13mm) flat styrene, offset to recreate the missing recess and vertical slats. This was pressed into place and touched from the back side with Tamiya liquid cement to set it. Once that was dry I added the horizontal bar made from 0.020" (0.5mm) square stock, then lightly sanded everything to blend the new and old plastic. The end result isn't perfect, but you really need to be looking for it to see the scars. I also cut off the headlight mounting pegs, opting instead to glue the headlights in place by their edges. The final detail was some rope for the roof rack, made from craft string.
Overall, I was impressed by this kit. The quality of the casting, the decals, and the instructions were all top-notch and it went together with no trouble at all. The chassis was good enough for me, but if a fully detailed suspension or complete 360° engine is critical then you'll have to do some major surgery. Otherwise the only note I'd add is that I wish they'd provided an undamaged grille. But other than that, it was a great build and I will definitely be looking into more DDA kits in the future.