Original Kit:
Dodge L700 & Tanker Trailer
Made By:
Lindberg (kit #118)
Scale:
1/25

Other Transformers Models
G1 Wheeljack
G1 Optimus Prime
Beast Wars Rattrap
Robots In Disguise Prowl (Super)
G1 Siren
Energon Ironhide
Robots In Disguise Sideways
Machine Wars Prowl
Prime Bumblebee
G1 Bumblebee
G1 Bluestreak
G1 Ratchet
G1 Sunstreaker
Rise of the Beasts Bumblebee (Review)
Other Cartoon & Anime Models
Jimmy Neutron Rocket
Thundercats Thundertank (Review)
Rugrats Movie Reptar Wagon (Review)
Max Steel Jet Racer (Review)
101 Dalmatians Cruella's Car (Review)
Cars 3 Jackson Storm (Review)
Cars Mack (Review)
Tiger & Bunny Double Chaser (Review)
Batman:TAS Batmobile (Review)
F&F: Spy Racers Thresher (Review)
Steven Universe Van
Spiral Zone Monocycle
Batman:TAS Batmobile (Review)
Robotech Roy Focker & Toyota Supra
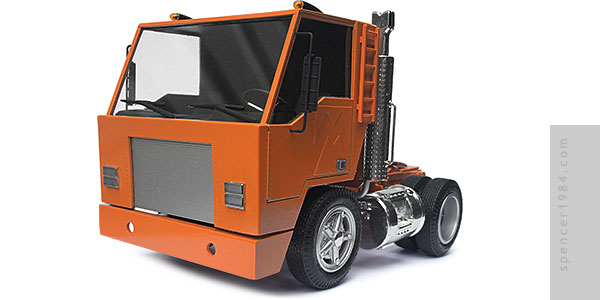
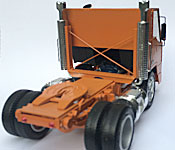
Huffer was one of the oddballs of the original Transformers series, in that he wasn't based on any specific make and model. Other molds adapted from the Micro Change toys were recognizable as real (if misproportioned) vehicles, but thanks to their origins in the Mysterians line vehicles like Gears and Huffer were simply listed as "4WD" and "Truck," respectively. The best guesses are either a single-axle day cab or a yard mule, but either way there's really nothing to use as a "close" starting point.
Nothing for the cab, at least. Lindberg's Dodge L700 had an extremely short wheelbase that was perfect for Huffer. It also had a heavy duty rear end with helper springs, which seemed appropriate for a yard tractor.
I cut the main frame rails at the ends of the springs, then assembled the ladder as per the instructions with the first and last crossmembers moved to the new ends. The rear axle was only partially textured due to the realities of manufacturing, so after assembly I shot it with a layer of Make It Suede to give everything the same rough cast appearance. I also replaced the tie rod with a styrene rod flattened at both ends. Other than those modifications, the suspension and drivetrain was built right out of the box. The engine is also mostly box stock, though I did replace the starter and generator because of how badly formed the kit parts were.
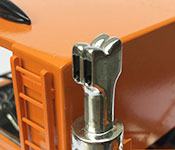
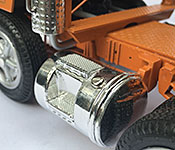
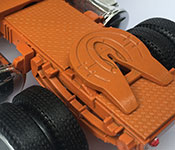
After that, things started getting creative. First, I bulked out what would become Huffer's legs by adding some diamond plate on either side of the fifth wheel. I also made a support for the new mufflers out of styrene stock and more diamond plate. The mufflers were taken from an Italeri truck accessory kit, with the tips cut from a broken G1 Huffer I found on eBay. I didn't like the square tanks that came in the kit, so I replaced them with a set of round step tanks from AMT's Mack R685ST. The front bumper was scratch built from styrene stock, and while the finished piece was perfectly fine I discovered a self-inflicted problem trying to mount it: cutting off the front of the frame rails left me with no place to attach it. I had to make an extension out of more styrene stock to get it where I needed.
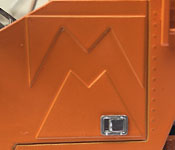
The cab was entirely scratch built. I drew up some plans based on the original toy, and transferred those to 0.040" sheet styrene to form the walls and roof of the cab. Because wide sheets end to bow after time, I reinforced the inside of the cab with a combination of stainless steel rod and thick styrene stock. The front corners of the cab and door frames were made from 90° angle stock, and 0.005" sheet styrene was cut and laminated to the doors to form the embossed "M" from the original figure. The door seams were cut directly into the plastic, and I added hinges (round styrene stock), ladders (Plastruct O gauge ladders), and rivets (Archer Fine Transfer decals). The glass was made from clear plastic stock: 0.005" for the sides where I needed some flexibility, and 0.020" for the windshield where I had less support. I decided to call the things on Huffer's roof clearance lights and used a pair from the same kit that provided the mufflers. That kit also had a set of mirrors that looked pretty good, so I painted them black and mounted them on scratch built frames. Finally, I installed a set of door latches from Don Mills Models.
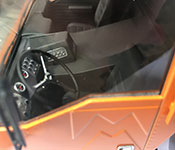
The interior was mostly scratch built from styrene stock, including the floors, engine tunnel, and door panels. I found a pair of seats in my parts box that needed the sports car headrests removed but otherwise worked perfectly. The steering wheel and dashboard were both taken from my first attempt at building Optimus Prime. I removed the peak from the front of the dash and stripped off the old paint, and they were good to go. Getting everything installed required some planning: first the door panels, then the engine tunnel and dashboard, the steering wheel, and finally the six-piece floor. To make sure everything lined up correctly, this was done across several days so that the glue had time to set between each stage...there would be no way to get at the interior once assembly was complete, so everything had to be done right the first time.
As a minibot, Huffer had a pretty basic color scheme. I used Krylon's Pumpkin Orange for the cab and chassis, flat black for the interior, and Krylon Dark Blue for the engine. The chrome pipes and tanks were a combination of Molotow Liquid Chrome and metal repair tape.
The final detail was also the one that caused me the most flip-flopping. The original toy had large rectangles flanking the grille, which were likely supposed to be headlights but would have been nearly two feet (60cm) across on a full-sized truck. The related cartoons and comics weren't much help, either, since they usually colored everything that wasn't the grille orange. I tried a few different ideas, but in the end decided a set of vertically-stacked rectangular lights would best match the spirit of the original design, albeit more realistically sized. I made them out of a set of taillights taken from Italeri's reefer trailer, cut down and trimmed with chrome.