Original Kit:
Custom Chevy Pickup
Made By:
Revell (kit #7135)
Scale:
1/25

Other 1980s Movie Models
Ghostbusters Ecto-1 (Review)
RoboCop OCP Ford Taurus (Review)
Blues Brothers Bluesmobile (Review)
Who Framed Roger... Benny (Review)
Christine 1977 Plymouth Fury (Review)
Dirty Dancing 1957 Chevrolet
Romancing the Stone Little Mule
The Terminator Custom Pickup
Beverly Hills Cop Nova
The Karate Kid Ford Convertible Rain Man Buick Roadmaster
Ghostbusters Ecto-1
Stroker Ace Thunderbird Stock Car
Transformers Hot Rod (Review)
BTTF3 DeLorean (Review)
Gotcha! Citroën 2CV
Hairspray 1961 Corvette
Sharky‘s Machine Dodge Diplomat
Indiana Jones and the Last Crusade Bike
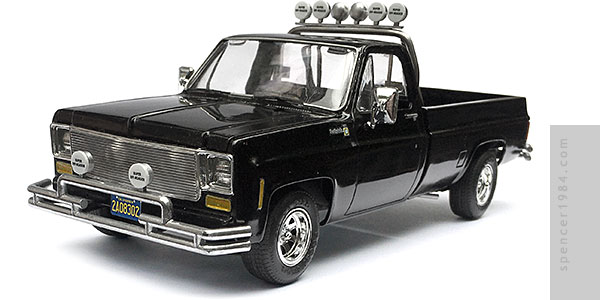
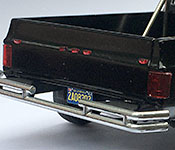
Working on the Trail of Lightning pickup got the gears turning on another pop culture truck that has been on my "to do" list for a while: the custom Chevy used by Sarah and Kyle in The Terminator. I used Revell's squarebody as the starting point, not because it was particularly good but because I thought the Hot Rod release might offer some appropriate accessories plus I had one readily available. I knew whatever kit I used was going to require substantial modification, so as long as the broad strokes were there it was all I needed.
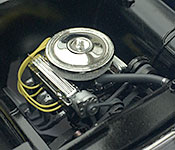
Things started off easy enough: the engine went together with no trouble, and while some elements like the oil filter and starter were simplified it looked pretty good once painted. I used the optional carbureted intake manifold, with a chrome air cleaner from my parts box to match the chrome valve covers. The belt assembly was the traditional crankshaft/water pump/alternator only, which was a little scant for a rig like this in 1980s southern California. So I swapped it out with one from an MPC Firebird, which provided an air conditioner and power steering pump. The headers were straight from the kit, going into scratch built pipes with parts box mufflers. Lastly, I added basic wiring and an upper radiator hose to give it a little more interest.
Inside, the only two changes I made were replacing the shift lever and CB wire with scratch built parts. Everything was painted satin black, and the gauges and horn button were detailed with custom decals.
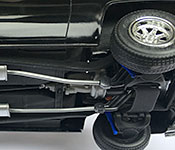
The chassis was the first major component that needed to be redone. First, for length: this kit was a short box, but the movie truck had a long box. I cut the chassis behind the cab pan, and added filler rails made from rectangular styrene stock. These were pinned to the kit frame at each end, then a thin strip of flat stock was glued to the top of the rails across the joints to give it extra strength. Second, the front end on these kits is notoriously bad. It has the parallel leaf springs of the 4x4, but a simple beam axle. As I noted previously, 2WD Chevy trucks had independent A-arm front suspensions. To fix this, I filled in the holes for the leaf springs and sourced a new front end from one of AMT's Van kits with coil springs from an old computer. The new front suspension meant I had to make new shocks, which were sized and painted to match the kit-supplied shocks on the rear axle.
Now that he chassis was the correct length, I had to have a long box to go with it. I went with the resin box from Morgan Automotive Detail, which was listed as fitting the MPC kit but matched the lines of the Revell cab just fine. I had to add ribbing to the underside and fill in the tailgate concave to match the movie truck, but otherwise it was a nice clean casting that dropped right into place. I filled the cab's sunroof with layers of sheet styrene and body filler, and gave the windshield a new surround made from floral wire and parts box wipers.
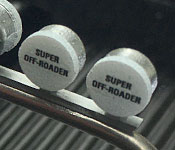
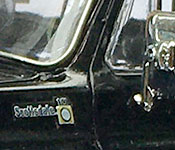
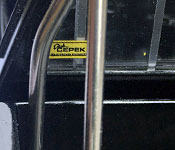
With the base work done, it was time to add the accessories. The bumpers and driving lights were 3D printed items I drew and had done at Shapeways (as part of the same order that got me the Hot Rods to Hell tires). The bumpers were painted with Molotow Liquid Chrome, and mounted to the frame with some scratch built brackets. I made the custom bar grille by cutting out the kit's eggcrate and replacing it with a panel of Evergreen metal siding covered in Bare Metal Foil. Mirrors, wheels, and tires were all parts box items. The rear window was made from bits of clear styrene and matte aluminum BMF layered to create the sliding window effect. I made the roll bar from stainless steel rod, which was a pain to bend but required no painting once it was shaped. The light bar is a section of channel stock with the 3D printed lights pinned to it. The extra lights across the tailgate were some spare clearance lights from AMT's Fruehauf trailer. Finally, the "Super Off-Roader" markings for the lights, "Scottsdale" fender badges, Dick Cepek window stickers, and license plates were all custom items I drew up.