Original Kit:
Starsky & Hutch Ford Torino
Made By:
Revell (kit #85-4023)
Scale:
1/25

Other 1970s TV Models
Starsky & Hutch Ford Torino
Scooby Doo Mystery Machine
Legends of the Superheroes Batmobile
Doctor Who TARDIS
Beverly Hillbillies Truck
Mannix Oldsmobile Toronado
Dark Shadows Vampire Van
Bewitched ‘69 Camaro (Review)
Dukes of Hazzard Undercover General
Dukes of Hazzard 1977 Fury (Review)
Other 2000s Movie Models
Dale Daytona Winner (Review)
Transformers Bumblebee
Collier & Co: Hot Pursuit Traveller
Night Watch Audi TT
War of the Worlds Monte Carlo SS
Austin Powers: Goldmember Shaguar
Talladega Nights Monte Carlo (Review)
Minority Report Lexus
Charlie‘s Angels 1969 Camaro
Terminator 3 Lexus
Death Racers Lotus Elise
The Fast & the Furious ‘70 Charger
The Simpsons Family Sedan
Cars Mack (Review)
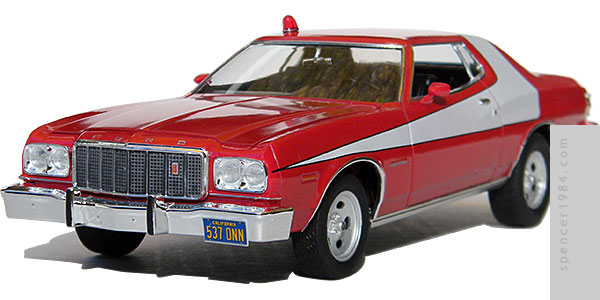

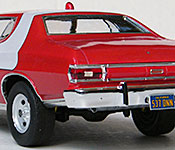
First planned as a late 2014 release, Revell's Starsky & Hutch Torino would actually hit shelves a year later thanks to repeated trips back to the factory to correct several details. But those of us who were anxious to add this to their TV/movie car model collections were rewarded with a kit that - while not perfect - was well worth the wait.
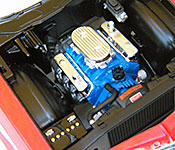
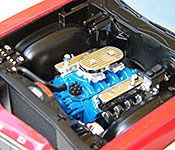
To really see how they did, I built this essentially box stock. The engine was fairly simple in the number of parts they used, but smart in the way parts were cast to maximize detail and clever in hiding the seams. It also includes the single coolest feature possible for those of us who like to add spark plug wiring: the top of he distributor cap towers were dimpled, so drill bits self-center on each tower while you work. Although I ended up not adding wiring this time, I still drilled out all nine towers just because of how cool the feature was. The engine appears to combine a Cleveland block with Windsor heads/valve covers, so if you want it to be 100% accurate you may wish to substitute the correct heads (or block) from your parts box. Also, the alternator is just plain ugly: the back of it is hollow, and the belt goes into the side of the fan rather than the pulley. The power steering pump on the other side of the engine is a separate piece that looks great, so I have no idea what happened here. Fortunately, once on it's far enough down in the engine bay that it doesn't detract from the final appearance. It also helps that there are some other nice details like the separate oil filter (with decal), sharp casting on the radiator and bulkhead, and separate breathers. The overall fit is also outstanding, with the parts lining up perfectly and fitting together almost as tightly as a current snap kit.
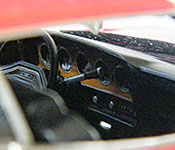
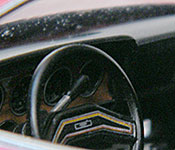
The interior was just as good, with an assembly very similar to Revell's '69 Charger. Details were sharply cast, and the fit was excellent all around. It's especially nice that Revell figured out how to make a floor without leaving ejector pin marks in the footwells. It includes a police radio and separate pedals to be hung under the dash, so altering this to a non-Starsky & Hutch Torino should be easy work. I did cut the cord off the radio, replacing it with a short section of coiled wire. This was really my only deviation from kit-supplied parts during this build. I assumed that the woodgrain decals would be just as bad as every other dashboard decal I've ever encountered so I had originally planned to leave the dash face black, but I figured I'd give them a shot just for grins. To my surprise, they actually fit almost flawlessly, and only a little solvent was needed to get them to snug down over the gauge bezels. The gauges themselves were simply cut from the sheet and dropped in their respective holes with a dot of white glue on the back to hold them in place.
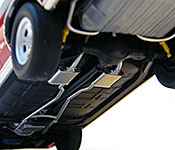
At first glance, the chassis seems to have gone too far with the simplification. The entire front suspension assembly was cast as one piece, the entire exhaust system as a second piece, and the rear end—including shocks—was four pieces. But first appearances were deceiving...comparing the front end to the multi-piece units found in AMT's '67 Mustang or Revell's Pro Modeler '70 Torino, the detailing here is actually finer and cleaner than either of those. It needed a little help rounding off the tie rod and sway bar, but otherwise looked fantastic. The exhaust pipes lined up with their mount holes and the engine headers without drama, and even had dimpled tips. The rear end was probably the weakest part of the chassis, with a seam cut right across the axle housing and solid standoffs representing the springs. With everything painted and installed, though, the results weren't too bad.
The only problem I had with the body was some light ghosting of the hood reinforcements on the top side that needed to be sanded smooth. There were also the usual parting lines that needed to be removed, but these were so faint that I missed one and only realized it when I was doing the final polishing. As with the rest of the kit, the detailing was sharp and everything fit together nicely (this was especially nice with how tight the lights fit into their respective bezels both front and rear). The tires are Revell's generic "hot rod" big & littles, and while they look OK the wheels themselves don't quite look right. The rears should definitely be deeper, and ideally should be replaced with a pair from the parts box. Glass is provided for the front, rear, and side quarter windows, all with stepped edges to put the glass closer to the outside of the body without sacrificing fit or strength - another nice touch. The engine bay is cast as part of the body, similar to older Monogram kits, but the detailing is much sharper and the sides more properly square than those older toolings. Revell also went with a separate heater core and master cylinder to help keep things from looking too clunky.
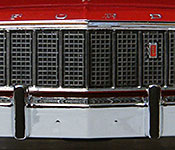
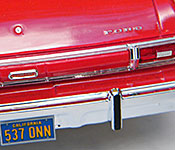
I painted the body Tamiya TS-8 over white primer. The "striped tomato" look is provided as a set of decals, and fit reasonably well to perfect depending on how much massaging you want to do. The "Torino" badge in the tail panel isn't as good, thanks to the trim being too tall to let the decal settle nicely. Either sand this flatter or (like I did) do the trim in BMF and cut the decal small enough to fit inside of it. The decal for the "Ford" script on the trunk fit perfectly, and the cast-in detail was shallow enough that decal solvent made things look nearly seamless. I opted to paint the nose and front fender scripts, and used BMF and chrome details for the trim and locks. I painted the grille flat gray, then sprayed it with a light layer of Testor's Transparent Black Window Tint to darken the holes and Dullcote to seal everything together. The badge decal was added after the painting was done and the surround and badge mount were unmasked.
So: the casting is good, the fit and finish is good, the accuracy is reasonable (especially considering that this was TV car portrayed by dozens of varying vehicles over the years), and the decals are good. That, sadly, leaves us with the instructions. As good as everything else in this kit is, the instructions start making mistakes at step one and don't let up until the last page. First, they tell you to put the intake manifold on backwards. The proper orientation should be with the distributor towards the front of the engine, which is also where the radiator hose connects. Fortunately, the manifold and the top of the block are keyed so that doing a test fit (and/or looking at the box art) will let you know that things aren't right. In the same step, the fan belt is identified by two different part numbers with two different paint callouts and the water pump is identified with the part number of the left exhaust header. The water pump should be identified as #19, the fan belt should be identified as #17, and the far left paint callout refers only to the alternator. Next, the part numbers for the fillers behind the front bumper are switched - again, a test fit should clear that up, but it will be too easy for a new modeler to assume that the parts just go together poorly and make up the difference in glue. Then in the step where you install the grille, it is shown upside down. The badge should be on the driver's side of the grille, above the horizontal centerline. Finally, the way they tell you to apply the decals makes no sense: by applying the sides before the roof, you're almost guaranteeing a misalignment. Put the roof decal on first, line it up with the corners of the roof and the back of the doors, let it set, then apply the sides to line up with the roof. The instructions are bad enough, in fact, that I made my own version
Instructions aside, this really is a fantastic kit. It's not flawless, but it's nicely detailed, fun to assemble, and looks good when finished. The way that the parts are broken down, it's even set up to accept modifications easily should someone want to turn this into a factory stock replica, street custom, hot rod, wasteland survivor, or a NASCAR racer. It would be great to see more cars of the '70s produced by model manufacturers, and if this is any indication of what we may see then all the better.