Original Kit:
2003 Lincoln Limousine
Made By:
Sunnyside
Scale:
1/24

Other 2000s Movie Models
Final Fantasy VII Fenrir (Review)
Bedazzled Lamborghini
Alone in the Dark VW Touareg
Ninja Cheerleaders VW Beetle Cabriolet
The Bourne Ultimatum NYPD Impala
Talladega Nights Monte Carlo (Review)
Harry Potter Anglia 105E
Star Wars E3 Starfighter
Speed Racer Mach 5 (Review)
xXx ‘67 Pontiac GTO
Sex Drive 1969 GTO Driven Target CART Racer
Fast & Furious ‘70 Charger
The Bourne Identity Mini
3000 Miles to Graceland Cadillac
Starsky & Hutch Ford Torino
P2 Oldsmobile Cutlass Supreme
Death Racers Lotus Elise
Dukes of Hazzard General Lee
Transmorphers: Fall of Man Police Car
Night Watch Audi TT
Revenge of the Fallen Bumblebee
Ghost Rider Stunt Bike (Review)
Avatar AT-99 Scorpion
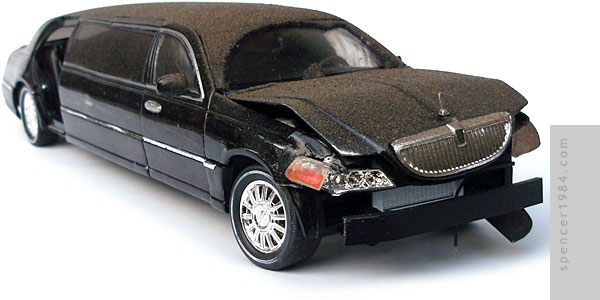
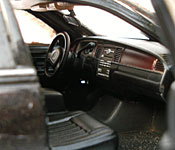
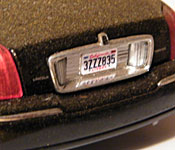
When I first approached this project, I had to decide if I wanted to build it as the "before chase" or "after chase" version. I generally choose "before", if only because there wouldn't be much left if I chose "after." But this time I decided to do things a little differently, and went with the look it had after John Cusack drove it through the end of the world.
My first task was to get the car cut down to the right length. Sunnyside's version of the Town Car limo is a super stretch, and nearly three scale feet longer than the 2012 car. I disassembled everything and made cuts in the chassis, body, interior, and roof. Each part was cut in a slightly different location, so that I would not end up with a weak spot in the middle of the car where all of the joints came together. Details like the exhaust pipes, driveshaft, side windows, headliner were trimmed to fit once the main parts were spliced together. Inside, the wraparound seat was cut down to make a second bench seat, and new side panels were scratch built from sheet styrene. Then everything was repainted satin black and carpeting was added.
Once the car was fixed, it was time to wreck it. Sunnyside's parts breakdown was very similar to the 1:1 Town Car, so the front bumper and right rear door were just a matter of leaving some bits off. The only part that wasn't an exact match was the bottom of the grille surround, which is part of the bumper on the 1:1 but cast as part of the body on the model and so had to be cut out. To recreate the smashed front right corner, I first placed the front fender over a heavy-duty vise and gave it a few whacks with a hammer. This bent the body appropriately plus it scuffed up the paint nicely. Next, I clamped the hood in the vise and hit that a few times as well. I positioned the panel to create a fold to match the movie car, and wrapped it in paper to keep the paint from getting torn off. The rest of the damage was a little less brutal: I cut off the headlight lens, bent the bucket with a set of pliers, and made the now visible guts from sheet styrene and bits from my parts box.
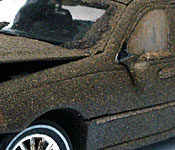
The last thing I had to do was paint it. The sides and roof (where I made the splices) were filled with putty & painted glossy black, and the trim was redone in silver paint and BMF. I then masked off the windshield wiper swipes by placing a piece of masking tape over the glass and drawing arcs with a compass. These were cut out with a hobby knife, and a small ridge was built from glue to help define the borders. I then shot the car from the left with multiple colors, including Rustoleum's texture spray. Once this was dry, I removed the windshield mask and added more gunk by sticking ground cover down with window cement. I also added some more dirt and scuff marks along the right side of the car, bent the right tailpipe, and broke off the driver's mirror. Finally, a light mist of Dullcote and a few minor paint details finished it off.