Week 1 | Week 2 | Week 3 | Week 4 | Week 5
Week 6 | Week 7 | Week 8 | Week 9 | Week 10
Week 11 | Week 12 | Week 13 | Week 14 | Week 15
Week 16 | Week 17 | Week 18 | Week 19 | Week 20
Week 21 | Week 22 | Week 23
Week 21
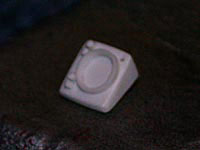
More interior details this week. First up, the radar scope for the passengers' side dashboard. A few different versions were used over the years, and I went with one shown in an early photo of the car. The body of the unit was made from square tube stock, cut at an angle and topped with a piece of sheet stock. The frame of the viewscreen was made from a short section of round tube stock, and the dials are thin rod stock. I drilled a hole between the two sets of dials for a flip switch, and another hole in the top right corner for an indicator light. Once assembled, the unit was painted semi-gloss black with a green screen, steel frame, silver for the flip switch (made from thin wire), and Stop Light Red for the indicator light (made from another short section of wire).
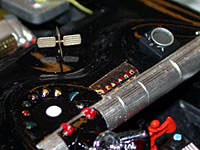
This shot shows the radar scope installed. The white dot on the near dashboard is going to be the compass. I used a dot of Crystal Clear to create the dome of the compass, and will be painted once it dries.
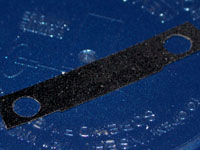
The front dashboards are doing pretty good, time to move behind the seats. After painting the ribbed panels flat black, I added sections of Bare Metal Foil over the speaker rims. I used the same material for the carpeted panel around the speakers as I did for the floor. In this case, I cut it to fit the panels, then cut holes for the speakers. To make sure I had a nice edge, I painted a flat black circle around each speaker and added a tiny bit of flocking to the still-wet paint. That way, when the carpet material was pressed down around the speakers, the flocking puhsed up through the holes a little and made a nice, tight seam.
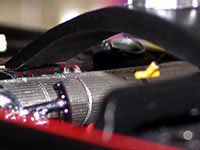
The last thing I did this week was install the emergency bat-turn lever in the roll bar. I made it the same way as the throttle lever. The roll bar is not permanently in place yet, as I need to finish off the fire extingusher first.
Week 22
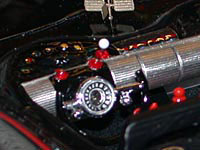
The interior is now finished, with the exception of the seat backs (which will be installed after the roll bar is in place). The compass dome finished drying, and I painted the appropriate markings. I also made the small lever on the right of the driver-side dashboard...
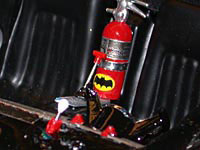
...The red section of the lever was made by laminating four sheets of .020" plastic, with the middle sheets lined up on a common edge. I then used a hole punch to cut out a circle, so that I had two full circles on either end of two semi-circles. This piece was then cut in half crosswise, so that I was left with the correct half-circle lever guards mated across the base. Once painted, the lever was added (made from a short section of straight pin).
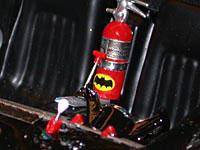
Finally, I finished off the fire extinguisher. I started with the extinguisher from the Polar Lights Batmobile, and sanded off all of the molded-in strap & label detail. After painting, I added a strap made from metal tape, the extinguisher label (made from a scan of the extinguisher used in the original Batmobile, applied over Bare Metal Foil), the bat logo, and a new nozzle (made from a section of wire insulation). With these items done, that leaves only the rear deck and roll bar details, and one or two minor odds & ends.
Week 23
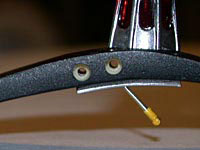
To finish off the roll bar, I still need to add the round side lights and "antlers." To mke sure that the lights are identical on each side, I start by drilling pilot holes through the roll bar. I gradually enlarge the holes with larger drill bits, until I have a pair of holes slightly larger than .100" rod.
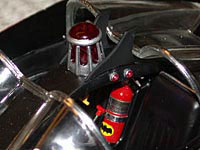
Once the holes were drilled, I cut two sections of .100" rod slightly longer than the width of the roll bar, and wrapped them in metal tape. The rods were fed through the bar, poking out both sides to form the chrome bezels for the lights. The ends of the rods were painted Stop Light Red, and a drop of crystal clear was used to create the domed lenses. Here you can also see the antlers, cut from .030" stock, and the finished windows (complete with bare Metal Foil trim).
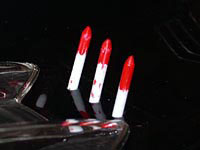
I wanted to have some fun with the rocket tubes, and make them look like they are loaded. The "rockets" will also serve as the locators for the tubes. here you can see the installed rockets, made from .080" rod. I tapered the ends of the rods to make the rocket noses, and painted them red.
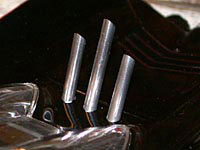
The tubes themselves are made from 1/8" aluminum tubing. After being cut to length, the tubes were polished and installed over the rockets - the red tips are just barely visible, so it looks like the tubes are armed and ready.
Conclusion
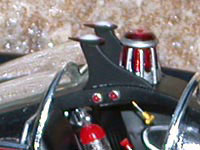
The final details of the buildup were pretty simple, but ended up taking quite a while to actually complete. The bottom halves of the antler lights were made by cutting a 1/48 scale P-38 mass balance in half, and gluing the half-teardrop shapes to the antlers. The flat surfaces were then painted Stop Light red, and the lenses were made with Microscale Krystal Klear.

The guys over at the '66 Batmobile boards pointed out that I missed a detail on the turbine exhaust: only the ribbed area of the nozzle should be silver. The tail of the nozzle should be black, with a red pin stripe on the trailing edge. Thanks, guys!
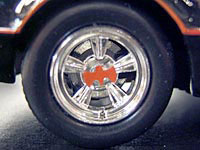
I also decided to revisit the wheels. Although the wheels on the original Batmobile look undersized to me, the wheels I used went too far the other way. Looking back over the car, I realized that the front wheels could not be turned without rubbing on the fenders. It took me a while of thinking it over, but in the end I decided to go ahead and change them out. The newer wheels came from the plastic Polar Lights Batmobile kit, and measure out a couple of inches smaller than the previous set. They're nearly identical to the Fireball 500 wheels typically used on 1/25 Batmobiles, but with two notable differences. First, they lack lug detail, and are truly knock-off wheels (not 100% accurate to the prototype, but darn cool looking). Second, they have sharper detailing than the 500 wheels, including an oft-missed detail on model wheels: valve stems. The center hubs were Weber carburetor intake bells, finished with the Photoetched bat-hubs I originally used.
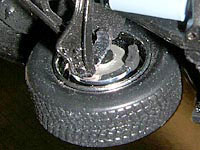
Since the revised wheels lacked brake detail, I had to make my own. I decided to go with the era-typical front disk/rear drum setup (as far as I know, the original was still running leftover '50s tech, but I wanted to make it more performance-oriented). The disk brakes came from Revell's '40 Ford Convertible kit, and the rear drums are my own invention. I took a set of large Hot Wheels tires, and drilled out the centers to fit over the axle hubs (these became the drums). Then, a set of small Hot Wheels tires were put inside the larger wheels facing the opposite direction, making the drum backers. With the new wheels in place, my 1966 Batmobile was finally complete!