Original Kit:
California Hauler Peterbilt 359
Made By:
AMT (kit #T-500)
Scale:
1/25

Other 1970s Movie Models
Star Wars C-3PO & R2-D2
The Cars that Ate Paris VW
Good Guys Wear Black Porsche
The Spy Who Loved Me Lotus
Thunderbolt & Lightfoot Firebird
American Graffiti Deuce Coupe
Dirty Mary, Crazy Larry ‘69 Charger
Animal House Deathmobile
Herbie Rides Again Herbie
The Car Kustom Lincoln
The Godfather Cadillac
Grease White Lightning
White Line Fever Blue Mule
Duel Peterbilt Tanker
Smokey & the Bandit Firebird T/A
Diamonds are Forever ‘71 Mustang
Hooper Firebird
Jaws Blazer
Star Wars X-Wing
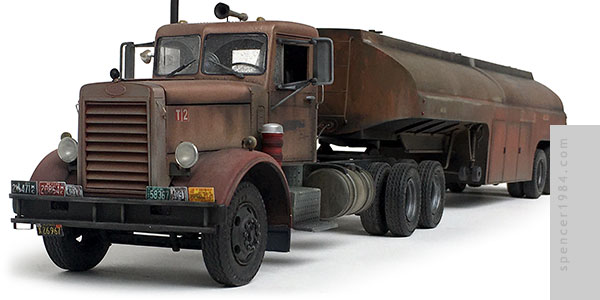
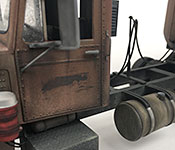
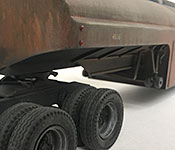
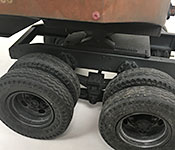
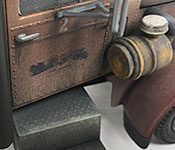
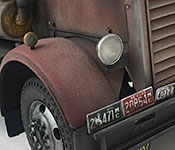
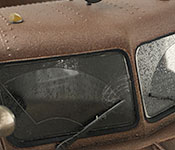
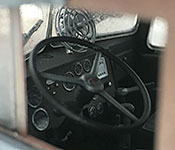
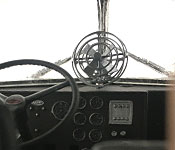
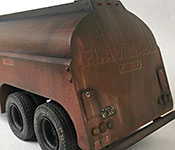
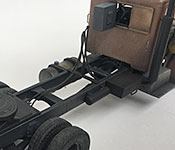
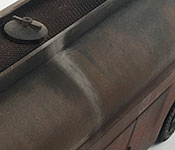
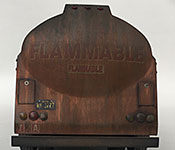
Although I say I used AMT's Pete 359, there's really not a whole lot of it left after all is said and done. But it was a starting point, nonetheless.
This was a 1973 release of the kit, so my first task was to take inventory and repair whatever was needed after nearly a half century of parts rattling around in the box. Most of it was minor stuff like scratched glass or the occasional missing chunk where a part had broken off the tree, but there was a large tire melt across the back of the cab that needed to be addressed. I sanded off the panel, filled in the divots, and replaced the rivet detail with texture decals from Archer Fine Transfers. Having now brought the kit to "baseline," I could start on the modifications.
The needle nose conversion was a resin kit from American Industrial Truck Models that included two bumper options, the hood/grille/side panels, separate fenders, and separate headlights. Only some basic cleanup was needed to fit the AMT cab, and while it would have been possible to turn this into a functioning multi-piece folding hood, that was a bit more than I wanted to do here. I settled instead for cutting the top panels off so that they could be removed to see the engine. I also cut out the grille and made my own open slats following James Stephens' instructions in the September/October '84 issue of FineScale Modeler. The individual slats turned out a bit wide, but the extra texture and open look were worth the trade-off. I didn't use the resin headlights because they were solid cast, and replaced them with a set of headlights from Revell's '29 Ford roadster mounted on scratch built arms. The last change needed to better match the movie truck was to the cab itself, where I filled in the lower window on the right door with a styrene plug and some Tamiya putty.
I needed to make substantial changes to the chassis as well. Again following the notes in Stephens' article, the frame was extended ¾" (19mm). But instead of adding a spacer, I instead cut off the Peterbilt rails just ahead of the rear suspension and replaced them with the rear sections of rails from AMT's International Transtar 4300 Eagle. Not only did this limit the number of joints (and, by extension, potential weak points), the International had the correct walking beam rear suspension to match the movie truck. The two weren't an exact size match to each other, but a little strip styrene and some filler putty got everything smoothed out. The front steering and suspension were built box stock, while the rear suspension was a combination of parts from both kits plus some scratch building. One of the unique details of the truck was that it only had a single drive axle - the rear was a tag axle, easiest to see after the truck goes over the cliff at the end of the movie. I liked this detail and doubted I'd get many more opportunities to recreate it, so I scratch built one using styrene tube and some scrap bits.
With the basic frame done, I started adding details: the left step box and fuel tank were both straight out of the kit, but the right step box was sourced from AMT's later Peterbilt tow truck kit. They're not exactly the same size or shape, but close enough. The tool box was scratch built, and the air tank was modified from the kit part. Up top, the pogo stick, table, and fifth wheel were all straight from the kit but stripped of chrome before painting.
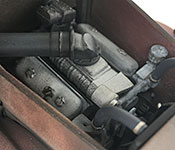
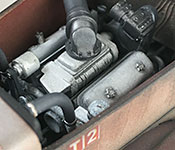
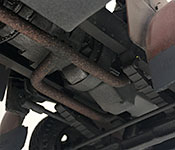
The base engine and transmission were built box stock. I wanted to use the kit-supplied supercharged V8 as a nod to Dennis Weaver's monologue in the diner about it having a "souped-up diesel." Somewhat surprisingly, none of the small details had gone missing, either: the only parts I replaced were the radiator, hoses, and intake, and all those were because of the new nose. The radiator was mounted to the back of my new slats, made from sheet styrene with a laminate of photoetched radiator face and a styrene upper tank. The hoses were simply styrene rod. The air cleaner used parts from the kit-supplied vertical cleaner, cut up and rearranged horizontally. To connect it to the inner tube, I scratch built a new outer tube from two sections of thick styrene rod. The exhaust system is stock until it gets under the cab, at which point I scratch built a crossover pipe and elbow to go out from under the right rear corner of the cab. The muffler and stack were also scratch built, using aluminum tubing for the stack to give the walls a more realistic thickness.
We never got to see much of the interior, so I didn't change much. I did fill in the right door panel where it had a cutout for the window, and scratch built a fan for the dashboard. Beyond those items, though, everything was straight out of the box.
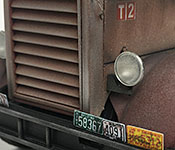
The rest of the details needed to better match the movie truck came from several sources. The front bumper was modified with pieces of styrene stock, shaped and assembled to match the rail ladder and finished with a metal stirrup and license plates from modeltruckin.com. The mirror on top of the radiator, hood straps, and clearance lights were all scratch built. The fender lights, spotlight, and horn were out of my parts box, with the horn heated and bent to give it the dent seen on the movie truck. Both side mirrors were out of the kit, but their frames were modified with some round styrene. Wheels - both on the tractor and trailer - were from Moluminum Truck Parts with some ancient tires I found in my parts box that already had a nice patina thanks to their age. The various grab handles were made from craft wire. Trying to figure out the exact specs of the swamp cooler/air conditioner was nearly impossible, so I based my design on previous work by Randy13 at RPF and Tim of TimsTrucks.com. Lastly, the lines to the trailer were made from a metal necklace, which was the only thing I could find that was the right thickness and also allowed for realistic drape and flexibility.
With the tractor essentially done, I turned my attention to the trailer. It started as a two-piece 3D printed tanker body from Keystone Aluminum Model Miniatures. I assembled the main body, which included some alignment holes so that I could add pins and make sure everything was straight and solid. I then gave it a thin layer of Bondo and sanded it smooth to remove the print texture.
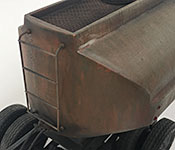
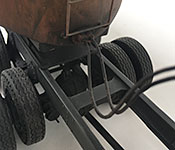
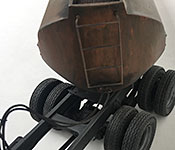
Now that I had a good base, it was time to start adding details. The ladder up front was scratch built from more wire, and mounted to the trailer by drilling holes into the tank body so that it was good and secure. The walkway on top of the tank was first layered with a strip of expanded mesh to create a textured tread area, then caps were made from large wiggle eyes with scratch built details. Both the side and rear doors as well as the bumper were scratch built from styrene stock. Lights were a combination of parts box lenses, model railroad details, and bedazzling bling. The rest of the "trailer" bits like the frame, jacks, and rear suspension came from Lindberg's L700 & Tanker Trailer kit with jack wheels from AMT's Freuhauf Flatbed Trailer. To make sure the rear suspension would sit level regardless of the fifth wheel height (even if I attached this to a different tractor), I mounted the entire rear frame on a sliding hinge at the rear. To make sure it didn't tilt too far or drop too low when I picked it up, I glued a plate across the top of the frame near the front, drilled a large hole through the middle of it, and sank a screw through the hole and into the bottom of the tanker. Now the frame can move freely to get all the wheels on the ground, but is located by the screw shaft and stopped by the head.
Paint was a whole monster unto itself with this project. The color could probably best be described as "old" or "filthy," but translating that idea into scale model form was a challenge.
For the chassis of both the tractor and trailer, all suspension components, the engine, and the cab interior, I started with Duplicolor's black primer. Then, much like I did with the Beverly Hillbillies truck, I built up the "colors" using a combination of weathering techniques including paints, pastels, and effects kits. To get the white Peterbilt engine, for example, I drybrushed flat white over the black primer until the high spots looked like paint and the low spots became shadows of grease and grime. Then Tamiya snow weathering effect, chalk, and AK Interactive paints were used to further add age. The interior received similar treatment in shades of brown and green, while the suspension and frame components got more metallic shades.
The cab was base coated in red primer, then the fenders were set aside. The rest of the cab received several mist coats of Tamiya TS-21 Gold intermixed with mist coats of various browns and grays. Metallic weathering effects were used to blend the colors, then the whole thing was shot with Dullcote to kill any shine. This included the windshield, which I first masked off with arcs of blue painters' tape to create the wiper sweeps. To make the masks, I put a wide strip of tape across the glass, installed it, and then drew the shape of the sweep by placing a compass with the point on the wiper arm pivot and the pencil set to the distance of each end of the blade. Once the arcs were drawn, I carefully cut them out using a new X-Acto blade and peeled off everything outside of the sweep area.
Returning to the fenders, I used pastels and weathering effects to turn the primer red into sun-faded pink. I applied a similar effect to the rest of the cab, dulling the paint and adding streaks of grime and rust to give it an ancient, well-worn appearance. Places that saw more wear, like the sides of the hood and doors, got darker applications. The hood and door decals were added in the midst of this weathering, which when combined with several generous layers of Dullcote made them look properly aged.
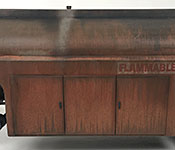
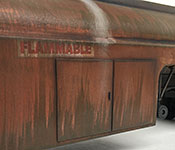
The trailer, on the other hand, started with a coat of Rustoleum copper. I wanted something similar but not an exact match to the cab, as well as something that would give me a good surface to apply the myriad "Flammable" decals. Once those were on, I sealed them in place with more Dullcote and then set to work weathering. Most of the work was the same as I did for the cab, but with much larger tools including a 3" paint brush to get the parallel streaks down the sides. These steps were repeated until the base color was little more than a suggestion, at which point this monster was finally finished.