Original Kit:
Riptide Corvette
Made By:
AMT/Ertl (kit #6621)
Scale:
1/25

Other Corvette Models
Matchbox '83 Corvette
‘98 Corvette
‘06 Corvette 2 (Review)
‘64 Comic Book Batmobile
‘64 GS
The Junkman 1981 Corvette
Transformers Vector
‘70 Comic Book Batmobile
‘72 Comic Book Batmobile
The Dead Pool R/C Corvette
Judge Parker Corvette
Rush Hour Corvette
Corvette Fighter Craft
Stingray 1965 Corvette
Other 1980s TV Models
Hunter Plymouth Fury (Review)
V Laser Jeep
Dukes of Hazzard 1977 Fury (Review)
Dukes of Hazzard General Lee
Thundercats Cheetara
New Monkees Mustang GT
Knight Rider KITT (Review)
Scooby Doo Mystery Machine
Automan Countach
Danger Mouse Mk III
Riptide 1960 Corvette
Miami Vice Ferrari 365GTS/4 Daytona
Stingray 1965 Corvette
Married...With Children Dodge
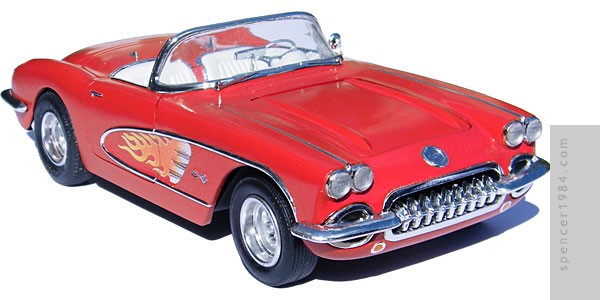
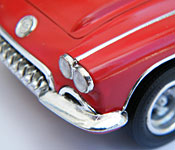

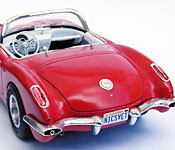
Though marketed with the Riptide logo, this was basically the same 1959/60 Corvette that AMT has had in their stable for what seems like forever (it's actually a '60, but has been sold as both). By modern standards it is a very rough kit, but I had built one years ago and so was at least somewhat familiar with it and knew it had potential.
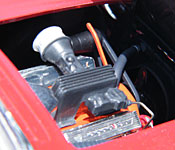
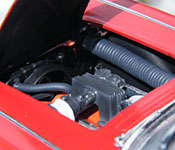
The first thing I did was scrap the engine. Even considering the age of the tooling it was pretty awful, and I had lots of better choices in my parts box. I went with the engine from Revell's Vette AGIN, which wasn't perfect but still far better than the original. It needed a little trimming at the transmission snout, and I kept the fan, belt, and exhausts from the Riptide kit, but otherwise it dropped in with no difficulties. The main block was painted Testors Competition Orange, with various metal colors used for the transmission and other details. The battery wasn't bad, but dated. I used one from my parts box to look a little more like what would have been in the TV car. The air duct was both too short and badly cast, so that also had to be replaced. I made a new duct by shaping a piece of styrene rod, then wrapping it with wire and coating it with white glue.
The chassis was very simple: only the four axle mounts were separate pieces. I didn't even use the rear mounts, choosing instead to mount the metal axle on a pivot in the center of the car. This way I didn't have to worry about getting all four wheels to touch, as the rear axle would automatically adjust. The front mounts needed to be trimmed to lower the front end, but otherwise fit perfectly. Finally, I made a transmission tunnel out of sheet styrene. Without this, looking at the chassis would provide a view of the inside of the body, back of the firewall, and bottom of the interior bucket.
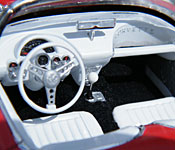
The interior bucket has always been one of this kit's greatest failings. The detail work is not bad, but it is far too shallow. I fixed it using a trick I first used on AMT/MPC's Knight Rider: I made vertical cuts along the insides of the door panels, kick panels, and seat cushions, then added a new floor to the bottom of these openings. While it's still not 100% accurate to the full-sized interior, it looks a lot better. I also removed the area between the panic bar and dashboard, replaced the gearshift with a round-headed pin, and modified the steering wheel to have thinner, open spokes and a wire rim. The red plastic was base coated with silver, then finished in Tamiya white. The carpet is black flocking, and the dash mirror was taken from my parts box.
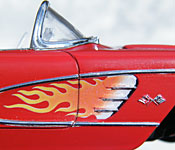
Work on the body was mostly limited to removing lines, seams, and sink marks. I had to replace both window sills because they were badly cast, and I replaced the windshield frame with the more delicate piece from AMT's '57 Corvette kit. There was a pretty big step between the rear splash pan and the rear fenders, so I epoxied the pan into place and filled the seam. I also filled the license plate bracket gap in the front splash pan. Finally, I thinned down the edges of the hood and mounted it on a custom wire hinge. The body was painted Testors Gloss Red, with custom cove decals and a custom rear license plate. The cove decals provided in the kit were printed on a red background that didn't match any paint that I am familiar with, and the license plate was woefully undersized. They were relatively easy fixes thanks to Illustrator, Photoshop, Fireball Modelworks, and Staples.
The chrome in the kit was actually very good, but it was on top of some pretty rough castings and so I ended up removing most of it. The rear bumpers and license plate bracket were cast as one large piece, and was cut apart to be more accurate. The front bumper/grille unit was even worse, because the license plate bracket meant there was no way to save the grille surround or teeth. I ended up scratchbuilding a new surround from styrene, heated and bent to get the rough shape and then sanded to get the exact contours. The teeth were taken directly from Revell's '58 Corvette. The headlights were drilled out and I used lenses from my parts box. My parts box also provided the sideview mirror, and the exhaust tips are jewelry crimp sleeves. Other than the wheels and the parts taken from other kits, every chrome component was finished in BMF.