Original Kit:
Inspector Gadget Car
Made By:
Bandai/Popy
Scale:
N/A

eBayPartner Affiliate Link
Other Cartoon & Anime Models
Other Police Models
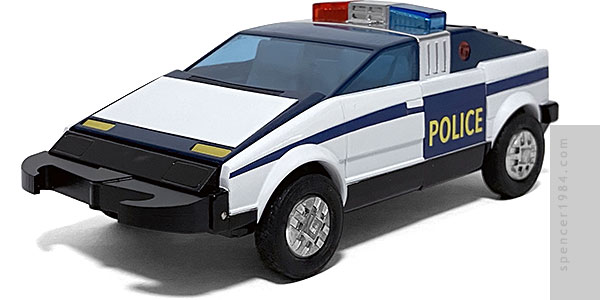
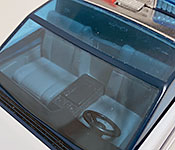

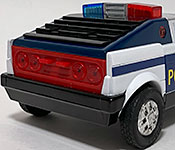
Inspector Gadget's Gadgetmobile was one I had long wanted to add to my collection, though it was one I kept putting off. While it appeared to have been inspired by cars like the DeLorean, Bricklin, or Nissan Z, the details of it were unique enough that anything I started with was going to require major reworking to look even close to correct. Then I found out about Bandai/Popy's Gadgetmobile toy, released way back in the early 1980s. From all the pictures I could find it was a near-perfect 1/24 scale, but as was true for many transforming toys of the era it was fairly fragile and easily broken - finding one that wasn't too badly thrashed without having to take out a second mortgage was going to be a task. My searching eventually paid off, and I was able to secure most of two toys. Neither had their rear doors or bumpers, many of the smaller gimmicks were broken or missing, and the bodies were badly yellowed...but the clear parts were intact and the tires were whole. Since their condition made them nearly impossible to restore, it put the price right where I wanted it to be. I picked the one that looked most intact, and got to work.
My first task was disassembling and cleaning it. Four decades had really taken its toll on the finish, which was especially noticeable when the stickers were removed and the original bright white plastic was revealed. Dawn dish soap and Goo Gone got the plastic parts looking nice and clean, and they were then painted Tamiya TS-26 Pure White to restore their original brightness. Aircraft Stripper was used to remove the remnants of the old paint on the diecast parts, then they were painted AS-8 Navy Blue followed by TS-72 Clear Blue. The rockers, bumpers, and other details were painted TS-14 Black, and the roll bar, light bar, and light bar release button were finished in Bare Metal Foil.
The rear section of the car was reassembled without the van mode tailgate or divider, since this would no longer be a transforming vehicle (the retaining clips for it were long gone anyway, so I simply filled in the gaps where they had been). I did leave the rear louvers unpainted and their gadgets functional, since they were more or less appropriate to the cartoon and a fun little feature.
Going the opposite direction, there was nothing salvageable about the interior. Having to transition from van to car mode made it uncomfortably shallow, and it included a driver figure squished into the deformed seat. The only part of the module I saved was the canopy. Once I removed the post mount and polished out the worst of the scuff marks, I painted the frame to match the diecast parts. The seats, dash, and door panels were made from a Revell Chevy pickup interior I had in my parts box. The size was just about perfect, all I had to do was trim the door panels to fit the sides and make a new rear bulkhead from sheet styrene. Rather than try to get my spacing exact, I glued the dashboard to the bottom of the canopy and slid that into place once everything else was assembled.
Finally, a few details had to be created to replace missing parts. The front bumper was something I drew up and had 3D printed, the hood panel was cut from thin styrene, and the side panel extensions were made from laminated styrene stock, trimmed and sanded to shape.
The last detail was a set of custom made stripes and "Police" panels I made as waterslide decals, and the Gadgetmobile was ready to Go-Go!