Original Kit:
'70 Oldsmobile Hardtop
Made By:
Jo-Han (kit #C-5070)
Scale:
1/25

eBayPartner Affiliate Link
Other 1990s Movie Models
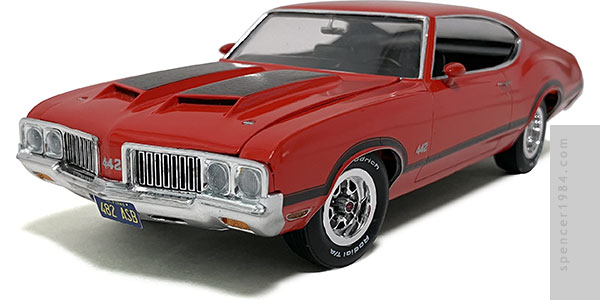
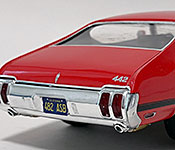
Ah, Demolition Man...somehow a movie that is both ridiculously outdated and yet eerily prescient at the same time. Part of the reason it still holds up at all is thanks to an all-star cast that included Sylvester Stallone, Wesley Snipes, Nigel Hawthorne, Dennis Leary, Glenn Shadix, Bill Cobbs...not to mention Sandra Bullock, Benjamin Bratt, and even a cameo from Jack Black before their big breakouts. The real star of the movie, of course, was the '70 Oldsmobile 442 used in the chase scene near the end of the movie.
Scale options for the Olds are pretty limited, though. The only one really out there is the classic Jo-Han kit, reissued once in the mid-eighties under the Testors banner and still fetching high values on the secondary market. Fortunately, I had picked this up several years ago back when the cost was "high" rather than "ridiculous," and I got one that was posted as a rebuilder. It meant some extra work, but I couldn't argue with the price. I also picked up a W30 conversion from Modelhaus for the hood and air cleaner, and a set of Fred Cady decals that included the badges and side stripes but not the W30 hood stripes.
My first step was to kind of "reset" the model. I put it in the freezer for a week, which let me break apart the glue joints with minimal impact to the plastic. Once that was done, I dropped the interior and body in a jar of Super Clean and let that do its magic. The body cleaned up surprisingly well, even revealing badges that had been completely obscured by the paint. The interior didn't do as good, but since it was to be painted black I wasn't going to sweat it too much. The body was cleaned of all parting seams and the few scars left over from its first assembly, and the steering wheel was repaired from where it had been broken off the parts tree. The body was then painted TS-86 Pure Red and the interior was done in satin black, then they were set aside to dry.
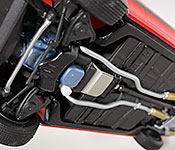
As is typical for kits of the era, the chassis was little more than a flat pan with the exhaust, driveline, and suspension all molded as a single piece. I wanted to give this an upgrade, and instead used the chassis from AMT's '69 Hurst Olds. The unique Hurst exhaust system was technically wrong for the Demolition Man Oldsmobile, but the kit did have the proper automatic transmission so I'm just calling the exhaust an upgrade the Scraps made as they were tinkering with the classic muscle car.
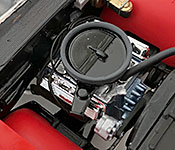
The engine and chassis went together straight out of the box, other than a new set of rear shocks and the air cleaner from Modelhaus' transkit. There's no readily available "Oldsmobile Blue" rattle can paint any more, so I went with something "close enough" from my paint rack. I kept the chrome dress-up parts, and painted the rest of it with minimal weathering to reflect it being a project car. The tires are the same style as what came in the kit, but I used a set from my parts box without the sidewall printing so I could make them screen-accurate BF Goodrich Radial T/As with some decals from Fireball Modelworks.
Once the base colors were dry, I finished the interior with embossing powder for the carpet and painted chrome and woodgrain panel detail. I made some new stripes to compliment the Cady set, and the trim was done with a combination of BMF and a chrome Gundam marker. I drilled out the headlights and used lenses from the '69 kit, then gave the grille a wash and fixed the few wear spots with more BMF. My final upgrade was a set of sport mirrors from my parts box.
Final assembly was surprisingly good. Jo-Han had a set of locating tabs above the rear wheel openings, so I cut matching notches in the tops of the inner fenders. That and a small filler panel inside the rear bumper were the only alterations needed for the AMT chassis to fit, and it did so better than some unmodified kits. Even the contour of the front splash pan mated to the front bumper like they were made for each other. The final detail was a set of screen-accurate license plates I drew up.