Original Kit:
Jurassic Park: The Lost World Velociraptors
Made By:
Revell-Monogram (kit #85-3614)
Scale:
1/25

eBayPartner Affiliate Link
Other Transformers Models
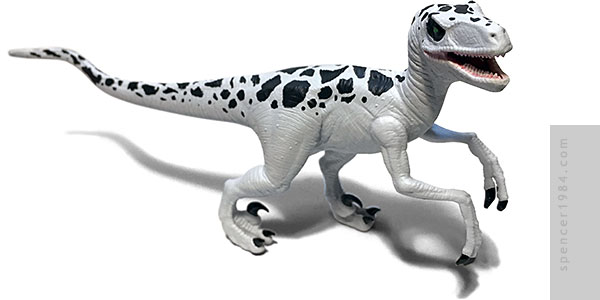
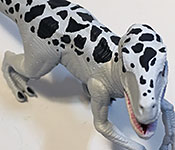
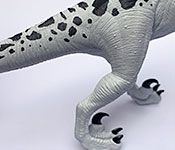
While I've always preferred building models of mechanical things, in the last few years I've thought about ways to branch out a little. My first attempt turned out OK, but showed me where I really needed to put in more practice. After spending some time trying new techniques and getting some new supplies, I was ready to attempt another organic. Well...technorganic, at least. I already had two 1/24 scale Grimlocks (Binaltech and a KO/oversized G1 Masterpiece), so making one with his Beast Wars look seemed like a good way to try out what I had learned.
I used one of the two velociraptors in Revell's Jurassic Park: The Lost World set, since they were not only the right scale but also had the same late-90s "featherless skinny raptor" look that was used in Beast Wars. Watching some videos from Chris at ClassicPlastic 101 let me know what to expect from the kit, and it was time to start building.
I removed all of the assembly tabs, opting to glue the parts together to make a stronger assembly and help start the seam-filling process. Even so, there were still quite a few places that needed addressing: the base of the neck was particularly bad, but there were also gaps at the shoulders, hips, tail, and along the spine. To fix these I used Vallejo's acrylic putty. My usual go-to for putty work is Tamiya, but the Vallejo was thinner and had a great needle tip that made application much easier in tight areas. I was also water soluble, making feathering and clean-up really easy. In the places where assembly or parting seams went across sculpted elements (such as the wrinkles in the arms), I sanded them smooth and re-scribed the detail. I also sharpened the teeth and medial claws, which looked a little clunky out of the box.
Now it was time for paint. Actually, the inside of the mouth was painted before assembly...as with the Mospeada Ride Armor, I masked the prepainted area with Silly Putty before painting the rest of the model.
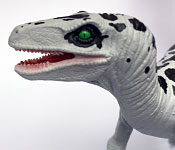
I first sprayed a base of Napa's gray primer to check for any missed cracks or holes, and to even the overall tone. Once I was satisfied, I did some underpainting with German gray around the underside of the hips, shoulders, and chin, and white on top of the head and some high spots on the body. I then layered several light coats of Tamiya white primer, which went on thin enough to let me control just how much of the base colors I wanted to show through. I then freehand painted the spots with Model Master flat black, using photos of the toy for reference on size and placement. The Grimlock toy was a bit shorter than the model, and had to make several concessions for hinges and joints, but overall it was not too difficult to translate the design. The eyes were painted neon green, and the lips and gums were drybrushed with layers of pink and white to try to transition from the off-white body to the dark red mouth.
In the end I'm pretty happy with how this turned out. There are still some things I need to work on, like my skills with drybrushing and working with filler, but it's a vast improvement from the last time I tried something that wasn't a vehicle of some sort.