Original Kit:
Black Top Warriors Killer Bee
Made By:
Revell (kit #2144)
Scale:
1/25

eBayPartner Affiliate Link
Other Post-Apocalyptic Models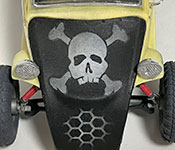
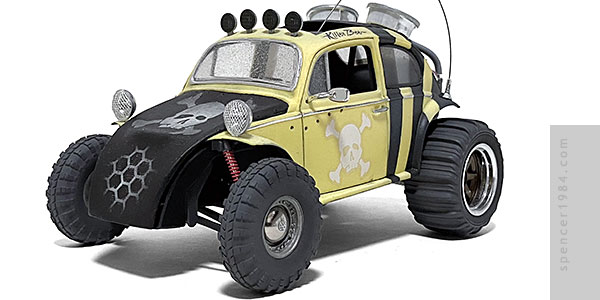
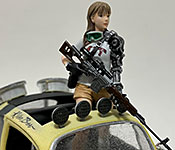
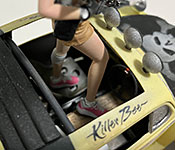

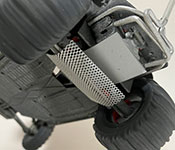
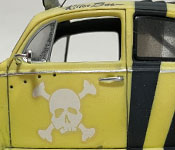
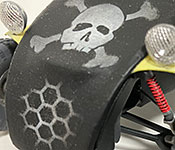
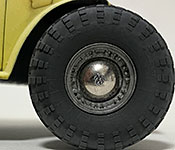
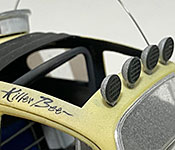
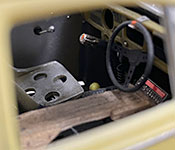
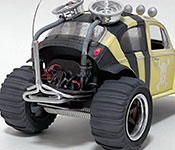
Killer Bee was the first of Revell's Black Top Warriors that I started, and the last that I finished. While Pink Poison was pretty good straight out of the box and Alley Rat was rough but buildable, Killer Bee was a mess. Massive amounts of flash, malformed parts, badly textured chrome, and those terrible two-piece vinyl tires that will never line up right no matter how hard you try. Clearly, I was going to have to do some work here.
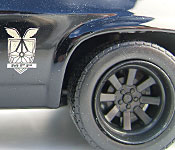
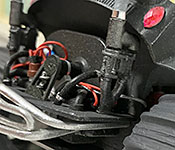
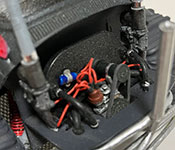
I used the chassis pan and spine, but the suspension parts needed so much work that it would have been easier to scratch build my own...so I did. I really liked the idea that each of these vehicles navigates a different terrain, and the bio for Killer Bee specifically notes its role as a quick-moving desert vehicle. My new suspension was built to reflect this, with long swing arms and tall coil-over shocks. Everything was scratch built from styrene, wire, and whatever bits were laying around the work bench. About the closest to off-the-shelf parts were the lower front arms, which were modified from the handlebars of a 1/6 Star Wars STAP. I didn't want to add too much weight, so skid plates were kept small and thick wire mesh was used to protect the engine. Front wheels were resin 1/35 scale military tires with hubcaps made from furniture brads and chrome "VW" emblem stickers. The rear wheels were B-N-L Resins copies of Jada sand paddles fit to Aoshima 19" TE37 wheels. As is the case with many sand rails, Killer Bee just has rear brakes. These were made from thin washers and aftermarket calipers. A set of custom driveshafts with 3D printed universal joints finished off the underside.
The engine started out strong, with decent casting for the block, heads, and transmission. Then as with the chassis, I had to do my own work. The distributor was undersized and malformed, so was replaced with a scratch built piece and wired. The carburetors had almost no detail, and were replaced with 3D printed parts. Hoses, tubes, and any fine details were replaced with scratch built parts, including the snorkels which were made from fine springs slid over heavy wire to set their shape and eliminate any stress on the carbs. I was able to use most of the exhaust pipes, but the stinger was cast in two halves that lined up as successfully as the aforementioned tires. This was replaced with a section of aluminum tube, cut to length and flared to match what the kit piece had been going for.
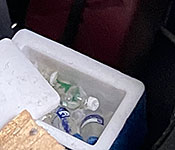
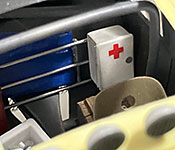
For the interior, Revell provided a front bulkhead, dash, stock steering wheel, pedals, levers, a roll bar, and two bucket seats. Not terrible, but lacking (especially with the finer pieces). I started by drilling out the dash face and replacing the pedals and levers. The rear seat area was converted to a small cargo area, with a wire frame holing a tarp, a first aid kit, a cooler with ice and bottles of water, and a jerry can. The high-backed racing seats weren't too bad, but didn't feel right for a lightweight dune runner. The driver's seat was replaced with a resin bomber seat, and the passenger's area was converted to a sniper's perch over a gas tank. My idea was that the car can be driven into position, the driver can stand up through the sunroof to take their shot, then drop back down and take off. To make standing up and sitting down even easier, I made the steering wheel a pop-off NASCAR style wheel that can be hung on the dashboard. There were no door panels, so I made some with metallic gray sheet vinyl applied to the inside of the body. Only the left door got a handle, made from a reshaped straight pin.
The body was cast in yellow, and after cleaning up the parting lines and flash I decided to keep that as my base color. A few coats of thin flat white were applied to the top and sides to make it look faded, then the stripes were masked off and painted Tamiya TS-63 NATO Black. Since this is more a flat dark gray than a true black, it fit the sun-faded look of the car better. The hood cover was painted black, the skull and honeycomb decals were applied, then it was weathered to blend the decals into the material and show more sun damage. The door and roof decals were similarly weathered, then the whole car was shot with Dullcote to seal it. To add the stripes to the side and rear windows, I held them in place and marked where the stripes on the body lined up then masked off the glass according to my marks and sprayed them with TS-71 Smoke clear. Once unmasked, the glass was lightly misted with Dullcote to make the glass look slightly pitted or dusty.
Once the major parts were assembled, it was time to add the final details. Unsurprisingly, the lights were a total write-off. The roof lights were too flat, the fender lights didn't fit their lenses, and the taillights were so awkward even the box art left them off. For the fender lights, I used a set of chrome buckets from my parts box with stone guards made from fine mesh that I shaped into domes. The roof lights were 3D printed parts, the same style as what I made for my Jurassic Park Jeep. The taillights, as they were for Alley Rat, were made from craft gems. Finally, an antenna was made from guitar wire and a base from my parts box.
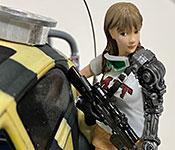
Killer Bee's driver was unique in being the only one who herself had a post-apocalyptic look thanks to her cybernetic arm. She was Nuts Planet's Belford kit, which I chose in part for that very reason. See, the box art and decal sheet for Killer Bee show a line of bullet holes just below the window on the driver's side (I actually drilled holes rather than use the decals, but kept the number and location as they were shown). This lined up perfectly with where the driver's left arm would have been, so headcanon says that she made herself a new arm after the previous one was injured some time ago. As befitting someone smart enough to make their own replacement arm, she has a T-shirt from her old alma mater. The rest of her paint was various light colors to reflect the desert environment. Her arm was painted gunmetal then given a black wash and detailed with black grip pads on the hand and some metallic details. Her gun was painted Model Master Gunmetal then detailed with woodgrain paint and a black scope. Since her gear was all in the car, I left off her tool pouch and replaced it with a canteen lined up to the molded-in strap. The rest of the strap that went across her back was made from a strip of thin styrene bent to shape.
Considering how much of this kit had to be reworked or replaced, it almost doesn't feel like it's part of the same series. But in the end I'm very happy with how it turned out, and will definitely consider adding to this universe in the future.