Original Kit:
N/A
Made By:
N/A
Scale:
1/24

eBayPartner Affiliate Link
Other Comic & Manga Models
Other Jeep Models
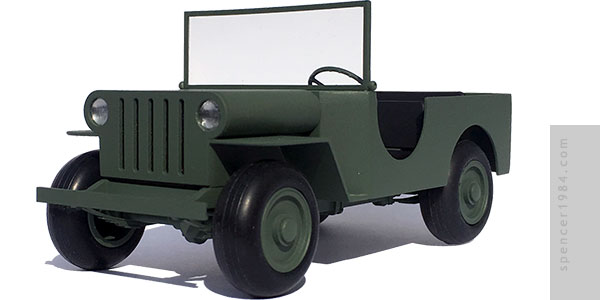
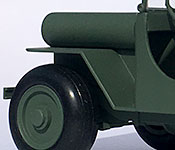
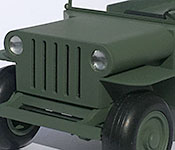
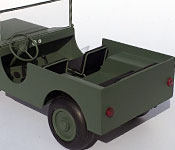
There generally aren't many cars in the funny pages, other than the occasional one-off gag or establishing shot. Beetle Bailey was kind of an exception to this rule, though, with many of the strips including the famous Jeep as a prop, setting, or even a character in its own right (even long after the actual Army replaced the M151 with the Humvee). Its design hasn't changed much since the strip's early days, either. While the character models for Beetle, Sarge, General Halftrack, and others evolved quite a bit over the years, the Jeep has changed but slightly since the early 1950s. The look is distinctive enough that it didn't seem right for me to simply use an existing military Jeep kit. I wanted something that looked more like a 3D realization of Mort Walker's art, and the only way to really do that was going to be as a scratch build.
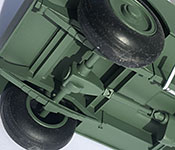
I started by taking some rough measurements from Hasegawa's WWII MB, as that would serve as a guide for the general proportions of this project. The first part of the build was the chassis, which I constructed from various widths of 0.080" rectangular stock. The biggest sections - between the axles - were 0.188" wide and taper cut on each end, then smaller pieces were glued to the tops of these to create the raised sections over the axles and even smaller pieces were used to make the short sections at the ends, so each rail was made up of about five pieces. I had considered cutting each one out of a single piece, but decided against it since it seemed like I would waste a lot of extra material that way. Plus, doing it this way I know that the body mount points will be absolutely level and dimensions would be guaranteed to match side to side. Crossmembers were made from more rectangular, "C" channel, and "H" channel stock.
The springs were made by cutting and layering lengths of 0.010" x 0.080" stock. To make sure all four corners sat level, I placed tabs where the ends of each topmost spring needed to sit and glued the leaves to them. Once the springs were solidly in place, axles were made from a couple different diameters of plastic tubing and differentials I carved from 0.250" square stock. Finally, I made a set of shock absorbers and the steering linkage from a combination of plastic rod and aluminum tubing.
When I first conceived this project, I had no plan to make any kind of engine. But as I got further into it, I started to realize that the Jeep was too open to ignore it completely - I had to make at least the bottom half so that there wasn't a strange void between the front wheels. I briefly considered sourcing one from my parts box, but in an effort to make this true to the comic art I was intentionally avoiding all but the broadest details. A parts box engine with bolt heads, linkage, etc. would be out of place. So this too was scratch built, based roughly on measurements taken from the Hasegawa MB. The block is a length of rectangular tubing with the ends capped off, and the oil pan is a stack of 0.080" sheet stock carved to shape. Between the two is a flange made from 0.040" sheet and some quarter round to make transition from the flange to the block. The intake manifold, exhaust manifold, pulleys, and generator were made from scrap plastic bits I had on the bench, and the exhaust pipe was made from aluminum tubing with two other diameters used for the muffler. The transmission was made from more scrap bits (I had accumulated quite a few "leftovers" by this point in the project), and the transfer case was made from square stock with the ends rounded off and some small tubing for the driveshaft snouts. The shafts were made from plastic rod and aluminum tubing, and the universals were made from small bits of channel stock cut to shape and assembled around a tiny piece of rod stock.
The first component I made for the body was the grille, which I drew up and had printed at Shapeways. The rest of the body was made from 0.030" sheet styrene. Using the Hasegawa kit as a guide, I started from the floor and used the completed chassis as a check to make sure everything would fit and be level. Once the stepped floor was set, I moved on to the sides (cut at the same time to ensure symmetry), rear, kick panel, and firewall. These panels were left to cure for a few days, and then sanded and filled with Tamiya glazing putty where needed. Next came the cowl and dashboard, which were similarly glued, sanded, and spot filled. The nose was built by gluing my printed grille to a pair of lower side panels made from wide "C" channel, then topping them with a single piece of 0.030" sheet. Using this single piece guaranteed that the front fenders would be straight and level, plus it gave a solid base for both the side panels and the hood. The hood was made by cutting a piece of 0.250" tubing in half to form the sides, then connecting those with flat styrene stock. With the nose now completed, it was glued to the front of the body and the few remaining pieces of the fenders were added. Lastly, I made the windshield frame from small "L" stock and used 0.020" clear stock for the glass.
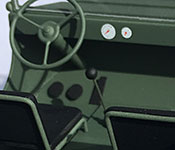
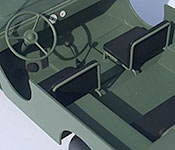
I made the seats by bending floral wire to shape and adding pads made from 0.080" stock. Nothing too fancy here, though it did take a few tries to get a matching set of front seats. The shift lever was made from a straight pin with wire insulation and craft beads for the boot. The pedals were cut from sandpaper and painted black, with the brake and clutch lifted off the floor with more craft beads. The steering wheel is one of the very few kitbashed parts of this model, but was too perfect to not use. It was mounted on a column made from plastic and aluminum tubes.
Other kitbashed parts used here were the headlight and taillight lenses, wheels, and tires. The wheels are the unused leftovers from the Batmissile, simply flipped inside out and capped with craft dots. Tires were a little trickier, since they were usually drawn like early balloon tires with no edge between the tread and sidewall (most famously seen on Donald Duck's "313" roadster). After much searching and number crunching, I decided that the main gear tires from a 1/32 scale P-38 would be the right size and shape. I got two sets of tires via eBay, and they worked just about perfectly - just a little trimming to fit the wheels and they were good to go.
Beetle Bailey's Jeeps go back and forth between gray and green, with a few different shades of each depending on the era, colorist, medium, etc. I decided to go with Tamiya TS-78 Field Gray, which was a nice desaturated green that worked as a nice middle ground among the myriad shades used in the comic. The black details were painted using Plastikote Black Primer and Apple Barrel paint, and the gauges were taken from a Slixx set.