Original Kit:
N/A
Made By:
N/A
Scale:
1/25

Other 1980s Movie Models
Other Music Models
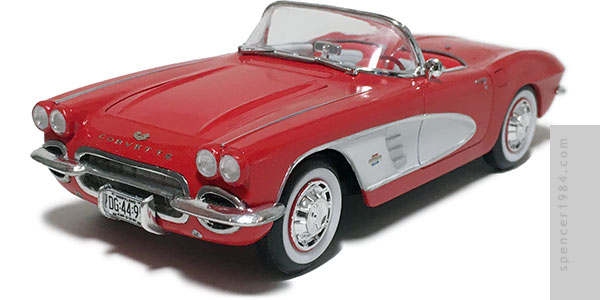
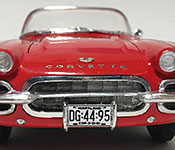
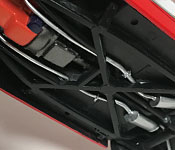
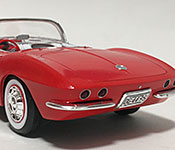
One of the unicorns for anyone looking to build a full history of Corvettes is 1961. SMP and AMT had kits of the car available for its debut year, but those were quickly retooled into the '62 Corvettes we still have today. So without spending a fortune on one of those, a slightly smaller fortune on one of the short-run resin kits, or an altogether different fortune on one of the Danbury Mint diecasts, if you want a '61 you'll have to get creative. So that's what I did, mashing together parts from at least three different junkyard Corvette kits (the most expensive of which was a $10 box of parts I got at a car show and the cheapest was in a pile of parts given to me for free).
The first of these was an AMT '60 Corvette. This provided the front fenders, hood, and doors. The second was an AMT '62 Corvette, which got me the rear fenders, trunk, grille, and bumpers. The third major contributor was Revell's '60 Corvette, which had the best chassis and engine of the lot, plus an interior with the correct seat pattern to match the car used in the movie Hairspray.
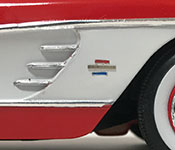
Work began by combining the '60 and '62 bodies. I went into this hoping that because they were both AMT kits, they'd match up pretty well. Although this was true width-wise, the two cars had radically different heights (a problem I should have remembered from building Lola). Still, it was close enough that I could make it work by lining up the tops of the fenders and working from there. I cut both bodies just behind the doors, added several styrene tabs inside the body to act as locators and glue points, then glued them together using a combination of liquid cement for tacking and 2-part epoxy for strength. Once this was set, I trimmed off the bottom of the '62 so that it was even with the '60 and got to work smoothing the joint between front and back. I tried to make the cuts as clean as possible, but working with old plastic like this meant there was still a fair bit of cleanup needed to make everything look good. Once the major body work was done, I shaved off the '60 badges and rescribed the panel lines before painting it Tamiya TS-86 Pure Red with TS-26 Pure White coves.
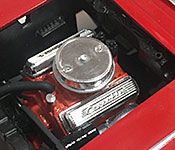
Neither engine was really salvageable, with the chassis only being marginally better. Fortunately, I also had most of an old Revell "Skip's Fiesta" '60 Corvette that could be used. The engine and chassis were built up box stock, with the addition of some Bare Metal Foil on the air cleaner to match the valve covers. The radiator was gone, so I modified one from my parts box to fit. My parts box was also the source for the wheels, tires, and stock hubcaps, since what I had to work with from the other kits was either badly damaged or custom.
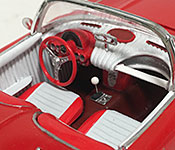
The Skip's Fiesta Corvette also had the advantage of a much better starting point for the interior than the others. The Hairspray car had a custom interior, and the Revell kit had separate seats, separate door panels, and a multi-piece dashboard that made doing the custom work a lot easier. The seats were especially nice, since they had the '59-style seats with the crosswise pleats, just like the movie car. To recreate the tuck & roll look of the movie car's door panels and dash, I used 0.040" half round stock from Evergreen. The door panels were easy enough: I cut out two new panels from styrene sheet using the kit parts as templates, then glued the half round to the panels until they were completely covered. The dash was a bit harder thanks to the complex shape. I started here by marking the center of the dash and gluing one piece of half round to one side of my mark, carefully heating the plastic over a tea light so that I could wrap it around the front edge. Once the shape was correct I held it in place with mini clothespins and glued it down with liquid cement. I let this fully cure overnight, then repeated the process with a piece of half round on the other side of my mark. Over the course of several days, I slowly built up the new pad until the dashboard was fully covered. I then went back and carefully trimmed the edges and sanded the tips so that they looked properly finished. The carpet was painted with a mottled mix of red, black, and brown to recreate the 1:1 carpet pattern, and everything else was painted flat white with TS-86 red details. These included the steering wheel from the Skip's Fiesta kit, photoetched defroster vents from Model Car Garage, and a speaker grille carved from one of the gluebombs' dashboards. I deviated from the movie design at the tops of the door panels, where I added an extra pad made from larger half round to further dress up the edge of the panel, but otherwise tried to match the look as closely as possible.
Pulling together the disparate parts was an entire day's work. There wasn't really a good way to test fit the seats, chassis, engine bay, and body together early in the process, so I had to do it once everything was painted. It required a great deal of checking, removing material, and checking again until I was satisfied by how it all fit.
Final details include the grille and bumpers from the '62 kit, headlights and windshield from the Skip's Fiesta kit, nose and cove trim from Model Car Garage, and a few odds and ends from my parts box. The license plates were my own creation based on the movie design, drawn up in Illustrator and printed onto smooth paper stock.