Original Kit:
Ford GT40 Mk.II/1966 le Mans
Made By:
Fujimi (kit #12604)
Scale:
1/24

eBayPartner Affiliate Link
Other 2010s Movie Models
Other Racing Vehicle Models
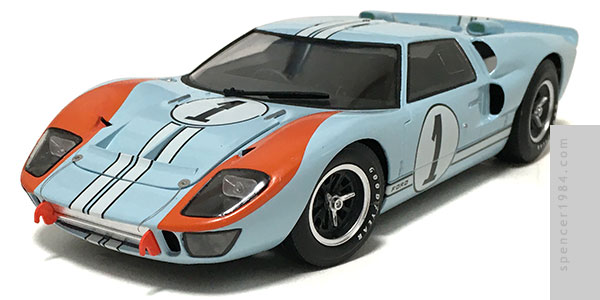
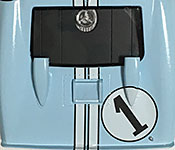
I've wanted to give Fujimi's classic GT40 a try after hearing so many good things (with a few caveats), and the release of Ford v Ferrari was the perfect prompt to get me working. I even lucked out, and after being told it was discontinued still managed to get a hold of one with the appropriate 1966 Ken Miles #1 parts and decals (as well as a companion Ferrari).
Happily, the reports about how good the kit is were not exaggerated. There was essentially no flash, sprue connection points were smartly done, and the parts fit was outstanding. The only part where I really deviated from the instructions was the rear boxes: in the kit they are made from bottoms cast as part of the chassis pan and sides cast as part of the rear crossmember. This left an ugly seam visible on the finished car, and it made that crossmember more difficult to paint cleanly. So I cut the crossmember free, then built new boxes from sheet styrene. It did mean that installing the crossmember required double-checking the alignment to the rear suspension, but otherwise everything went together just fine.
Inside, I used a combination of blacks and grays to indicate different materials and textures. For the seat grommets, I used a good sharp silver colored pencil to carefully outline the cast-in details. The seatbelts and photoetched hardware were included in the kit, though the belt diagrams were too wide - they needed to be about 80% as wide as they were drawn to fit through the buckles. The gauge decals were similarly close but slightly oversized, and had to be trimmed to fit in the dashboard.
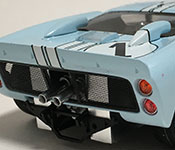
The chassis was basic but sufficient, with multi-piece front and rear suspensions and working steering. Again, a mix of several different blacks, grays, and metals brought the details. The rear boxes were finished in matte aluminum Bare Metal Foil, and the tailpipes were swapped out for short sections of aluminum tubing. The wheels and tires were straight out of the box, though the dry transfers provided by Fujimi didn't go on all that well so I used a set of vintage GoodYear markings from Slixx instead.
For the main body, I used ScaleFinishes' "1966 Ford GT40 Light Blue" gloss enamel. The color was, as usual, good to use straight out of the bottle and went on nicely. At this point it was time to mount the body on the chassis, a process I've heard from several people as being the single most difficult part about this kit. The problem comes from the GT40's extreme overhangs. After much fiddling, checking, and talking to other builders, this is the method that ended up working:
I started by going through and rounding off any protrusions on the sides of the chassis. Places like where the door panels met the rear bulkhead formed sharp angles, and so I carved those angles off to help the body not get hung up. Since the body was going to have to be flexed quite a bit, I didn't glue in any of the glass. The side and rear windows could be installed when everything was together, and the windshield would be located by the dashboard-to-cowl connection. A strip of tape at the top center of the glass held the windshield in place while I worked, and allowed for plenty of flex while eliminating the risk of it falling out. I then hooked the nose under the front of the chassis and slowly "walked" the body down over the chassis. Whenever I had to spread the body to get it around a wide part, I slipped my hobby knife or a thin ruler under the body to act as both a lever and a guide. It finally got to where the rear of the body was sitting on top of the rear boxes. The body and chassis had to be flexed quite a bit to get around them, but with some more help from my thin ruler I was able to get it done. Once I was past them, the body essentially snapped itself into position and stayed there - I never had to glue it. The final parts were added, including the photoetched rear grille. This needed to be gently rolled to get the curve to match the opening, but after wrapping it around a bottle on my work bench it dropped right in.
Finally, it was decal time. I started with the ones over the front fenders, assuming they would be the most difficult. Not only did they have to line up perfectly with the headlight openings, they had to adhere to multiple compound curves including the tight radius where the front deck rolls into the fascia. It took an entire afternoon of slowly coaxing the curves into place with plenty of Mico-Sol, but in the end they snugged down beautifully. The only place that was impossible to get right was the gaps caused by the NACA ducts. I had to cut the decals here, then go back with some custom-mixed paint to clean up the edge of the color. The decals over the roof vents were only slightly better, but could have gone on much easier if I had simply left a gap for the vents and did those with paint. All of the other decals went on without a hitch, including the funky triangular decal to allow the back deck number to fit around the right scoop.