Original Kit:
Space: 1999 Moonbuggy
Made By:
MPC (kit #984/12)
Scale:
1/24

eBayPartner Affiliate Link
Other 1970s TV Models
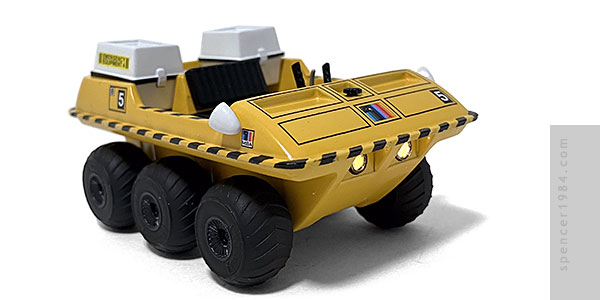
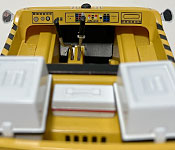
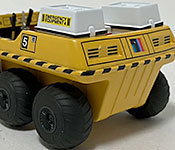
When Round 2 acquired MPC from RC2, they immediately leaned into the nostalgia of the brand by reissuing classic kits like the General Lee, Dark Shadows Vampire Van, and Monkeemobile. Space: 1999 was among those early licenses to see the light of day again after many years, and kits from the series have been readily available now for over a decade. But the one I kept hoping to see was the Moon Buggy, the only proper 1/24 scale kit from the show (true, there was "The Alien," but that was a show rod modified from Barris' "Moonscope" and never featured in the show). We nearly got it in 2017 when the Nuclear Waste Disposal Area 2 kit was released with the Moon Buggy as a pack-in, but I wasn't going to buy a whole 1/48 scale diorama for just one vehicle if I could help it. Finally, in 2023, the Moon Buggy was repopped by itself and I grabbed a few of them.
Knowing it was an older kit with an on-again/off-again history, I tried to set my expectations low. But I needn't have worried, because this was either an exceptional tooling when it was first released or Round 2 did a great job cleaning it up before using it...little to no flash, good tight parts fit, and smart casting to reduce parting seams. I also really like the way they did the packaging, printing full color plans on the inner box for both the Buggy and Amphicat, plus one panel for just the engine and another for just the figures. It's similar to what we've seen on Tamiya kits in the past, but with actual part and decal callouts plus notes that were super helpful when doing the final paint and decal work.
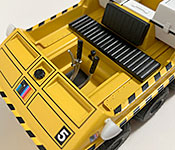
Putting it together was pretty straightforward, though in the end I really only used the instructions to verify part numbers - my order of assembly was very different. Officially, I was supposed to start by mounting the seat cushions on the engine cover, then installing the (optional) engine, then the tub, the upper hull, the exterior details, then finally the axles and wheels. To make my life easier, I assembled the hull and axles, dropped in the tub and engine cover, and then painted everything together. I went with TS-47 Chrome Yellow over TS-46 Light Sand to give it a somewhat used look - not really weathered, but clearly "in service." The tires were painted flat black with semigloss black wheels, and the controls were painted silver with flat black handles.
The decals were straight out of the kit, and while from being the most difficult I've done they required a fair bit of massaging. Part of that was the size & shape of the Moon Buggy: the instructions flat-out tell you that you'll have to make some short crosscuts in the front and back stripe decals so they can wrap around the bumper strip properly. It'd be a good idea to do the same with the side stripes as well, as the decals are a little on the thick side - excellent for opacity, less so for conforming to complex shapes without the aid of Micro Set and Micro Sol. The decals for the front and rear panels also needed a little work, as there was no allowance for the recessed areas near the tops of the panels. I carefully cut out those parts of the decals with a good sharp knife. The last set of decals that needed work was the sill stripes, which thanks to their clear backers were just a hair wider than the sills themselves. There wasn't enough overhang to offset the thickness of the decals and let them settle down, so they had to be trimmed tight to the printed area and went on just fine after that. Once the decals were all on, I gave it a shot of semigloss clear and minimal weathering to give it a little extra realism.
My only real modification to the kit was the addition of working lights. The setup was almost too perfect to not give it a shot: separate buckets in a removable tub right next to a big open compartment with a built-in removable lid? I had to do something with it.
Everything was from Evan Designs, the same place I got the light for my Pizza Planet truck from. I used two of their Nano LEDs, connected to their 3V battery holder and switch. The LEDs had 14" (35.5cm) wires, so those had to be trimmed back to fit inside the Buggy, but otherwise everything went together easily. I secured the lights with PVA glue as per Evan Designs' recommendation, and the switch and battery holder were held with Mixed Media Adhesive.
The final details were the mirrors, toolbox, and containers from the kit, painted TS-101 Base White as a test to see if it would actually block color bleed from the cast yellow plastic. I'm happy to find it works as advertised (no real surprise considering the brand), and is something I'll definitely be using again in the future. The mirrors then recieved chrome vinyl "glass," and the Moon Buggy was complete!