Original Kit:
Spinner
Made By:
Fujimi (kit #91327)
Scale:
N/A

eBayPartner Affiliate Link
Other 1980s Movie Models
Other Police Models
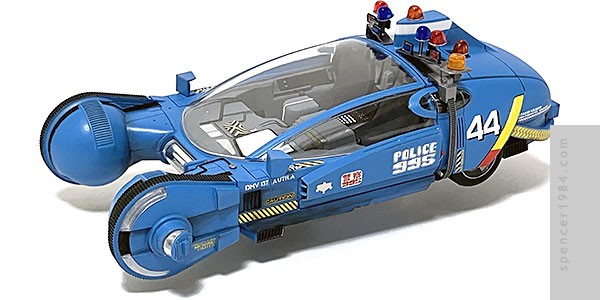
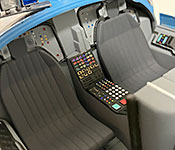
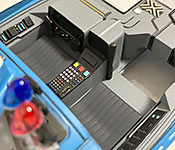
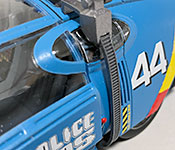
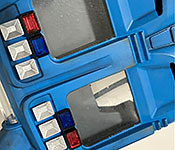
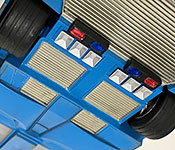
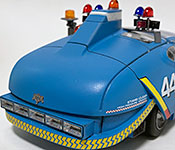
When Fujimi released their Blade Runner Spinner kit, I grabbed one as soon as it was available. Then the aftermarket kits started showing up: a photoetch set, multiple resin upgrades, lighting kits, the works. Of these, I only purchased a decal sheet, the PE set (having been impressed by the set ParaGrafix made for the Ecto-1A) and "Laser Spinner" upgrade from Magonote (being impressed by the seats, rear bulkhead, and other details). As it turned out, the latter didn't really work for me...the seats wouldn't fit without some major work, and the bulkhead wasn't sufficiently better than the PE once assembled.
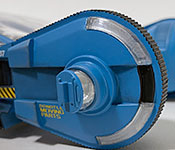
The instructions start with the floor, and so did I. I removed the cast-in vent faces to replace them with PE parts, and filled in the hollow backs of the rear vents. Fujimi supplied two-part hard plastic tires with no tread detail, which I corrected with a tip from Terry Jesse's build in Scale Auto magazine. By cutting thin strips of vinyl and applying them to the assembled tires, I was able to create a sort of grooved tread pattern that recalled aircraft tires.
As noted in nearly every review of the kit, Fujimi included the correct upper and lower windows and then cast the interior in such a way as to make them almost completely useless. So no surprise, that part of the build required the most work. I removed the rear bulkhead (leaving the vertical console) and both footwells as per the masks included with the PE set. It wasn't perfect, as the masks had a fair bit of wiggle room and could be "correctly" positioned in one of several ways. I took my best guess, then left a little extra plastic to trim back if needed. It took a fair bit of test fitting and the addition of a filler strip where I got a little enthusiastic with my cutting, but eventually I was able to get the spacing correct. To test the placement of the PE footwells, I used poster tack to hold them to the upper body and adjusted them through the openings where the window would fit. Once I was happy with how everything looked, I secured the footwells with 5-minute epoxy. Epoxy was also used to assemble the new rear bulkhead which fit the body perfectly. I used the PE panels for the right side and center rear, but left the others as the stock Fujimi parts since I wasn't going to be lighting anything and they were close enough for my tastes. Plus, now I have a few spare panels if I need them on a future project.
I really liked the look of the Magonote seats, and planned to use them right up to the moment I discovered that they only worked with the door panels from the same kit - the Fujimi door panels made the space too narrow. I wasn't about to chop up the kit or seats, so I reverted back to the kit-supplied seats with ParaGrafix head rests and back panels. To give the headrests a little more bulk, I used the center sections of the kit-supplied headrests and some scrap styrene for the backs of the wings. Guitar wire was used to simulate the corrugated edges of the back panels.
The only extra work needed on the body was filling the seam between the upper and lower front wheel pods. I hadn't noticed the problem until late in the build so my fix isn't quite as clean as I'd like, but it's a lot better than it was. I also had to shorten the sideview pod stalks to allow them to fit nicely against the body. Otherwise, parts fit was just as good as you'd hope for.
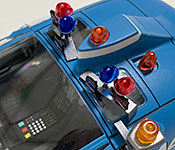
Even without trying to add functioning LEDs, lights for the Spinner were a project unto themselves: two pop-out headlights, four wheel cover lights, one central forward light, two side strips, five rear lights, eight underside lights, and fourteen topside lights. The headlights were hollow on the back, and like Aoshima's Z became windows to look at the front tires. Some reflectors made from chrome vinyl and Bare Metal Foil took care of this. The wheel cover lights had the exact opposite problem, looking totally flat thanks to a lack of any detail. I fixed this by using the lenses as guides to scribe lines into the covers, painted up to those lines with chrome paint, then Dullcoted the backs of the lenses to frost them. The rear lights were done with more chrome paint. Most of the roof lights were out of the kit, thought he two that mounted directly to the fuselage were swapped clear-for-red so that they could be painted to match the movie prop. The clear lens on the starboard rack was made from a piece of the clear parts tree, and the amber dome light on the opposite side was pulled from my parts box.
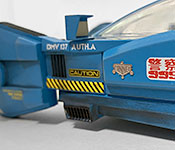
Choosing the colors was a process unto itself, since not even the prop cars matched each other. I decided to go with Tamiya TS-10 French Blue as a suitably municipal blue over a Krylon gray primer interior. Details were done with a combination of neutrals, metallics, and a few bright colors for the interior controls and panels. The two main displays were finished in black vinyl to make them look like deactivated screens, and the "mirrors" were painted to look like smaller displays. Most of the markings came from the aftermarket decal sheet, which went on beautifully and fit perfectly. The only ones I didn't use were the diagonal stripes/lights over the rear wheels, which were only available on the kit's sheet. These weren't quite as good, needing a liberal application of solvent before settling down. Finally, I gave it some weathering to reflect its life in the far-off future of 2019 LA.