Original Kit:
Mach Baron KSS Mach Trigger
Made By:
Imai (kit #829720)
Scale:
1/24

eBayPartner Affiliate Link
Other 1970s TV Models
Other Z Car Models
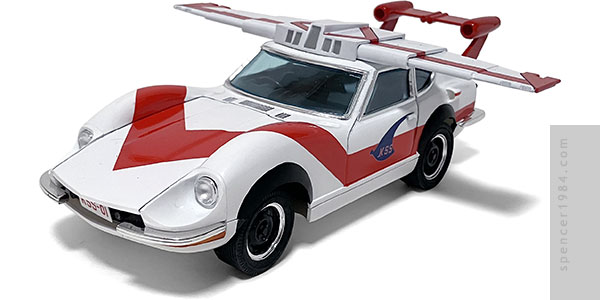
I went into this project a little different from my usual methodology. Normally I'll have a pretty good idea of what I'm getting into, either having read reviews, watched videos, or built a similar kit in the past. This time I didn't even know if it would be 1/24 scale when I bought it since there is next to no information available anywhere. Even Scalemates, usually a great resource, was only able to let me know that I had the 1999 reissue of the original 1975 release.
My first impression was that this kit was very much a product of its time. Like many mid-1970s Japanese kits it had poseable steering and a motor to make it go zooming across the floor. In this case the motor was an old school wind-up motor complete with a key and clockspring, and there was also a spring loaded figure/missile that could blast off from the hood of the car. Very fun, but as usual the extra gimmicks meant that the interior had been reduced to a flat panel with minimal detail. At least the casting was nice and clean, thanks to the short production run(s), and the low parts count suggested an easy assembly.
The first thing I did was a test fit of the major components and immediately I saw room for improvement. The body is split just below the door seams into upper and lower halves, but had nothing to align the parts and only a butt joint for assembly. This wouldn't do.
I added cleats to the inside of the upper body, which would line it up with the lower pan and also give me some good solid glue points. I then recut the hood, door, and hatchback seams and lightly sanded the body to level the surface. I also glued the nose in place and cleaned up the seam where that met the body.
The more I looked at it, the more the flat interior bugged me. I checked through my stash and found a possible donor in Hasegawa's recently reissued 240Z kit. A quick mock-up confirmed tha the Datsun interior would fit the Mach Trigger's body with a little work.
Now that I knew I wouldn't be using any of the mechanical gadgets, I filled in the holes in the hood and chassis. The hood ports were sanded down and smoothed over, while the chassis holes were simply eliminated by gluing a sheet of thin plastic over them. Eliminating the motor also meant eliminating the rear axle, so I made a new one from some styrene tubing. Since I was already making these changes (and had most of a spare Z kit at my disposal), I decided to also fix the cast-in headlights and taillights. Both were cut out and the holes were resized to fit the Hasegawa parts.
The interior was painted gray and black to match the prop vehicle. To get it to fit, I had to cut down the strut towers, oil pan, and the top forward corners of the door panels. I thought this would be all that was needed until I tried to put it in with the glass in place. It turns out I severely underestimated how thick the old kit glass would be, and had to cut the dash pad nearly in half before it would fit correctly. I can't claim it was my cleanest work, but the tinted glass helps hide it some.
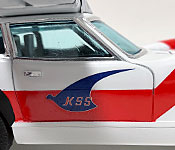
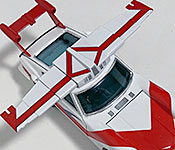
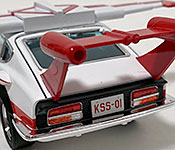
The body was painted TS-26 Pure White, then masked off and the stripe was painted TS-86 Pure Red. These stripes were originally provided as decals, but were cut to fit the various holes in the hood. I considered making my own without these, but after considering the dramatic bulges on the front fenders I figured it would be smarter to use paint. I did use my own custom decals for the door insignias and scoop stripes. TS-26 and TS-86 were also used for the wings, and the rear fascia and fender flares were done in flat black. Body trim was a combination of BMF and chrome paint. The wheels were solid black in the show, but the chrome plating was so nice here that I couldn't bring myself to eliminate it entirely. My compromise was to leave the edges unpainted, giving the Mach Trigger gloss black wheels with chrome beauty rings. The final detail was a set of screen-accurate license plates I drew up and printed.