Original Kit:
Toyota Supra
Made By:
Tamiya (kit #24123)
Scale:
1/24

eBayPartner Affiliate Link
Other Fast & Furious Models
Other 2010s Movie Models
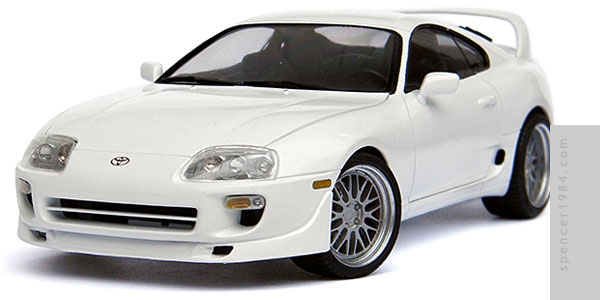
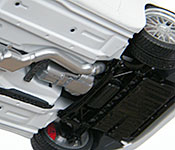
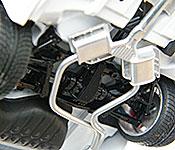
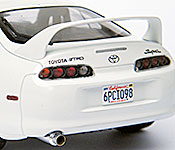
I purchased Tamiya's Supra kit with the intention of making my own custom parts to turn it into Brian's "Last Ride" from the end of Furious 7. I then learned about a transkit by ZoomOn Models: resin front spoiler, two-part BBS LMs with low profile tires, metal exhaust parts, upgraded headlights, full photoetch details, window masks, and two sets of marking sheets (waterslide decals and chrome peel-and-stick). It was a little pricey, but given the variety of materials and limited production run of 80 units, it wasn't too bad. So was it worth it? Eh...
The Supra was, as expected from Tamiya, fantastic. Everything fit together beautifully, and there were some very clever assemblies like the way the front of the engine merged with the chassis. Parting lines were minimal, and there was essentially no flash to worry about.
The transkit was somewhat less brilliant, though admittedly the first problem was self-inflicted. I sliced off the bottom of the front bumper with no problem, but when I glued the new spoiler on I bumped it just a hair. Worse, I didn't notice that it was off until after the glue had set and there was no way to remove it without destroying the lip and possibly the front bumper. I did some measuring, though, and by adding a thin strip of plastic at the wheel opening on the "forward" side and carefully carving at the leading edge of the sweep line, I was able to get the two sides to match. I also corrected the angle of the lip itself, and while I was working I took the opportunity to fix a problem with the transkit: the tops of the sweeps came nearly to the break line between the bumper and the front fenders. Paul's Supra had the sweeps end much lower, with space above them for the corner marker lights.
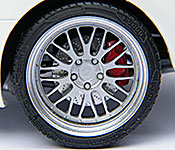
There were further problems with the wheels. The two-part photoetched pieces were a good idea to recreate the cross-drilled rotors, but they required a great deal of massaging to get into place. At first I thought it was because they had been designed to go on unpainted parts, but upon closer inspection I realized that there was no way they were going to fit without doing some trimming. A little extra margin would have been appreciated here, especially since the centers of the discs were going to be covered by the PE hubs. The wheels had very soft locators, both axle-to-spider and spider-to-rim, which made getting everything lined up tricky. Worst of all, though, the tires were useless. Roughly cast in black vinyl, all four were identical with one "good" sidewall and one "bad" sidewall. There was nothing to do to save the "bad" side, either, since casting marks obliterated the sidewall detail. This meant that one side of the car would look good, but the other side would have nasty looking sidewalls with ugly chunks of casting points, or would be on backwards. The only up side was that it seems that ZoomOn recast these from a set originally made by Aoshima, and I had a set of those that I could just swap out.
I was further unimpressed by the muffler. The instructions suggest cutting off the stock pipe ahead of the resonators, then just sticking the straight pipe from there to the back of the car at an angle so the tailpipe lines up with the notch in the rear bumper. It was pretty crude looking, and I knew I could build something that looked better. So I cut the stock pipes just behind the resonators and scratch built my own tailpipes, having them join together at a new muffler I built based on parts from the transkit and my own inventory.
Things got a little weird when it came time to do the lights. The outer forward lights were fine, and the chrome bezels fit with no problem. But the inner lights had mount posts...to fit over the only lights on the front of the car that had cast-in bulbs. So those had to be cut down and drilled out. The lower front lights fit OK and looked decent, but the lenses for them were black ovals drawn on clear sticker stock. I would have had the same results sticking clear packing tape to the front of the housings and trimming them with a good pair of scissors.
Similarly, the grille that came in the transkit worked better as a template than an actual part. As it was, the edges were uneven and it had a significant curl across the main horizontal. I first tried to straighten it out, but in the end it worked better to simply use it as a guide to create a new one from sheet styrene.
The most frustrating flaw with the transkit had to be the peel-and-stick chrome markings. Normally I love these. They are easier to work with than photoetch, have a true "chrome" finish, and look better than either decals or molded-in scripting. These, however, were terrible. The adhesive holding the clear film to the parts was much too strong, making it nearly impossible to get the parts free without destroying them. The only ones that worked correctly were the corner marker lights, since they were large enough to get a blade between the film and the chrome and hold the chrome against the car as I removed the film. Everything else was damaged—I saved most of the "TRD" badge and was able to reassemble the "Supra" badge—or completely destroyed. The nose and tail emblems and "Toyota" script were ones I had on hand, and I was able to repair the "TRD" badge with bits of metal tape. I didn't even try to use the mirror glass as stickers, opting to simply cut them out and glue them into their housings.
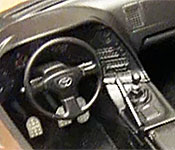
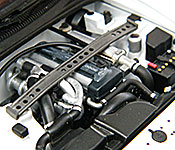
I also made a few non-transkit modifications to the model. I replaced the steering wheel with a correct three-spoke design from Tamiya's Land Cruiser, and swapped the stock seats for a set of Sparco seats from Hobby Design (the logos for which came from the same eBay seller that provided the usable chrome scripts). Under the hood, I added a scratch built tower brace, clamps, and throttle linkage to help add some extra detail and make it better match photos of the 1:1 car.
So, was it worth it? ZoomOn sells the chrome stickers and window masks as a stand-alone set for $5+shipping. You can get Aoshima's BBS LM wheels and tires for $8+shipping, and they don't require cleanup. I didn't use the "Reach Out Worldwide" decals because I built this as the movie version, and there were no screen-accurate decals included (I made the rear plate myself). The exhaust didn't look right, the seat belts and grille were write-offs, and the photoetched parts were either ill-fitting (brakes), redundant (badges), or not substantially better than the kit-supplied parts (wipers). The lights and front spoiler were good, and I'm happy with how the finished model turned out, but for me there was too little to justify the price of the transkit. If I had to do it over again, I would have stuck with my original idea of customizing the Tamiya kit myself.