Original Kit:
Batman Forever Batmobile
Made By:
Revell (kit #6720)
Scale:
1/25

eBayPartner Affiliate Link
Other Batmobile Models
Other 1990s Movie Models
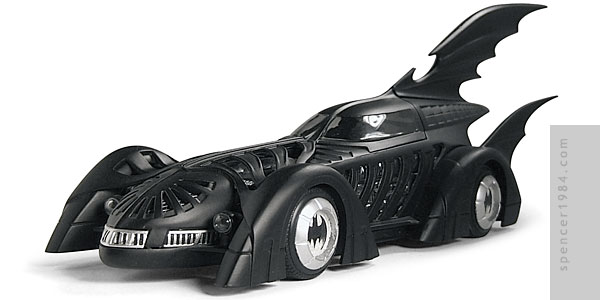
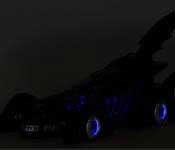
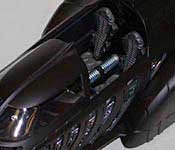
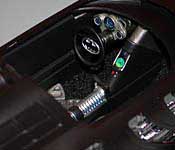

Though I generally prefer the darker incarnations of Gotham's defender, I have to admit that the Batman Forever Batmobile can be a striking presence. Learning more about the car (and those before it) has made me respect it a little more, and so I wanted to revisit the model to give it a movie-accurate appearance. One feature that I definitely wanted to recreate he was the blue glowing engine panels. With my previous expereince using products from GlowInc., I knew exactly how to approach this.
I started by building the kit in modules: the front fender/hood assembly, rear fender/chassis assembly, main fuselage, roof fin(s), and cockpit. Each module was assembled, prepped, and painted individually, only coming together at the very end.
The front fender/hood assembly and rear fenders/chassis assembly were glued together, and the seams were filled in where necessary. On the rear fenders, I also cut the appropriate panel lines inside of each of the rear fenders at the beltline.
Next, the main fuselage was modified by opening the triangular slots on the nose and putting wire mesh behing the openings. I also installed the rear panel (under the tail piece) and filled in the seams around it.
I wanted the fin to work like it did in the movie, but that was going to take some engineering since the kit wasn't really designed with that in mind. I started by removing the base of each fin half, and installing three sections of plastic tubing end-to-end. This essentailly made the bottom of the fin one large hinge, with a hinge pin made from stainless steel rod. To allow the fin to sit properly in both the open and closed position, the hinge needed to have enough slack to raise slightly while the fin was being moved. For this, I made the hinge "U" shaped, with the legs of the "U" going into the body. That solved one problem, but the fins are pretty long and thin. I now had to figure out how to get them to stay together at the top. I considered magnets, pins, and several other things, but nothing would look as realistic as I wanted. What I finally did was take two sections of .040" plastic rod, rounded the end of one, and hollowed out the end of the other. These pieces were glued along the top ridge of the fin halves, so that when they were closed, the round end pops inside the hollow end, locking them together.
The cockpit was built according to the instructions. The seats were painted using two custom-mixed paints, as was the firewall brace. The center console is Bare Metal Foil with Liquid Micro Mask between the ribs and sprayed with Dullcote. the floor was flocked, and kit-supplied decals provided the gauge & radar faces. Movie-accurate switches and lights were added using drops of white glue painted the appropriate colors.
Once the modules were assembled and painted, I was ready to add the glow paint. First, the inside of the ribs were covered in metal tape. This did two things: first, it protected the plastic (the Glow Inc paints are very similar to nail polish, and can damage bare plastic). Second, the highly reflective surface made the glow brighter. Once the foundation work was done, I applied the paint straight out of the bottle, using the supplied brush. This was pretty quick work, and the car was soon ready for final assembly and detailing.
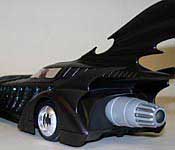
The engine panels were sprayed with a layer of Testors Transparent Black Window Tint and various details were painted. The front grilles and wheels were detailed and Dull-Coted, while the exhaust nozzle was stripped and repainted. The wheels and exhaust were also detailed with Glow Inc. products: more blue for the wheels, and red for the inside of the nozzle.
Send me an e-mail with your thoughts!