Original Kit:
Silhouette Show Car
Made By:
AMT/Ertl (kit #31224)
Scale:
1/25

eBayPartner Affiliate Link
Other Toy Models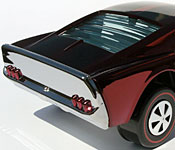
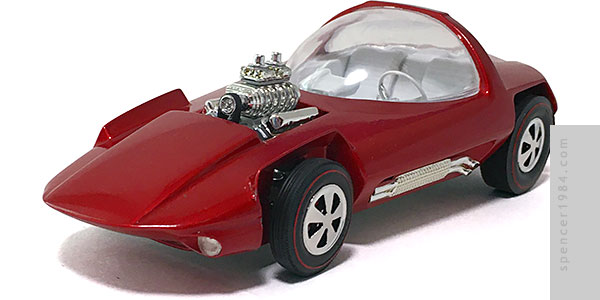
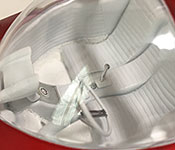
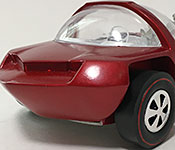
Building tributes to the Hot Wheels "Sweet 16" - the original 16 cars released in 1968 - has long been on my to-do list. As is often the case, though, where to begin was where I kept getting stuck. So many ideas, all equally interesting. I finally decided to go for the first car shown in the original commercial, Mattel's take on Bill Cushenberry's famous Silhouette show rod. AMT has been reissuing the kit semi-regularly since 1964, so I even had an easy place to start.
Well, sort of.
As it turns out, a fair bit of work had to be done to really get it to look like the Hot Wheels car. Being a 1/64 scale toy, the body had been simplified quite a bit and the hood, trunk, and canopy hinge were all smoothed out. I replicated this by gluing everything into place, then filling the seams with Bondo and Tamiya putty. I also added the front fenders, made from flat styrene stock. The model kit was split at the beltline, with the upper and lower halves closing around the rest of the assembly. There was no way to hide that on the finished model, so I cut off the lower pieces for the nose, sides, and rear, then glued them to the upper clamshell and filled that seam as well.
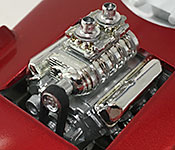
The engine was pretty much built straight out of the box, with my only changes being to the intake bells (a pair of craft eyelets) and the exhaust headers (flipped and cut short so they would not interfere with final assembly but still be visible along the sides of the engine). Trying to stay true to the look of the toy, everything but the belt was painted some shade of silver or chrome. I added a scrap piece of chrome to the back side of the belt so the tensioner looked like it was actually mounted to something, and the engine was done.
The chassis, like the engine, was done completely in silvers and chrome to recreate the ZAMAC appearance. I also modified the rear end to be wider and sit higher. This included new springs between the axle and frame, and a set of parts box drum brakes to push the wheels out a hair. Said wheels were 3D printed parts I drew up, made to be direct replacements for the kit parts. They were painted black, then Bare Metal Foil and chrome paint were used to give them their finished appearnce. The front tires are straight out of the kit, while the rear slicks are from AMT's '49 Mercury kit. Their sidewalls were hand painted with some Apple Barrel Candy Apple to get that proper "redline" look. Inside, I kept everything chrome or white. The carpet was made using embossing powder, and the gauge was my own decal.
For paint, I wanted to try to recreate Hot Wheels' Spectraflame Red - a color they created by essentially spraying tinted clearcoat over the raw metal body. Since that base wasn't an option here, I started with Tamiya TS-88 Titanium Silver before applying their TS-74 Clear Red. The result is...OK. Where it worked, it worked great. But I also ended up with a couple of gray swirls that don't seem to polish out. It actually does a really good job of recreating the look of an original Spectraflame paint job, but it's something I'm going to want to try to improve on going forward.
One other trouble spot I ran into was fitting the interior to the finished body. The tub is quite a bit wider than the opening left when I cut out the belly pan, and Silhouette isn't big enough to have a lot of flex in it. I finally managed to squeeze it in without damaging anything, but don't ask how - it finally just popped ino place after about a half hour of fiddling with it. Not wanting to repeat that particular stressor, I opted to trim down the mounting flanges for the canopies so I could install them from above.
The final details included the headlights, grille, taillight bar, and side pipes. I chose to use the dual pipe version both because I felt it better matched the rectagular tabs visible on the original, and I really liked the unique look these provided.