Original Kit:
Lupin III & Fiat 500 (Attack)
Made By:
Gunze-Sangyo (as Mr. Hobby, kit #346)
Scale:
1/24

Other Cartoon & Anime Models
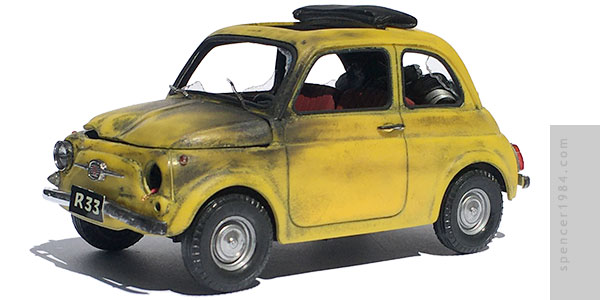
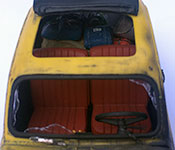
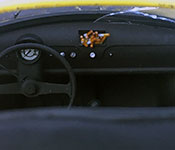
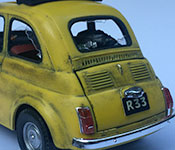
Arguably even more famous than his Mercedes-Benz SSK, Arsène Lupin III's Fiat 500 made its debut appearance in Hayao Miyazaki's 1979 movie Lupin III: Castle of Cagliostro. It didn't take long for the little Fiat to prove its mettle, helping Lupin and Jigen rescue Clarisse from a carload of baddies despite being hit by some errant Citroën parts and a stielhandgranate.
Despite its packaging, this is a near-straight reissue of Gunze-Sangyo's standard Fiat 500 kit. The only change was the addition of a new decal sheet and some resin parts to recreate the nighttime chase scene from the movie: a retracted roof panel and figures of Lupin, Jigen, and two assassins to be placed in and on the car. If I wanted any screen-accurate details beyond those, I was on my own. After some consideration, I decided to go with the look of the car between its two longest appearances.
The first thing I did was to recut the panel lines, including all the way through in a few places around the decklid and complete removal of the engine cover. I started applying heat to add the dents, but discovered that the plastic Gunze-Sangyo used reacted strangely...rather than soften to allow for reforming, it simply shrank and curled up. This meant that I needed to rethink the process. So I did some strategic thinning and slicing, and when I reapplied heat the plastic shrunk itself to essentially preformed dents. More dents were added by carving into the plastic with a hobby knife, sanding sticks, and the Dremel tool. The final bit of custom body work was drilling out the left headlight and parking light.
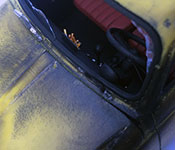
There wasn't really much more of the kit at this point...a two-piece chassis, simple wheels and tires, dashboard, and trim. No engine, no interior panels, the glass was to be left out, and the seats were Gunze-Sangyo's usual vinyl so they couldn't be corrected to the later style shown in Lupin's car. I found some seats in my parts box that worked after a little reshaping, and painted them Testors Dark Red with a shot of Dullcote. The door panels were cut from Evergreen grooved panels and drilled out for door handles and window cranks. These, along with the rest of the interior and chassis, were painted flat black.
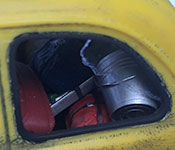
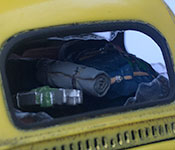
To add some more interest as well as place it in Castle of Cagliostro, I loaded up the interior with personal effects. The ash tray was opened up and filled with cigarette butts made from 0.020" rod stock colored with Sharpies for the filters and ash. In the back seat, I piled as many items as I could, including bedrolls, tarps, bags, cases, a bottle of wine, a tennis racket, a photoetched metal bucket, and an ammo box for Jigen's extras. These were pulled from military detail kits, diecast cars, and old model kits, along with a couple of scratch built items.
Finally, it was time for paint. I had originally planned to leave the car in its original bare yellow plastic and just weather it heavily to create the scorch marks left by the potato masher, but when I first started working on deforming the panels I managed to crack the decklid. So I filled in the crack, sanded it, and primed the body inside and out with flat black. Then I shot the yellow, and everything went straight to hell. Wrinkles galore, across all but a few small areas, and deep enough to go right through the primer. The work I had done to this point made chemically stripping it difficult, so I resigned myself to seeing if I could sand enough off to salvage the finish. As it turned out, though, this major league disaster ended up working in my favor. Because I had started sanding sooner than later, the paint hadn't had a chance to harden and I ended up peeling the car. It wasn't exactly easy going - think of de-shelling a particularly stubborn hard boiled egg - but when I was done I was left with a mostly stripped yellow body marred by swaths of flat black embedded in the finish. Almost like scorch marks.
Struck by this odd bit of serendipity, I did a little more spot sanding to clean up some areas and a little extra "burning" using flat black paint and Tamiya Soot. The result wasn't exactly as I envisioned going into this project, but was close enough. All that was left was the trim (including a set of PE wiper arms to recreate the mangled remnants seen in the movie) and a few strategically placed bits of clear plastic to represent the edges of the blown-out glass. These subassemblies were then put together, the kit-supplied license plates were added, and Lupin's Fiat was done!