Original Kit:
Corvette Collector Series (1957 Corvette)
Made By:
MPC (kit #1-2052)
Scale:
1/25

eBayPartner Affiliate Link
Other Music Models
Way back when I was first getting into model building, I really wanted to do a model of the early C4 Corvette. Chevy (and by extension, the model manufacturers) had transitioned to the post-facelift C4, and since the internet wasn't really a thing yet I started checking toy shows and swap meets. There I ran across MPC's "Corvette Collector Series" box set, with my C4 plus a '57 and '75. I built up the C4, adding anything and everything I could think of doing at the time regardless of skill, totally whiffed the '75 to where it was relegated to parts, and built the '57 as a more or less stock version with a few minor details. I ran across this '57 some 30-ish years later, and looking over my work from back then I decided I wanted to revisit the old kit and give it another try.
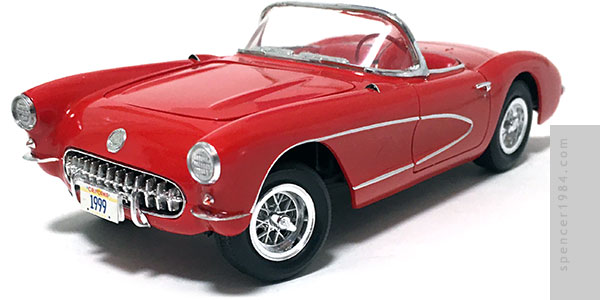
I decided that a good subject for the build would be Prince's "Little Red Corvette." Yes, the song isn't about a literal car, but I wanted to build this as more of a general homage to The Purple One, and a Corvette was a good place to start. I also thought the '57 would be a good candidate since it was, in fact, one of the "littlest" Corvettes. Plus, when the song was released in 1983, we were still in the Malaise Era. If you wanted a cool car at the time, you had two choices: European import or American classic.
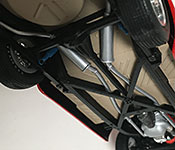
Since I didn't want to deviate too far from the nostalgia kick, I built it pretty much box stock. There was a lot of parting line cleanup needed, but otherwise it generally went together with little difficulty. The biggest change I made was swapping out the wheels and tires for a set from my parts box. I was originally going to go with white letter tires for that complete "early 80s" look, but the tires I wanted to use had big divots right at the corners where the tread met the sidewall. I could have dumped them, but they fit the wheels and fender openings so nicely I didn't want to start my search over again. Instead, I flipped them inside out, putting the divots at the top inside center where they'd never be seen. The chassis was painted semigloss black, with a light brown floor to mimic a restoration I saw and liked the look of. Blue shocks, gunmetal springs with a black wash, and silver exhausts give a little extra life to the underside.
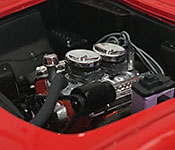
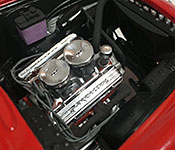
A couple of small changes were needed under the hood, stemming from a busted fan belt. I swapped this with a nearly identical one from my parts box, but "identical" and "nearly identical" was the difference between whether I could use the kit-supplied radiator hose or not. Instead, I made a new hose from aluminum wire, The rest of the engine went together just as I had done previously, including a set of ignition wires. I got the order a little better this time, though, so the distributor doesn't look like Alfalfa from The Little Rascals. I also added a coil, since MPC never included that detail.
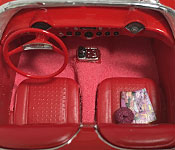
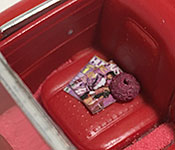
Inside, I had to deal with four very obvious ejector pin marks. the two on the floor were sanded flat and then I added red embossing powder to create carpeting. It's my first real try using it, and generally I'm very happy with the results. It's as fine as flocking, but doesn't clump and is a little heavier so it pours and levels much better. My only complaint is I should have used a slightly darker/more saturated red here, but even that's a mild gripe. For the driver's seat, I carefully sanded off the mark then went back and added the seat pattern using tiny dots of white glue. Finally, for the passenger's seat, I used the simplest method of all: I covered it with a pile of stuff. It gave me a chance to throw in a couple of Easter Eggs, so I made a Raspberry Beret and a couple of magazines for Darling Nikki. While I was at it, I scrounged a washer bottle from my parts box, painted it purple, and stuck it in the appropriate location under the hood. Now when the washer is activated, it'll spray the glass with Purple Rain. Womp Womp.
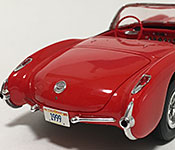
The body was painted TS-86 Pure Red directly over the red plastic, then hand painted black on the inside to prevent any light leaks. The trim was done using a combination of the kit parts, Bare Metal Foil, and a chrome Gundam Marker. I opened the grille by carefully Dremeling it from the back side, reinforcing the center bar with some wire, and then cleaning the teeth with a good X-Acto and a quick touch-up with more chrome. It was a fair amount of work, but improves the look of the car so much I can't even consider it an optional process. Finally, it got a set of vintage California "1999" plates.
All in all, it was a lot of fun to revisit this old kit. It's not great in a lot of respects - some assemblies are more fiddly than they need to be, there was a great deal of cleanup required, and some have argued that a few of the contours aren't quite right. But it hits that perfect nostalgic spot for those of us who grew up with these kits, and that's not a bad place to visit.