Original Kit:
1969 Dodge Daytona
Made By:
AMT (kit #38208)
Scale:
1/25

eBayPartner Affiliate Link
Other Fast & Furious Models
Other 2010s Movie Models
Other Charger Models
‘67 Charger (Review) Blade‘68 Charger
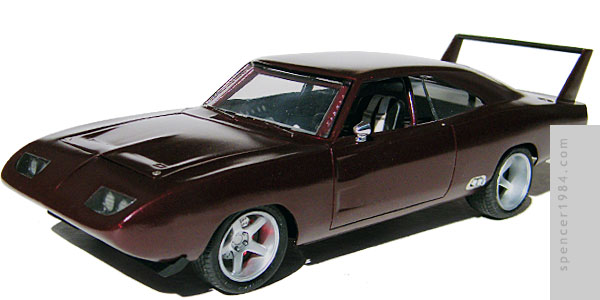
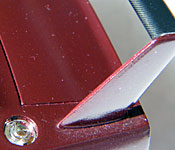
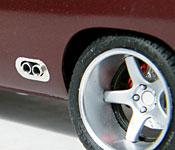
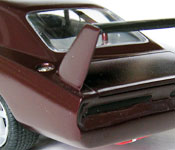
AMT's Charger Daytona kit is essentially their pre-update General Lee with a few extra parts thrown in. It's not quite as sharp as some more recent toolings, but it definitely had potential.
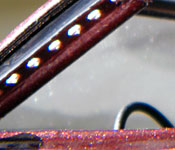
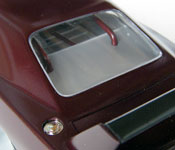
Atypical for me but necessary for this project, work started with the body. I cut off the leading edges of the hood and front fenders, shortening the front of the car by a scale 14" (35.5cm). The aero nose was cut in half and widened to mate up to the fenders, with a piece of square brass tubing used to keep everything straight and aligned side to side. Styrene, Tamiya 2-part putty, and superglue were used to blend the fenders into the nose, as well as reconnect the two halves of the nose. The headlights were moved to match the movie car and opened. Half-round was used for the centerline, sanded to meet the line on the hood and blend into the front of the nose. Nothing in my parts box was even close to the lower spoiler on the movie car, so I carved one from .080" x .250" rectangular stock. I left off the skirts and fender vents, removed the wing windows, door handles, and side trim, and enlarged the rear window to the outside edge of the trim. The locator mark for the fuel fill was used as a guide to drill out the fender, and a thin strip of plastic was installed inside the fender to create the recessed fuel fill. The wing uprights were shortened and reshaped kit parts, and the wing itself was made from aluminum so I wouldn't have to worry about it sagging in the future. The rear bumper was glued into place, and served as a guide for filling in the rear panel.
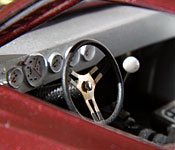
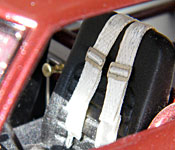
Nearly everything inside was reworked just as much. Unlike the actual movie car, I tried to build this as if it were a truly finished street rod...so no exhaust pipes routed through the interior behind the front seats. Instead, the rear seat was cut out and replaced with dress panels made from sheet styrene. Both door panels were sanded smooth and detailed with reinforcing bands and door handles. The front seats were replaced with a pair of seats modified from AMT's '68 Camaro. The dashboard is from the Charger, but has a new face taken from a NASCAR kit. That NASCAR kit also provided the nitrous bottle, modified from a fire extinguisher. The steering wheel is a photoetched piece I had on hand, mounted on a scratchbuilt column. The gearshift, seat belts, and other small details were also scratchbuilt. The roll cage is a custom fabrication of brass and styrene, built to match the movie car as closely as possible. To get the tightest fit to the body, the main hoop, side rails, and rear braces were all mounted to the interior bucket. The A pillars were installed in the body once the windshield was in place, and the connecting pieces were done through the windows once everything was together. The forward half of the floor was flocked in black, while the rest of the interior was painted Model Master Aluminum.
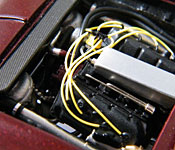
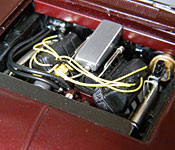
As with the car in Fast Five, the engine was kept entirely under the hood but was more than capable as a street racer. The engine started as the 426 Hemi from Revell's '68 Charger, mated to a T-56 transmission from Morgan Automotive Detail. To give it some extra "oomph," I used a pair of turbochargers from TDR Innovations—my first use of 3D printed parts on a model. Scratchbuilt styrene headers with Detail Master flanges feed the turbos, while solid core solder was used for the plumbing between the turbos and the pressure box. Electrical tape was used for the connecting hoses, with strips of aluminum tape for the clamps. The cold air intake, radiator, and intercooler are all squeezed into the aero nose, along with a new bumper and headlights from Tamiya's Lamborghini Countach. At this point the engine bay was pretty full, so I had to be careful running my fuel line, nitrous lines, brake booster/master cylinder, heater hoses, and ignition wires. I made everything as small as possible: the distributor, for example, was based on the smallest performance HEI unit I could find. Even so, I had to thin the hood in a couple of places so that it could still fit flush with the body.
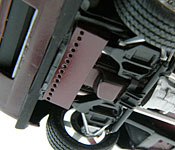
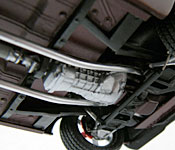
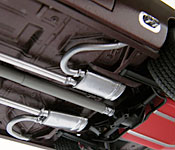
Not even the chassis escaped modification. Muscle cars are notoriously terrible at anything that isn't straight line acceleration, and suspension changes are common for stunt cars. The Daytona used in Furious 6 had the torsion bar front suspension, leaf spring rear suspension, and recirculating ball steering all replaced with modern components. I tried to mimic this as closely as possible: the new front suspension has A-arms taken from a Corvette with scratchbuilt coilovers, the steering is a scratchbuilt rack & pinion design, and the rear suspension is a modified trailing arm setup from a Mustang (again with scratchbuilt coilovers). These hold a set of custom wheels made from Aoshima Advan Racing GTs and parts box sleeves wearing tires from Monogram's 1955 Ford F-100 Street Rod. The racing fuel tank came from the General Lee release of this kit, so it dropped into place with no extra work needed. I bulked up the firewall and made side rails and a transmission tunnel using sheet styrene since these areas were lacking out of the box. Since I didn't use the movie car's crude (and, according to set reports, hot, loud, and stinking) through-the-cabin exhaust system, I had to come up with something that looked better. I decided to draw inspiration from another Mopar from the time, the 1970 Challenger T/A with its unique mufflers that had both ports at the same end. Aluminum tubing runs from the turbocharger on each side to the inboard port of the muffler, and then a curved pipe brings the exhaust up and out towards the side of the body above the chassis rail. These line up with the exhaust tips as shown on the movie car, which I made from smaller diameter aluminum tubing.
The color was an interesting challenge. I went through several "close" possibilities, until I found a reference to the actual color used on the movie car (Dodge color code PMP; Ox Blood Pearl) and used that to locate touch-up paint from Automotivetouchup.com. It was my first time using their paints, and I was very happy with the results...I will definitely be using them again for future factory colors. The body, chassis, engine, and roll cage were all painted with it to create a uniform look across the model. The headlight buckets, windshield frame, and chin spoiler were painted black, the wipers were painted aluminum, the heat shields around the exhausts were done in BMF, and the rear wing was finished with a carbon fiber decal. Headlight covers were made from clear styrene, and the taillights were made by polishing the backs of the lenses, painting the faces black, and swapping them side to side. This gave them the correct smooth, tinted look from the movie.