Original Kit:
Mach 5
Made By:
Aoshima (kit #43202)
Scale:
1/24

eBayPartner Affiliate Link
Other Speed Racer Models
Other Cartoon & Anime Models
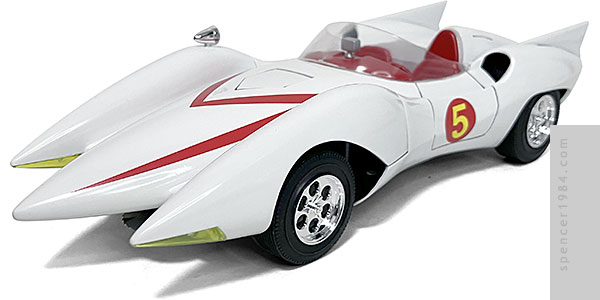
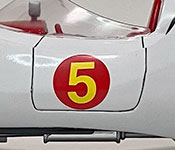

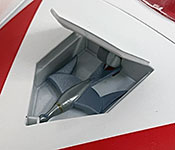
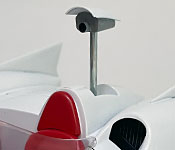
While the Polar Lights kit was fun, the Aoshima kit was always going to be my proper Mach 5. bigger, better proportions, more detail, lots of features, just an all-around superior kit. Not without its flaws, though.
The biggest issue I had with it was the way Aoshima did the body. They split it along the horizontal character line, with the lower body being part of the chassis. The argument could be made that this made it easier to give it a two-tone paint job, and I strongly considered it, but in the end there was no way for the upper and lower shells to fit together without gaps. So I cut off the rockers and rear valance, gluing them to the upper body and filling in the seams. By making the cuts straight and along existing lines, I was able to drop the body over the chassis once the work was done on each.
With the body setting up, I went to work on the chassis. The engine was clearly inspired by the Ferrari V12 engines of the era, so I painted and detailed it with those as my blueprint. The valve cover plates and radiator cap were photoetched parts included in the kit, each getting a red wash to bring out the lettering. The rubber hoses were also included in the kit, though instructions on where and how to use them were a little vague. I ended up just plugging them into the radiator and having them disappear between it and the front of the engine. The lower half of the engine is open to allow for the saw blades to work, though there's enough in the way both top and bottom that you really can't see the gap once everything's together. The last detail I added was a set of PE exhaust flanges to mark the transition from header to exhaust pipes.
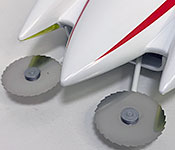
The saw blades were also photoetched parts, to be mounted on long arms that retracted under the front of the car via a slider switch. There's a particularly clever bit where the holes for each arm are slightly offset vertically, so as the blades retract the right one naturally overlaps the left one. The lower carrier also functions as the chin scoop, lower suspension, and center chassis pan. This was a little tricky to get together, especially with regards to the functional steering, but after a couple of attempts, once cracked steering knuckle, and a re-gluing it all worked.
To be fair, the gluing and re-gluing wasn't entirely the kit's fault. As soon as I put the wheels together, the lack of brakes was far more obvious than I anticipated and I couldn't accept it. So I took them apart, installed a set of brakes from Tamiya's Z3, and put everything back together. The rear axle received a similar upgrade, using the disc brakes from a Hasegawa 240Z.
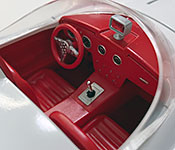
Like everything else, the interior was mostly box stock with a couple of upgrades. the first was the pedals, which were tiny little plastic nubbins out of the box. I replaced these with the PE pedals from Fujimi's 330 P4. I skipped the PE dash panel, since it didn't seem to match anything in the cartoon, but did use the PE steering wheel center. The gauges were also straight out of the kit, and fit the bezels perfectly once the carrier was trimmed back a hair. Carpeting was made from craft suede, and I scratch built a pad for the driver's seat since there was never one included in the kit (the instructions tell you to paint the leading edge of the cowling red, but that's not nearly good enough).
By this point the body was ready for final details and paint. I flipped the filler panels above the headlights over so that more detail was visible through the lenses, and replaced the kit supplied headlights with some chrome buckets from my parts box. The door for the homing robot was a little too tight to fit the opening, so I sanded and thinned the edges to fit better. The camera door needed a similar modification, not quite fitting the opening correctly. Aoshima provides a panel covered in greeble for the trunk, but no way to see it. I decided this wouldn't do, and cut out the trunk lid. Its hinges were made from straight pins in a thin aluminum tube, and needed a lot of testing and refitting to make sure nothing hit the body or the stuff on the greeble panel. To keep it level when closed, I made a lip from thin styrene.
The body was painted Tamiya TS-26 Pure White, the interior was Testors Flat Red with a light mist of Glosscote to give it the proper sheen, and the chassis was painted TS-4 German Gray. Various metallic paints were used for detail work, especially on the engine and trunk, and chrome paint was used to touch up anyplace where chrome parts were removed from their parts trees. The headlight covers and taillights were tinted with yellow and red Sharpie markers, respectively.
Final assembly was surprisingly easy considering the myriad modifications I made. The upper and lower hood pieces are supposed to be assembled around the hinge, but doing that would make it impossible to fix the gaps and paint it cleanly. I relieved the back edge of the holes, making it so that the completed hood could be snapped into place over the hinge. The body simply dropped into place over the interior and chassis, and everything else went together as per the instructions. The only thing I screwed up was the location of the trunk panel. Because I was working without being able to line it up ahead of time, I missed the alignment by about 2mm. Everything looks fine, but that misalignment made it so the rod for the camera doesn't retract like it's supposed to. I instead have to pop the rod off the camera and drop the pod into place by itself - a loss of function but not appearance. All things considered, I'm pretty happy with that being the biggest whoopsie.