Original Kit:
Bounty Hunter Funny Car
Made By:
MPC (kit #788)
Scale:
1/25

eBayPartner Affiliate Link
Other 1970s Movie Models
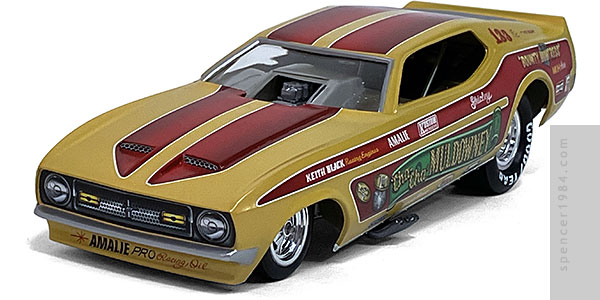
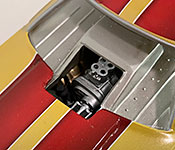
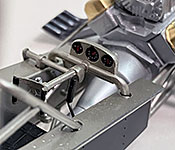
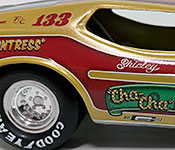
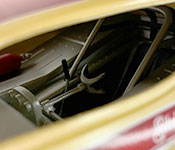
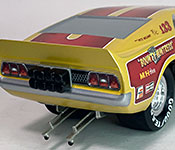
My only funny car before this was War Lord, and that was pretty much straight out of the box (not counting tires or decals). So I wanted to give the genre another try, and thought that the "Bounty Huntress" from Heart Like a Wheel would be a good candidate. MPC has released Shirley Muldowney's Mustang funny car, but when I started collecting parts for this Connie Catilla's "Bounty Hunter" was the only option. I got that and a set of "Bounty Huntress" decals from Slixx, and figured I was good to go (ominous foreshadowing).
Things started well enough: lots of cleanup on the frame rails, but nothing unexpected. I've heard other people complain that the front axle is too long, so I narrowed it a smidge by removing the straight sections of axle just inside the wheel mounts on each side. This left the suspension mounts alone so I could use the springs and hairpins straight out of the box. At least, that was the plan. While the springs lined up just fine, the hairpins were too short: they would attach to the axle or the frame mounts, but not both at the same time. Looking at pictures of other builds, this seemed to be a common issue. My fix was to mount each en where they belonged and then make new rods to fit between them. I used Green Stuff World's 0.8mm tin wire, which had a nice finish that was very close to the chrome plating used in the kit. The rear axle was a totally different headache, but one that was easily solved. The instructions want you to assemble the axle to the differential, then somehow cram the whole thing between the fixed sides of the frame. A far easier method is to mount the axle ends in the frame, then squeeze the differential between them. The shoulders that hold the axle ends to the differential are much shorter than what has to go through the sides of the frame, so les flexing is needed. Cutting a slight taper on the inner shoulders made the process even easier. Only the outer Halibrand front wheels were correct for the movie car, so I sourced new rear wheels and tires for all four corners from Revell's "Jungle Jim" Vega, and a set of inner front wheels from my parts box.
The interior tub didn't need any actual modifications, but rough casting and questionable instructions made it more work than I had expected. First, every bit of chrome was stripped and sanded to remove the flash and parting seams. The brake lever was broken before I got it off the parts tree, so I made a new one from a straight pin and a bit of wire insulation. The other lever and roll bar were OK, but the instructions were so vague about how they were supposed to go together that I had no idea. Looking around the internet showed everyone assembling them a little differently, so I just took a best guess - it's likely that I goofed, too. The steering linkage was clunky and covered in flash, so I ditched it altogether and made new parts from styrene.
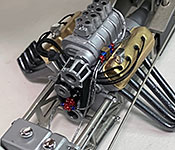
I only had to make two modifications to the engine, but for the most part it went together with no issues. First, the movie version of the car had exposed injectors rather than a scoop, so I took the intake from "Jungle Jim" as well. Second, the transmission needed a tail to reach the driveshaft (more on this in a moment). I then wired the magneto and added fuel lines based on whatever reference material I could find. Like the cockpit parts, I'm out of my depth here and it's entirely possible that I've got it wrong...but it was worth a shot just to see how it looked. The hoses are braided fishing line painted silver, and the fittings are small crimp tubes colored with Sharpie markers to look like anodized parts. Right or wrong, I like the way they look and will definitely give this another try in the future.
The body was surprisingly clean, and needed only a bit of cleanup around the parting seams and wheel openings. To recreate the "pearl butterscotch" base color, I layered several Tamiya paints: first a coat of TS-76 Mica Silver for an even finish with a metallic sheen, then TS-34 Camel Yellow for the main "dark yellow" tint, and finally a coat of TS-97 Pearl Yellow to brighten the finish and give it a little extra pop. Overall I'm very happy with the result. Then it was time for decals.
As it turned out, the Slixx decals were made for Revell's Mustang funny car, not MPC's. The sheet said as much, but I didn't realize how far off the two kits were until I tried to apply the grille and it hung out past both sides of the car. Whoops. Fortunately by this point Round 2 had released their "Bounty Huntress" and I was able to pick up a decal sheet off of eBay. These were fantastic, better looking than the "Bounty Hunter" decals by far and arguably better than the Slixx set. They still needed some convincing: the hood triangles didn't quite cover everything and needed some paint touch-up, the side spears had to be fit to the body creases with a lot of Micro Sol/Micro Set, and there's still a line visible where the upper and lower billboards meet. Even with those caveats I really have no complaints. I was able to use the Slixx set for the hood scoops, and the original "Bounty Hunter" Mustang for the chin spoiler. The lower body contingency sponsors were out of my spares box to better match the movie car. Finally, the rockers were finished with a strip of BMF.
When it was time to bring all the subassemblies together, I discovered that fit issues weren't limited to decals and vague instructions. Lining up the body, liner, chassis, and engine was impossible without a little help. After some frustration trying to figure out how to make it all work, I finally hit upon starting from the top and working my way down.
First, I installed the liner to the body without the rear bulkhead. Once that was set, I popped the rear bulkhead hinges over the frame and did repeated test fits, trimming the top of the bulkhead until it fit so that the interior tub lined up with the hole in the liner (which had to be further modified to clear the steering linkage). Once that was set, I checked the engine fit only to find that it had to be mounted much further forward than the dimples in the chassis suggested. This meant that my custom transmission tail was still too short, so I removed it and made a new, longer one. At least my new drag link fit through the appropriate notch in the firewall.
.
.