Original Kit:
1983 W. Queen Family Truckster Woodie 4dr Wagon
Made By:
Too Many Projects
Scale:
1/25

Other 1980s Movie Models
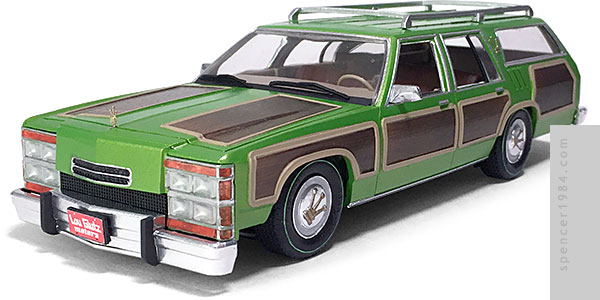
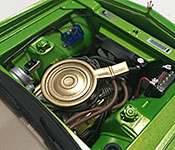
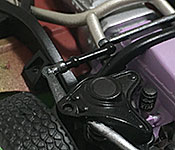
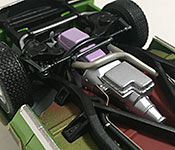
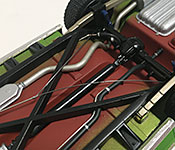
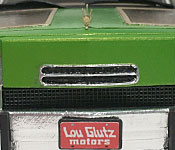
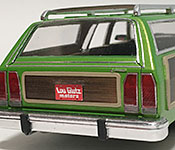
The Wagon Queen Family Truckster from National Lampoon's Vacation has been on my "wanted" list for quite some time, but kept getting put off due to the massive amount of custom work that would be needed to bring it to life. Procrastination worked in my favor once again, and Robert Burns of Too Many Projects released a Truckster body in 3D printed resin. In addition to the body (available in standard white or high-definition brown plastic), the kit comes with separate parts for the bumpers, nose, roof rack, wheels, window blanks, and lights. I chose the brown, knowing that the Truckster had a lot of details that I wanted as sharp as possible.
Print quality was very good: clean panel breaks, sharp edges, and a nice straight profile. It had the striations native to any 3D print, but they were minimal and could easily be eliminated with a light sanding. I actually ignored the lines in the panels, figuring they could simply be part of the woodgrain effect. Final prep for the parts was done with a good wash in Dawn and a wipe down with isopropyl alcohol.
I didn't want this to be just a curbside, so my first task was to cut open the hood. I assumed that this would be a delicate process, thanks to the fragile nature of 3D printed bodies, but it actually went just fine and I suffered little more than a scratch from a slipped blade that had to be smoothed out.
The movie car was little more than an LTD wagon beaten with an ugly stick, but I wanted to approach this as if Wagon Queen were its own marque with its own history and style. So I looked through my stash for something that could fulfill my need for something familiar but still unique, and hit upon Polar Lights' 1960s Comic Book Batmobile. The fine folks at PL had based much of the model's underpinnings on the TV Lincoln Futura, meaning that it looked very much like a Ford product without being a proper match to anything in particular. Perfect!
At least, close enough. I had to shorten the chassis to fit the Truckster's wheelbase, which I did by cutting a section from the straight part of the floor and the frame just ahead of the rear wheel arch. The floor was glued back together with flat styrene on top and bottom of the joint to both add strength and hide the seam. The frame had enough material to hold itself safely, so once it was glued it just needed a spot of filler to remove any sign it had been modified. The front end was build stock, then spacers were added to the spindles so that the wheels could be adjusted to be centered in the fender openings. The rear axle was also built stock, and simply moved ahead to locate the wheels. Doing this messed up the shock absorbers' alignment, so I moved them to just inside the springs and converted the pins where they were supposed to mount into sway rods. Brake lines, a parking brake cable, fuel lines, a fuel fill line, front springs, and the exhaust were all scratch built and added to the chassis. I wanted to use a hefty set of tires, so the supplied wheels were widened with some inner wheel rings from my parts box and then detailed with a set of drum brakes from Scenes Unlimited before being mounted on the car. A Sakura gel pen was used to create the greenwalls, while the hubcaps were done with a combination of Bare Metal Foil and paint.
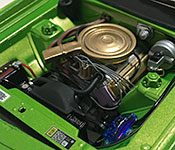
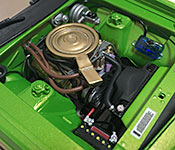
The Batmobile's engine was modified with different valve covers to further mix up its origin, but otherwise assembled using the kit parts. There was a strangely empty area above the power steering pump, and I was going to add an A/C compressor until I remembered that the Griswolds spent most of the movie with the windows open - even when they were in Arizona. So clearly air was not one of the options installed on this model, and the awkward gap was appropriate. The engine was then detailed with some Detail Master accessory brackets, wires, hoses, and other miscellaneous details to make it look appropriately busy. The early 1980s were kind of the last gasp for unique engine colors before everyone went to black or raw metal - AMC teal, Ford Gray, GM blue, Mopar Blue, etc. - so I had to figure out what would be appropriate for Wagon Queen. I thought something "royal" was fitting, and so painted the block, heads, and oil pain "Fragrant Lilac" by Mondo Llama. The valve covers and air cleaner were painted gold to continue the regal theme.
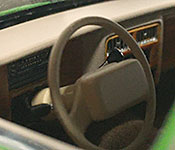
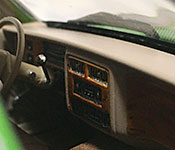
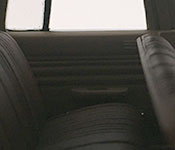
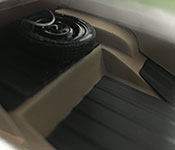
Unsurprisingly, I had nothing even close to what I'd need for the interior in any of my parts boxes. The only real starting point was the top side of the modified floor pan. That was flocked with brown embossing powder for the passenger area, and painted Tamiya TS-68 Wooden Deck Brown for the cargo area. The door panels were scratch built from laminated sheet styrene, taking design cues from the LTD of the time. The window cranks were from Replicas & Miniatures of Maryland, and the door handles were photoetch seat belt parts modified to look the part. The dashboard and steering wheel were leftover parts from Revell's Cadillac Lowrider, cut apart and rearranged to better fit the space (including a new dash pad and air bag pouch). I tried to keep the excellent speaker and defrost vent details, but the dash was just too deep and I had to lose the vents. So I decided to call the old speaker grilles the new vents and made a single speaker grille decal for the center of the dash. This not only solved my problem, it makes it look like the radio was an AM-only option. The seats were a pair of '69 Chevelle bench seats I got from Harts Parts Resin, modified to fit the center hump and rear fender wells. The rear cargo area was lined with a a ribbed rubber mat, made from the same Plastruct sheet I used for the Little Mule. The final interior detail was a spare tire, made from a damaged Mopar wheel and the smallest tire in my parts box to mimic the much-hated donut common to the era. I mounted it on the axle hump behind the rear seat, ensuring that it was both in the way when trying to load any cargo while simultaneously being in the hardest-to-reach area possible when needed. The door panels and dash were painted the same TS-68 as the cargo area, while the cargo mat was painted TS-82 Rubber Black and the seats were done in a mottled overspray of several colors to try to mimic the fabric pattern we saw in the movie. The wood panelling on the dash was done by brushing several different browns onto the surface, then hitting it with too much transparent orange to give it that plastic-y look. The speedometer was the only gauge we really saw in the movie, and I recreated that as a decal and applied it over the Cadillac instruments.
To finish the interior, the inside of the body was sprayed with more TS-68 for the headliner and roof pillars. Then the outside of the body was painted TS-46 Light Sand, the wood panels were masked off, and it was finished with TS-52 Candy Lime Green. To give it that factory fresh look, TS-52 on top of red primer was used to do the chassis overspray. The major assemblies were all brought together, and it was time to fill in the gaps.
The engine bay used the radiator bulkhead, inner fenders, and firewall from the Batmobile, trimmed to fit the new body. Styrene stock was used to build up any areas that didn't quite fit right, including the fender braces, forward crossmember, and cowl. These were all painted the same TS-52 to match the body, with the outside of the front fenders painted primer gray for a little contrast. The radiator and master cylinder were modified Batmobile parts, with a Detail Master cap and scratch built hoses and lines. The washer bottle and wiper motor were from Revell's Dodge Charger, the fuel fill was scratch built, and the battery terminals were Replicas & Miniatures of Maryland parts. The windshield and rear window were taken from my parts box, using the window blanks provided with the body as templates. The windshield was bigger than any 1/24 glass I had on hand, so I used the windshield from the same 1/18 Chevelle that had previously donated its headlights. The side windows were flat clear stock, trimmed to fit the openings.
Once everything was pretty much buttoned up, it was time for the final details. The headlights and parking lights were the parts provided with the body, but the corner markers were a little too tight after everything was painted so I replaced them with some plastic trimmed from the edge of a CD jewel case. This was also used in the rear, where the taillights weren't quite big enough to fill their openings and a set of custom reverse lenses were needed. One of the taillights also shattered coming off the parts runner, fortunately I was able to find all the pieces and glue it back together before hitting all four with some clear red paint. The wipers were taken from my parts box, as was the front license plate bracket. The license plates and wood panels were my own custom prints, the chrome trim was done using a combination of paint and BMF, and the final detail - a tiny Wagon Queen hood ornament - was scratch built from wire and part of a wire loom.