Original Kit:
Star Wars: Rebels Boba Fett's Slave I
Made By:
Hasbro
Scale:
N/A

eBayPartner Affiliate Link
Other Book Models
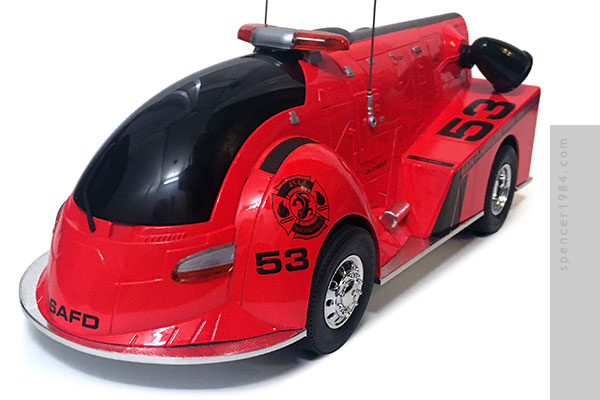
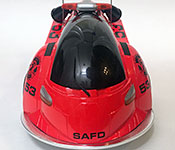
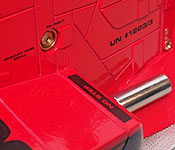
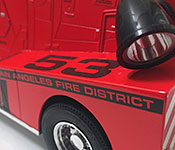
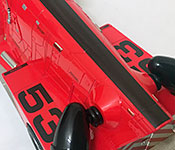
Inspiration for this project first came from Hakan's "FETT Trucking" model, a custom build where he used a Hasbro Slave I as the cab section of a high-tech semi truck. I loved the look of it and wanted to try something similar, so I started playing with the idea of what else could be done with it. The rounded front, protruding front fenders, and wide skirting reminded me of the classic American LaFrance fire engines, and suddenly the idea combined with a long-standing desire to build something from Ray Bradbury's classic Fahrenheit 451.
There were very few literal descriptions of the "Salamander" in Bradbury's text, so I had a lot of room for interpretation (the 1966 film used a minimalist design with a camera crane boom arm and long front overhang, while the 2018 adaptation used an off-the-rack Spartan Gladiator). I drew up some rough designs, finally settling on a single axle truck with squarish rear fenders that followed the slope of Slave I's hull.
My first job was assembling the parts of Slave I, then gluing them together with epoxy so I had a nice solid base for the rest of the build. I cut out the semicircles to make the front wheel openings, and then sliced off what was the back of the ship to make it a straight, flat base. The fenders were made from a combination of 0.080" and 0.060" styrene sheet, which was hefty enough to stand up to the cutting and sanding. Further styrene sheeting and rod stock was used to brace the inside of the rear fenders and the whole thing was epoxied to the ship. Once set, I ran it across a large sheet of sandpaper to make sure everything was even before I began detailing it.
Filler was used where the styrene sheets met, as well as the large seam where the two halves of the toy came together. The myriad panel lines on Slave I were at odds with the smooth plastic of my new fenders, so I also filled in the forward seams on the front fenders and cut some panel lines near the truck's waist to visually balance the look. I considered filling in the screw holes and missile launcher, but decided to instead use them as design elements. Kotobukiya makes a series of aftermarket detail parts for greebling sci-fi models, and among those were some round details that fit the screw holes perfectly. Thus the lower one became the Salamander's primary tank fill, and the upper one became the exhaust for the auxiliary power unit. The missile launcher port was close to this second screw hole, so I cut the body of a magic marker into a scoop and placed that over the port to become the APU's intake. The rear of the truck was going to be the main entrance, so I cut out the material inside the ship's tail and recessed the center section of the lower fascia to make a doorway. The door itself was cut from thinner plastic so that it would look appropriate once installed and with the rear window in place. The headlights were made by cutting parts off of the tail light panel from Tamiya's Nissan 180SX, since they had a nice aerodynamic look and were cast in clear. I cut holes in the body to fit them, aiming for somewhere where the finished location would both mimic the old ALF trucks and give it a recognizable "face."
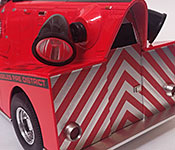
Body mods done, I primed the hull, cleaned up any stray marks, then base painted it with some leftover Krylon Meringue yellow followed by Tamiya TS-36 Fluorescent Red. The main base was a sheet of 0.080" styrene cut to the full width of the truck minus the wheel openings. A second smaller piece was cut for the front apron. Both of these were detailed with Archer's printed resin diamondplate decals, then finished using a combination of BMF and aluminum tape. These were then epoxied to the bottom of the truck, which combined with the red hull gave it the exact "fire truck" look I wanted.
The bulk of the truck now complete, I just needed to add the final details. The headlights were painted to look like LED projectors and installed. I located a windshield wiper in my parts box that looked decent, heating and bending it to fit the curve of the canopy. In a nod to my earlier Batmobile, I cut strips of sandpaper and placed them as anti-skid treads on the tops of the fenders. The light bar was from an Aoshima police parts pack, modified slightly to fit the hinge tabs of the canopy. Waist tanks were air tanks left over from an AMT semi truck, stripped of their questionable chrome plating and refinished in BMF. The spotlights were miniature Christmas Village lights I picked up at Walmart, mounted to the Slave I's gun ports. I liked the look of these since they had a rounded shell that recalled the truck's front end. Tail lights were a combination of HiQ Parts bezels with parts box lenses. The latch on the rear door was from the Don Mills Models set I originally used on Huffer. Finally, the wheels were from Moebius' Big Rig Wheel and Tire Set.
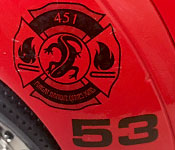
All of the decals are my own custom work. I wanted some stripes to break up the red and add to the "Salamander" vibe, and since Guy Montag's exact city was left vague in the original text I simply labelled it as part of the "San Angeles Fire District." The shields on the front fenders are based a little more closely on the text, though like everything else there was room for embellishment. The rear chevrons were done by placing the decals over matte aluminum BMF. Several warning signs and plates were scattered across the hull to add a little interest, and the "53" was used as the truck number in reference to the novel's original publication date.