Original Kit:
Highway Rig
Made By:
LEGO (kit #5580)
Scale:
N/A

eBayPartner Affiliate Link
Other Toy Models
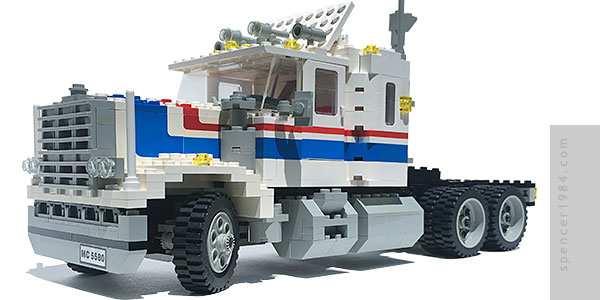
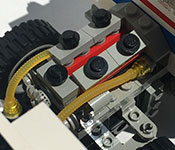
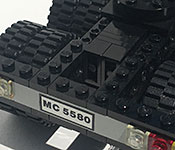
I received this set as a Christmas gift back in the late '80s, and it went on to become the first "model" I really got into customizing. The original truck had been modified over the years to include more lights, a custom engine, air deflectors, and a host of other details. I made a trailer for it, then a second one, support vehicles, a mobile test platform, and so on. At 4' (122cm) long and 20lbs (9kg), it was by far the biggest and most elaborate project I had built at the time and part of the first group of models uploaded to this site in 1998. But the years weren't particularly kind to it, and after a while it was starting to look a little rough. Many of the bricks started to yellow, parts got knocked off, it was collecting dust in those hard-to-reach valleys between the studs, etc. It really needed a refresh, and since I had to clean it up anyway I decided to try to return it to its original look. The best way I could think to accomplish this was to break down the model into subassemblies, and tackle each one in turn.
First up was the chassis. I stripped off anything I had added over the years and gave everything a thorough scrubbing in dishwashing detergent. In an effort to keep it as original as possible, I set aside the yellowed parts and soaked them in hydrogen peroxide so they could be reused. The only parts this didn't work for were the ones that were physically damaged - a couple of the rear lights and their associated bricks were cracked, and the rear bumper was badly scuffed. These parts were replaced with ones from my stash, so that even if they weren't part of the original #5580 they were from the correct vintage and kept in similar conditions to the truck. I carefully removed the license plate stickers and placed them a little straighter than I had been able to 30+ years ago. The rear plate was scuffed in the same incident that damaged the bumper, so I touched that up with a magic marker to get it back to its original appearance.
There was hardly anything left of the original engine, and what was there had to be completely redone. The original black band acting as the fan belt was badly deformed by the new route I had it take, and crumbled when I tried to remove it. So I replaced it with one of my own, which worked perfectly. The only other out-of-house replacement I needed to make was one of the two yellow hoses, which had gone missing somewhere in the last three decades. It was the only thing from Bricklink I needed for this project, but I was able to combine it with the last few details I needed for the Ultra Sonic Raider to make the shipping worthwhile.
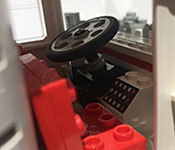
The cab and hood were the trickiest part of the whole affair, partially because it had the most white (and thus badly discolored) bricks, and partially because this is where I made the most modifications and thus required the closest scrutiny to figure out what to keep and what to replace. I loaded up a set of instructions on Peeron and got to work. As with the gray chassis parts, the discolored pieces were soaked in H2O2 and reassembled as best as I could to put the cleanest sides out.
There was one place I deviated from the original: one of the very first mods I ever made was to put a set of brake drums inside the wheels. I decided to keep those as a nod to the work I had done, but was otherwise quite happy with the way this cleaned up. It also doesn't hurt that it fits in nicely with some of my other 1/25 scale trucks.