Original Kit:
Bedford 'OSB' SWB 'O' Series 5-ton Recovery Truck
Made By:
Emhar (kit #2404)
Scale:
1/24

eBayPartner Affiliate Link
Other Toy Models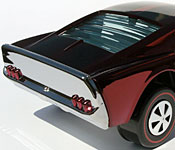
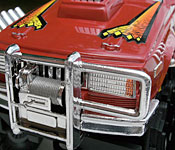
After building a tribute to the early Hot Wheels diecasts, it was only fitting that I also visit Matchbox. Their vehicles tended to be a bit less fanciful, but that didn't make them any less important to my playsets when I was a kid: if anything, they were doing all the heavy lifting thanks to the selection of construction equipment, emergency responders, and heavy trucks. Their first series of vehicles from the mid-1950s encapsulates this idea perfectly, with vehicles including a road roller, dump trucks, a bus, a fire engine, and a Bedford wrecker.
Manufacturing was limited at the time, and these little diecasts generally had no interiors, no glass, hefty metal axles with unpainted wheels, and very basic decos. Emhar's Bedford OSB is just about as far from that as possible - two whole pages of the instruction book dedicated just to assembling the tow rig. But I'd been wanting to try out one of these kits, and this was the perfect opportunity to do so.
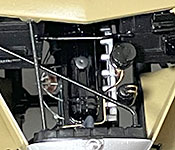
Assembly started with the engine, which went together smoothly save for the many trips to the floor picking up incredibly tiny parts that seemed destined to fall. I didn't find the coil until after the build was nearly finished, so I scratch built one instead. I also wired the distributor with some fishing line to represent vintage cloth insulation and added fuel and oil lines from copper wire. From what I read all the painted components were supposed to be some shade of black. To make it at least a little interesting, I painted the main block TS-63 NATO Black, the valve cover gloss black, and the belts/hoses dark gray. Since this was supposed to represent a new truck, I painted the exhaust TS-42 Light Gunmetal.
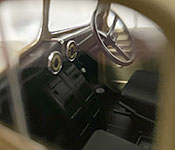
The chassis was built straight out of the box, fully assembled to get the strongest bond between parts then painted entirely satin black. The wheels were painted in two steps: first with TS-33 Dull Red, then a coat of TS-74 Clear Red to bump up both the sheen and saturation. The interior was also box stock, painted satin black with a flat black rear panel and TS-71 Smoke over dark gray, similar to what I did for the
When it was time to work on the cab, I opted to assemble all the parts first and then paint it. I've heard recommendations going both ways: some have told me that doing it this way ensures a good fit around some tight areas like the door window frames and side vents. Others have said that painting everything before assembly (and leaving the doors as the last parts to be assembled) allows for a better view of fitting the cab to the floor, which allows for easier assembly of the hood. That may be the case, as it took me three tries to line up the cab, hood, and grille to where I was satisfied. When I build another one of these, I'll try it that way. The wrecker body was much easier, being cast as one large piece. But they made up for that - and then some - with the crane.
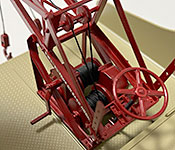
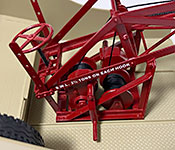
Everyone I spoke to, every review I read, all said the same thing: the crane is super fiddly to put together, but the results are worth it. I can confirm both.
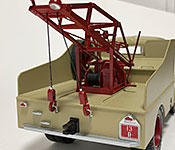
It's actually not a difficult assembly, per se - there are just a lot of parts, and everything is extremely fine and delicate. It takes a fair bit of time to put together, and there are several parts that look almost identical or are cut with a slight taper, so you'll need to pay close attention to the instructions and do lots of test fitting along the way. Not wanting to risk a failed joint or paint-clogged assembly, I put together everything before painting it using the same method I used for the wheels. I did have the foresight to drill a hole in the bottom of each drum, so at least I had a good solid anchor for adding the lines. The thread they provided in the kit looked a little too soft to me, so I went with fishing line (a heftier version than what I used for the ignition wires). Another afternoon was spent winding that around the drums and through the pulleys to the rear of the truck.
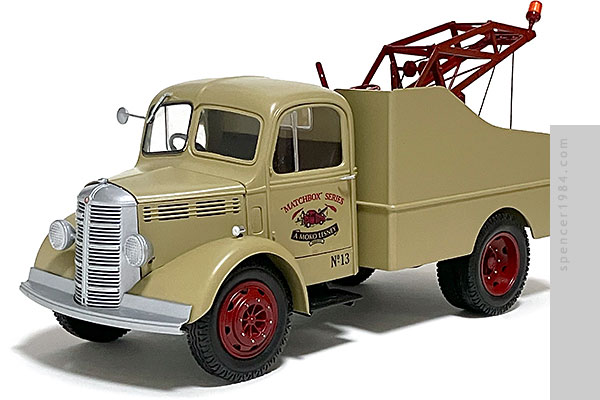
To try to capture the feel of the original Matchbox truck, I used TS-3 Dark Yellow with a semigloss clearcoat for the body, and TS-17 Gloss Aluminum for the grille, bumpers, and other details. I painted several of the small details like the fender lights, wiper, and door handles chrome as a nod to how often these raised details would be worn down to bare metal after just a short time playing with the cars.
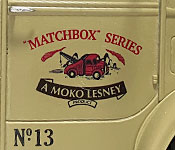
Overall I was happy, but it still needed something to "finish" it. I decided to make some garage logos for the doors, based on the original Matchbox box art. I recreated a scan of the box in Photoshop, cleaning up the art and adjusting the colors so they'd translate properly over the Dark Yellow paint, and printed them onto clear decal stock. The rear license plate, 13/B, is the number of the truck with the long box variant from the original Moko-Lesney series.