Week 1 | Week 2 | Week 3 | Week 4 | Week 5
Week 6 | Week 7 | Week 8 | Week 9 | Week 10
Week 11 | Week 12 | Week 13 | Week 14 | Week 15
Week 16 | Week 17 | Week 18 | Week 19 | Week 20
Week 21 | Week 22 | Week 23
Week 1
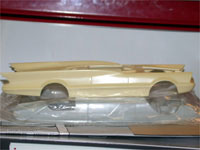
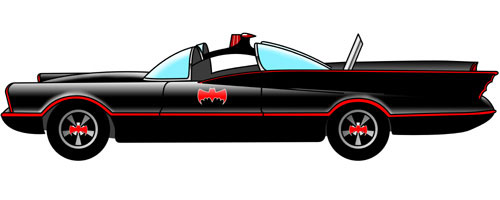
Week one was full of test fitting and prep work. The resin body is very good overall, and requires only minor cleanup. Even though much of the car will be fantasy-based (such as the turbine engine and drivetrain), I want to root the car in reality as much as possible. I'll be using a '62 Ford Thunderbird for the chassis, to keep it in the Ford/Lincoln family. The T-Bird is the same width as the Futura, but requires a 1/4" extension to match the wheelbase.
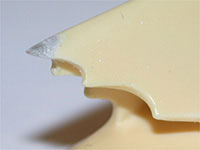
A couple of repairs are needed before the body will be ready for any finishing. I had dropped the body shortly after I got it, and it landed right on the left fin tip, snapping it off. Here you see the finished repair: a hole was drilled along the top of the existing fin, and a section of straight pin was inserted. The fin was built up using superglue & baking soda, and reshaped to match the right fin.
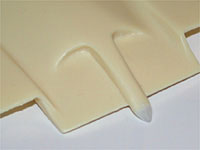
Another unfortunate victim of my own accident-proneness was the hood tip. Like the fin, I started by drilling a hole and inserting a metal spine (thinner wire in his case), then building up the former shape with superglue & baking soda. Here is the finished result, ready to go on the Batmobile.
The hood looks pretty good, but I want to open up the hood scoop. The hood is pretty thick through the middle, so I'll have plenty of material to dig through. Also, there's a bit of a rough edge over the right parking light; I'll have to straighten that out.
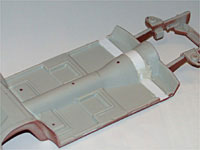
Now on to the last major work of week one: the chassis extension. I'll be scratchbuilding my own turbine engine, and plan for it to be about the same size as the traditional internal combustion engine. However, I'll want it to sit lower and further back, so I've added the chassis extension in the transmission well so that the new engine will have plenty of space. .25" strip stock is used for the floor, while a strip of .040" styrene is cut and curved to fit the center. To make sure everything is strong enough to support test fitting and final assembly without breaking or warping, I drilled & pinned the pieces together, and glued everything together with epoxy.
Week 2
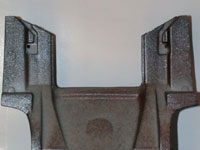
With the chassis extended to the right length, I was ready to fit it into the body. The rear end required a pretty substantial modification, since the Thunderbird has a square back bumper and the Futura has a unique "V" shape.
I started by laying the chassis on the underside of the body, and marking out what needed to be removed with a pencil. The point of the "V" was just about in the middle of the T-Bird's gas tank, but since the Batmobile used an Atomic Turbine powerplant there's no loss there. I made the "V" cut by making two passes with the straight saw, then I removed the rest of the fuel tank. I also had to trim down the rear fender wells to fit inside the body correctly. The photo shows what the finished piece looks like.
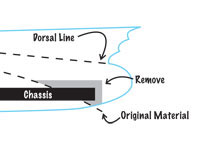
Next, I had to remove a lot of extra resin from the underside of the rear end, so that the chassis would sit properly. The Dremel got a pretty good workout this time, as there was a lot of material to go through. I worked with the body & Dremel inside a giant plastic bag to prevent resin chips & dust from getting everywhere, stopping periodically to test fit the chassis. In the end, I wanted the frame rails to be just above the lower edge of the body, so that I can add a lower panel to even out & dress up the rear end a bit.
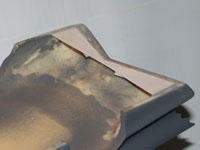
Here is the panel in place (this photo is shown slightly out of order, as it was taken after the first primer coat - see next box for details). I traced a rough outline of the panel from the body onto paper, then trimmed the paper until I got a nice, tight fit. This template was then transferred to .020" sheet plastic, which was glued to the bottom of the body with superglue and epoxy. I will eventually blend it into the body and make it look like a solid piece. This not only dresses up the rear & makes it look nicer, it creates a pocket for the end of the chassis to slide into, ensuring a solid fit.
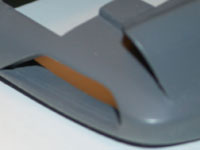
Moving to the front of the car, I wanted to open up the front grill areas so that I can install a set of photoetched grills. I used the Dremel tool to rough out the openings, then finished them with files and an X-Acto knife. I left about 1/32" around the edges, creating a lip to ease in installing the grills. I won't open up the rear grill areas because there's essentially nothing to see on the inside of the car back there, and I'll be doing something a bit different with the headlights. After a thorough washing with dishwashing liquid and an old toothbrush (to remove the mold release agent and any fingerprints it picked up along the way), I sprayed a coat of gray primer to show where I need to do more work.
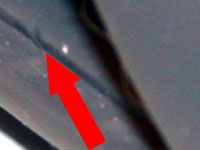
When I was working on the front grill openings, I nicked the body with the Dremel tool. There were also a few imperfections with the body that I needed to remedy; small air bubbles in the resin create pits, and these needed to be filled along the rockers, wheel openings, front & rear pans, and one small dimple on the rear deck. I used Squadron White Putty to fill in all these spots. I like using the plastic from diecast car boxes & toy blister packs for my putty application because it's pretty slick (so the putty doesn't stick to it), and since it's clear I can see what I'm doing easier.
I also used Squadron White to fill in the chassis where I added the extension last week. The chassis & body now need time for the putty to cure, followed by sanding, then priming to show any place that I missed the first time. The whole process will repeat as necessary until I have the body & chassis extension as smooth as possible.
Week 3
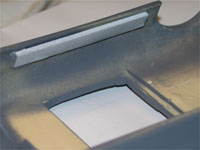
The tedious filling & sanding (& filling & sanding & filling & sanding & ...) is done, and body is in pretty decent shape at this point. Now it's time to move under the skin. The "pocket" in the back of the car keeps that end of the chassis located, but the tapered sides of the body try to force the chassis up too high. Here I've glued two strips of .25" x .080" strip styrene to the insides of the body to act as stops. The chassis will slide into the rear pocket, then up between the rockers until it hits these. The strips also give me one more surface to glue to when the final assembly comes.
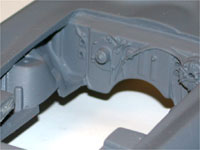
Now that the chassis has some pretty solid mounts, I'm ready to add the engine bay to the body. The Thunderbird's firewall is already a separate piece, but the inner fenders needed to be removed. Snapping the chassis into place allows me to do plenty of test fittings, and be confident things will line up in the end. I have to cut down the tops of the fenders a little at a time until they stop pushing the chassis out of place. The firewall is also too tall, but I can't just cut it straight across, otherwise it will sit below the fenders and look weird. Instead, I cut about 3/32" off the top, and then notch both top corners so that the top edge of the firewall mates with the leading edge of the hood lip. Once everything is shaped to fit correctly, I glue it to the inside of the body with epoxy. As it dries, the epoxy has just enough wiggle to let me make sure the fenders and firewall fit exactly.
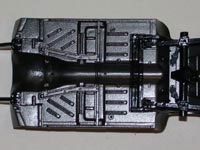
Once the epoxy starts to harden, I can remove the chassis to finish it. The filler piece has been fully molded in, and a light mist of Krylon's Make it Suede gives it the appropriate texture. To make things interesting, I've decided to go with a dark gray chassis pan and gloss black subframes. I sprayed everything with a Duplicolor Dark Charcoal, and painted the subframes by hand.
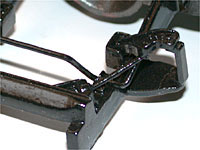
Both front and rear suspension units required heavy reworking. For the front, there was no way the stock pieces would fit around a turbine engine. Everything except the lower arms was scrapped, and these were glued into their respective pockets. They were a little short front-to-back, so I used short sections of plastic rod to make the hinges. I used more rod stock for the diagonal bars. The ends of these were flattened with toothless pliers, and glued to the lower arms and forward bushings. I made a new sway bar by straightening a paper clip and re-bending it to the correct shape. I used thin strips of metal tape for the sway bar's brackets, and tiny drops of white glue for bolt heads. Finally, I made new wheel mounts with smooth faces, so I would have some freedom to center the wheels properly when I do the final assembly.
The rear suspension was pretty rough. The leaf springs were miscast, so even though they fit correctly, they weren't flat. Styrene strips were cut to make new spring leaves, using the T-Bird's springs as a guide. Since the Batmobile is a pretty hefty car, I doubled the number of leaves (two of each length). Once cut, I angle-cut the end of each leaf, then carefully stacked & glued them together. I got the curve by laying the top leaf on a large can, so that gluing the lower leaves forced the curve. The spring wraps were made using pinstriping tape, and bolt heads were made with white glue.
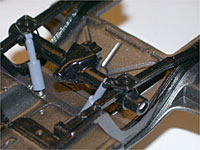
When the springs were done, I made the rear axle by combining a Corvette differential with a racing rear cover, and a section of plastic tube for the axle housing. Bent wire was used for the U-bolts, and the lower plates were used from the Thunderbird kit. The whole assembly was painted gloss black, and finished with a set of scratchbuilt heavy-duty shocks painted with Krylon's "Stonewashed Denim."
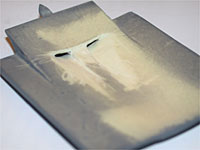
To wrap up week 3, I went back to something I mentioned when I first started. The hood scoop has the right shape, but to really look great I needed to open the intakes. I measured and marked where the scoop was on the bottom of the hood, then created an outline of the final shape with an X-Acto. I took a dental file and carefully dug away at the underside of the hood, following my guide scores, until I had the underside of the scoop formed. I then used sandpaper and an X-Acto to cut the finished shape. I decided to make the center divider go all the way through. The scratches around the relief aren't critical, because after the hood is painted I will add padded panels to dress things up.
Week 4
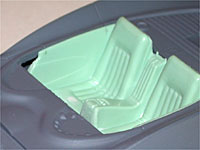
With the body & chassis mating up nicely, it was time to start working on the interior. This will be a tricky area, as I will be trying to fit together a resin body, Futura interior, and Thunderbird floor.
First, I do a "dry run" to see how everything fits. To get the bucket in the body, I have to cut off the trailing edges of the seats (along with the parcel shelf), and shave the door panels to about half the thickness they were originally. I also have to cut out the center console so it will fit over the T-Bird's transmission tunnel. After several test-fittings, the interior is ready to be installed.
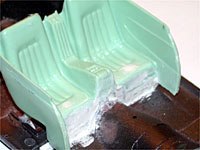
Now that I have the interior located, it's time to glue it in place. This is contrary to what I usually do: usually, the interior will be finished first, then glued to the body, not the chassis. In this case, though, I want to use the top of the chassis pan as my floor, and I'll have to do some filling around the door panels, firewall, & transmission tunnel. This is one more place where my kit differs from the 1:1 car...the tunnel is larger than what the original car had, but I want the extra room underneath when it comes time to install the engine & drivetrain. With the chassis & body double-checked one last time for proper fit, the interior was put into place and fixed with epoxy. After it had time to set, the body was removed and an even stronger bond was made between the chassis & interior. I then started filling between the two pieces.
The side kick panels were cut from the Futura's dash/firewall piece, thinned, and glued into place in front of the door panels. This requred another test fit to make sure everything lined up correctly, but I'm pretty happy with how it looks at this point.
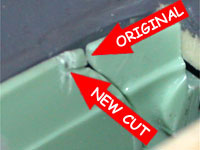
One thing that I wasn't happy with was the alignment of the interior & exterior door panels. Inside, the front break line was about 1/16" too far forward, and the rear break line was nonexistent - if the doors really opened, they'd tear the inner door panels off the first time. Using a razor saw, I cut a new set of break lines that matched the outer doors. More body fill was used to get rid of the original break lines, and correct the upper edge of the panels.
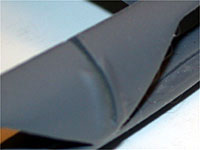
At this point the interior looks good, so it's time to let everything set. The body is also in pretty good shape, so now I can start adding some fun details.
The original Batmobile had a retractable chain cutter between the two grills. It was a pretty cool looking feature, and I want to add that here. I started by making a vertical cut down the center of the car. Once the groove was clean and straight, it was time to build the cutter.
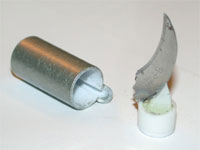
And here it is! Not only did I want the cutter retractable, I wanted it to look like to could take the force of a 2+ ton vehicle crashing through something at speed. The blade is an old X-Acto blade with the mounting part cut off. It's attached to a plunger made from tube stock, with sheet styrene for the backer and blade support. The outer housing is just large enough to fit the plunger snugly, with a groove cut in the top to act as a guide. A smaller diameter tube, cut into a "U" shape, is used to dress up the guide groove. A small hole in the back of the housing will let me push the blade out, and when it is retracted it will be almost completely hidden. The cast-metal finish was done with a Duplicolor metallic gray.
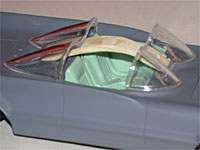
Now that the interior, chassis, and body are well underway, I have too see what it will all look like before I call it quits for week 4. I cut the center section out of the Futura's canopy, and here I have the front and rear windshields sitting on the car along with the resin roll bar. Though it's not much to look at color-wise, it gives a pretty good idea of what the shape of the car will be in the end. It also helps me see that the rear glass fits perfectly, but the front glass hits on the roll bar a little bit. I'll have to remove a little material to make sure everything fits correctly.
Week 5
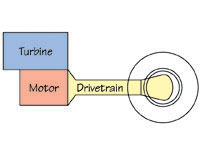
The chassis/interior requires more sanding & filling, and I'll be painting the body shortly. But first, I want to start working on the drivetrain. I always wanted to go with the atomic powerplant, but the exact arrangement has changed from my first idea.
The one real drawback to turbine engines is that they run at a constant speed far better than the frequent acceleration and deceleration required by street cars. My first idea was to simply run the driveshaft off the back of the turbine, but the more I thought about it the more I wanted to go with something more unique and realistic. This was my solution: this would be a "turbine car" the same way there are "diesel locomotives" on our railroads. The turbine would be for power generation, but the actual drive force would come from a traction motor.
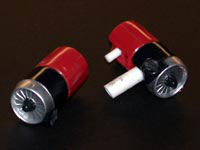
I wanted to go with a twin turbine engine, figuring that one can be used primarily for the drive system, while the other can be used for all the Batmobile's gadgets. Not only does it help make things look balanced, this also fits the famous "Atomic batteries to power, turbines to speed" line (indicating multiple turbines). I started with the jet engines from a Transformers: Energon Sky Shadow figure.
The engines needed to be shortened to fit in the engine bay and behind the chain cutter. Here they are just before final assembly, showing the plastic tube & rod that will mount the engines side-by-side.
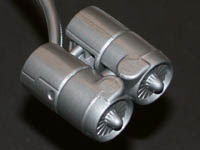
Here are the finished & painted turbines, ready for detailing. I used Testor's Metalizer Magnesium, followed by a coat of Tamiya clear coat.
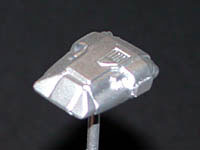
For the regulator/control box to go on top of the turbines, I used a Star Wars Battle Droid backpack, with the seams filed off and an access panel added to what was a mounting hole. What used to be the antennas will now be connection points for cables.
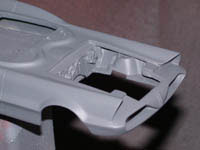
Now back to the body. The prep work is done, so it's time to paint. I started by spraying the body with a layer of Design Master Super Surface Sealer, to make sure I'm starting with an even base. Then I sprayed a layer of Krylon Primer.
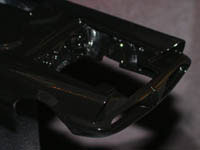
After the gray primer, I spray three layers of Krylon Ultra Flat Black, followed by three layers of Krylon Glossy Black. The finish isn't quite as smooth as I'd like, so I'll be doing some wet sanding before I do the final coat. This is a pretty good base coat, though, and I'm happy with how it's coming along. Next week, wet sanding and the (hopefully) final color coat!