Week 1 | Week 2 | Week 3 | Week 4 | Week 5
Week 6 | Week 7 | Week 8 | Week 9 | Week 10
Week 11 | Week 12 | Week 13 | Week 14 | Week 15
Week 16 | Week 17 | Week 18 | Week 19 | Week 20
Week 21 | Week 22 | Week 23
Week 11
Well, the final clearcoat *was* going well, until a stray wad of dust landed on the back deck. Now I'll need to sand that out before I can proceed...let this be a lesson to all of you: remember to clean your spray booths often!
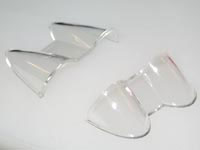
However, not all was lost this week: I was able to get the glass pieces done. With the center section removed, I needed to do a little cleanup to the exposed edges, then polish out a few scuffs that the glass picked up in the box. Once they were ready, I dipped both canopies in Future floor polish to give them a "glassy" look.
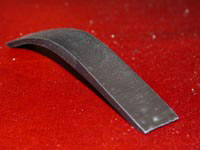
I also did more work on the roll bar. The cross-section needed to be squared off, and it needed some places filled in. Here is the nearly-finished roll bar, all it needs is some wet sanding to remove the scratches before I add the horns, levers, and lights. Next week I'll delve deeper into paint booth maintenence and the dangers of neglect.
Week 12
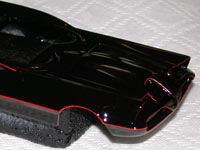
Sanding, priming, painting, striping, clearcoating - done! I very carefully wet sanded the dust from last week's trouble, and once that was done I gave it one good coat of high gloss clearcoat. After everything is together, it will get a final polishing, but for all intents, the body is now finished. I'll be doing the final major assembly next week, so that means I need to get some details ready for the big event.
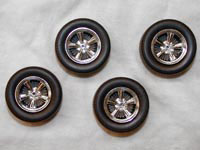
For the wheel assemblies, I decided to use the set that came with Polar Lights' 1960s Comic Book Batmobile kit. They have the right Radir styling, and they're a nice, big footprint so they look great under the Batmobile. The brakes were painted with Model Master Gunmetal, and the wheel backs were painted gloss black.
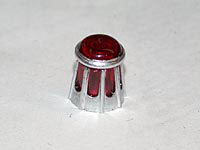
I'm also using a modified version of the signal beacon from Polar Lights. The shape isn't exactly right for the original Futura, but I really like the job PL did. Plus, because it was cast in transparent red, it looks that much better. To get it prepared for use here, I cut the original base off, and painted the cage silver.
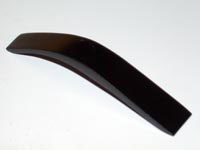
Finally, I'll need to have something to mount the beacon on, so I finished up the roll bar. Once the filling and sanding was done, I painted it Testor's Flat Black and gave it a coat of Testor's Gloss Coat. Next week, the body, chassis, and engine get together!
Week 13
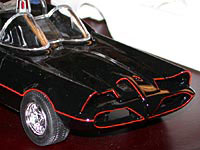
This week I put the body and chassis/interior together, and all the test fitting I did paid off here: the main assemblies snapped together so firmly that gluing it was little more than a formality. Here is a shot of the assembled Batmobile, set together with the wheels and glass to see how it looks. Overall it looks good, but the front tires need to be moved in a bit to look right. But first, I want to do some chassis detailing.
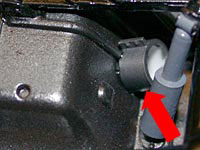
The first thing I wanted to do now that things are together is get the afterburner hooked up. I will route the turbine exhaust so that it will appear to run above the chassis pan. For the last section before the afterburner, I will run flex mesh over the rear axle and to the exhaust nozzle. Here is the installed clamp that will soon capture the end of the tubing. I made it to resemble clamps used on actual gas turbines, using .25" plastic tube.
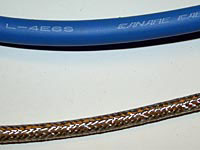
The tubing itself is made from audio cable. Here is a photo of the cable, along with how it looks with the insulation stripped off. I will use two short sections of this to go from the above clamps to the exhaust nozzle.
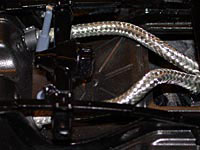
And here are the installed exhaust tubes. While I was installing them, I also finished touching up the rear suspension components.
Week 14

This will be a short update this week, as I'm getting things prepped for the release of Batman Begins. According to the labels George Barris put on the Futura, the oil slick nozzle is on the passengers' side of the car. To simulate the components of the oil system, I started with a set of roof tank details from an "N" scale detail set. I drilled out the ends of the tanks, and made braided lines to the rear bumper out of fishing line. The fittings are short sections of wire insulation, and the strap was cut from aluminum tape. Once assembled, the cylinders were painted red, the lines were painted silver, and the fittings were painted steel.
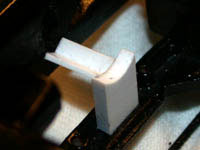
Moving to the front of the car, I was ready to install the chain slicer. First, I made a cradle by carving a semicircle out of a piece of .25' x .080" stock. Then I connected the cradle to the front bulkhead with a section of angle stock. Once dry, the unit was painted black to match the subframe.
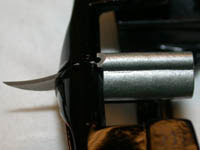
Here is the finished slicer in place. The blade slides in and out easily, and looks great in place. As soon as I get the turbines installed, I will add reinforcing braces to the chain slicer, and more gadgets around the base of the cradle.
Week 15
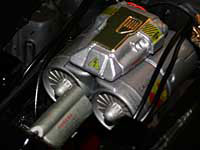
It's on to the home stretch at this point. With the chain cutter solidly in place, I installed the twin-turbine engine to the Thunderbird's original engine mounts (angle-cut to allow for the turbines to sit low enough to clear the hood). With the powerplant in place, I added a few small hoses made from vinyl cord. Two of these will go to the hydraulics for the chain cutter (not in place yet).
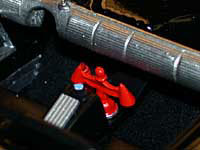
Inside, I installed the dashboard, center switch, and center panel. The dashboard is a white metal piece, and the switch was made from a piece of plastic rod stock. The panel was made by cutting small-scale Evergreen "Metal Siding" to size, then sanding it to the proper thickness.
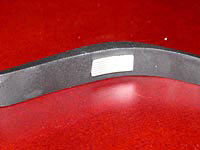
More siding material was used here, for the panel on the underside of the roll bar.
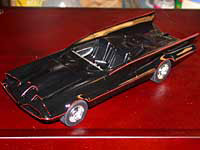
I also added the wheels this week. The insides of the front wheels were notched to fit further in, and glued to the suspension brackets. The rear wheels each recieved a collar and a short rod to lock into the rear axle. The JL wheels and tires are a little big, but it gives the car a nice, aggressive stance.