Week 1 | Week 2 | Week 3 | Week 4 | Week 5
Week 6 | Week 7 | Week 8 | Week 9 | Week 10
Week 11 | Week 12 | Week 13 | Week 14 | Week 15
Week 16 | Week 17 | Week 18 | Week 19 | Week 20
Week 21 | Week 22 | Week 23
Week 16
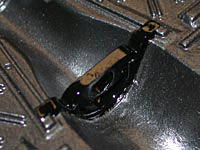
Before installing the motor, I need to make sure it has someplace to fit. I made a crossmember out of .080" x .25" rectangular stock and a piece of flat strip stock for the flange. The hole is drilled to accept the motor snout, and the top was shaped to mate up with the Thunderbird's transmission mount points. Here is a photo of the crossmember in place.

Here is a shot of how the motor will look once it is permanently installed.
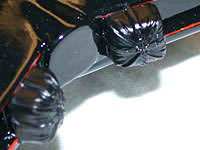
For the parachutes, I took a pair from Revell's Amoco Dodge Funny Car. Not only are they the right size, but because they are tapered, they line up perfectly to make room for the turbine exhaust. I shortened them slightly to look more prototypical, and glued them to the appropriate mounts.
Week 17

Detail work continues this week, focusing primarily on photoetched items. The radar unit for the cowl cmes as two flat "T" shaped pieces. I bent each vane 45°, so they ended up in 90° pieces with the center shafts angled to fit back-to-back. Here is a photo of the individual pieces both bent and unbent.
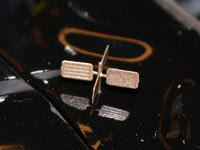
And here is the final assembled piece. You can see how, once assembled, the vanes now make the appropriate "X" shape when viewed from above.
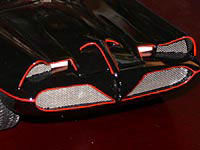
More photoetched details included the grills for the front openings and headlights. Though the grills in the TV show were painted black, several alternate sources show the grills as silver. I like the contrast the silver creates, so I've opted to go with that look here. You can also see the finished parking lights in this picture, made from layering transparent orange tabs on top of silver reflective safety tape.
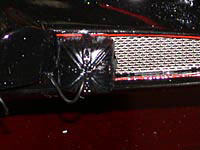
I installed the rear grills as well, keeping the silver look here as well. This view also shows the parachute rip cords, made from thin-diameter wire.

My final job this week was creating the throttle lever. The finished lever is made of four individual pieces: the boot, the shaft, the handle base, and the handle crossbar. The boot is made from the end of a disposable paint brush, and the handle pieces are made from .040" rod stock, drilled to fit the wire lever shaft.
Week 18
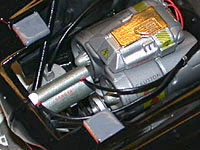
This week saw more detailing in the engine bay. First, I added reinforcement braces to the base of the chain cutter (as it would be the first thing to hit a wall when used as a battering ram, I wanted to make sure there was plenty of material to take the impact). With the braces in place, I was now ready to finish installing the hydraulic hoses to the cutter. I used aluminum tape for the metal clamp and connectors. The latter items were painted bright red and superglued to opposite ends of the chain cutter cylinder.

While that dried, I prepared the upper crossmember, to fit between the front suspension towers. Here is the unpainted piece, made from stainless steel rod.
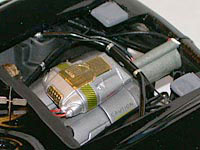
And here is the crossmember after installation. The path between the grills and the turbine intakes is still clear, and to make sure it stayed that way I clamped the light wiring to the crossmember with more aluminum tape.
Week 19
For all intents, the engine bay is now complete. Anyone who remembers Batman & Robin making Penguin's goons disappear with a single punch knows that the Batmobile used heavy water in its nuclear powerplant (for anyone interested, heavy water - chemically known as deuterium oxide - acts as a neutron moderator). The heavy water fill/reservoir was scratchbuilt from corrugated siding & strip stock, with an engine pulley as the fill cap. With the addition of an indicator cable and the appropriate decal, this part was done.
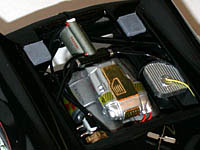
The last thing I had to add under the hood was the master cylinder. I kept the brake booster (as it was molded to the firewall), but I made a new master cylinder out of .060" rod and .060" x .080" rectangular stock. Pins were bent to form the brake lines, with the pin heads as the fittings.
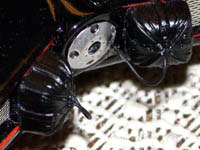
Now that the engine bay was done, it was time to move to the rear of the car. The interior of the jet nozzle was made by cutting the hub cap part from a 1/64 Matchbox car wheel. Using it this way, the large holes are the exhaust ports, and the smaller holes are fuel injectors for the afterburner.
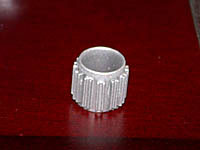
For the nozzle itself, I chose to build my own using .75" tube stock and the smallest C channel available. I carefully cut the tube to the proper length, and then cut several sections of C channel. To test fit them for the proper spacing, I stuck the channel sections to a piece of tape and wrapped the tape around the tube. After a few adjustments, I was ready to start gluing. Once the nozzle was finished, I painted it with Model Master's Aluminum Plate.
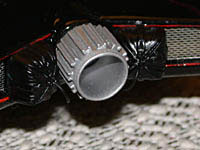
Here is the finished nozzle in place.
Week 20
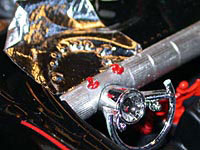
The last part of the car that needs any major work is the interior. First, I want to detail the driver's area. Here I've laid down a sheet of Bare Metal Foil: this will act as the bezels around the various lights and switches. I've also installed the steering wheel, cut down from the Futura kit. Next, I will burnish the foil and trim off anything that will stick out past the windshield.
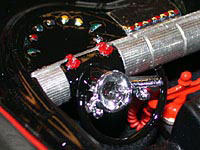
Here is the finished dashboard panel. Once the foil was down & cut to shape, I painted the black area, leaving BMF visible around all of the raised features. I also painted the steering column, spokes, and wheel, leaving the center hub and spoke trim chrome. I then painted the indicator lights using various red, green, amber, and light blue paints. For the small console that will be at the base of the roll bar, I applied a rectangle of BMF and painted the lights with Stop Light Red.
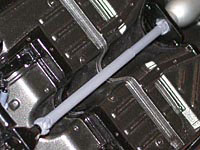
While the top was drying, I added one more (very important) piece to the chassis: the driveshaft. The ends are taken from the parts box, and the bulk of the shaft is a small stirring straw. To install it, I slid the forward end of the driveshaft into the straw, located the rear universal, and pulled out the front of the driveshaft until it mated with the back of the motor.